Initial Installation of Windows 10 in VMWare
Installing Windows 10 in VMware for the First Time
In this section, we’ll use VMware to install a Windows 10 virtual machine for the first time.
Why “for the first time”? Because this method doesn’t involve advanced steps (like using a PE system, etc.). Its main purpose is to familiarize you with the initial system installation process. Advanced installation methods will be covered in the future.
Creating a New Virtual Machine
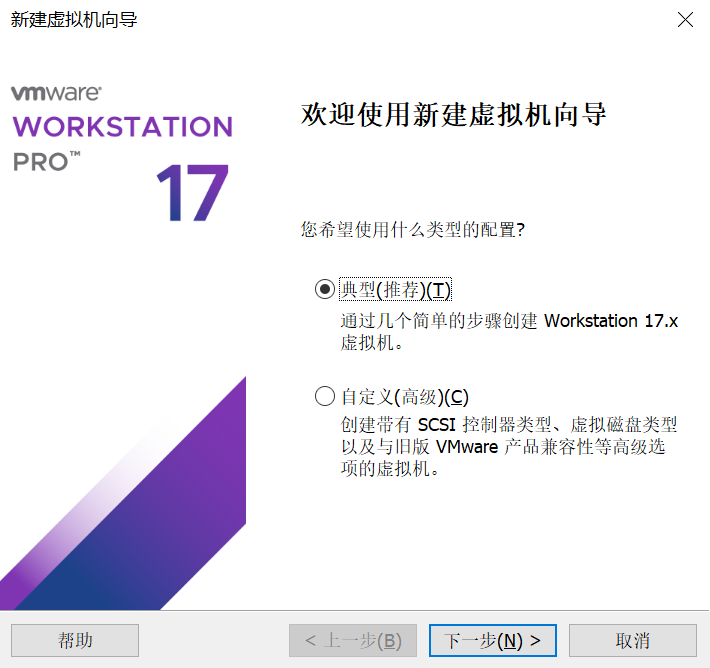
In VMware, click “Create a New Virtual Machine”
Steps:
- Select Typical, then click Next
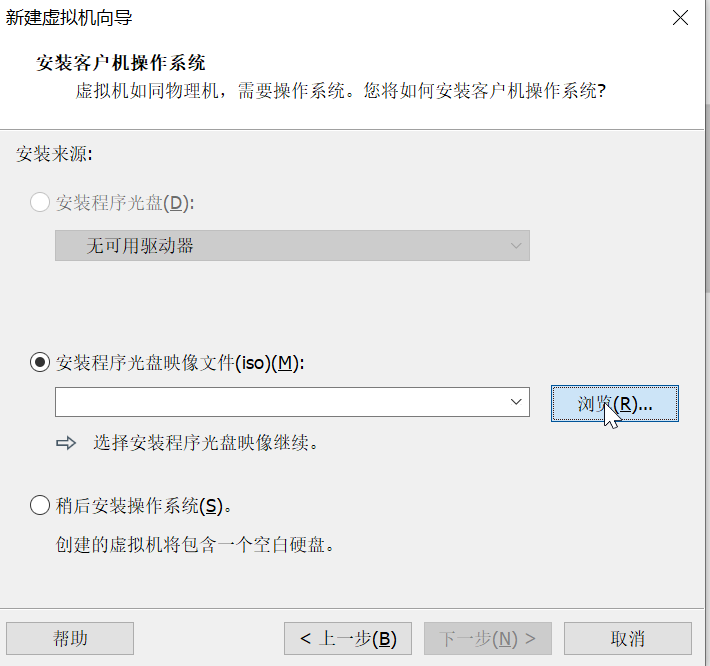
- Select “Installer disc image file (ISO)”, click Browse, choose the Windows 10 ISO file you’ve already downloaded, then click Next.
- Leave the Windows product key blank
Select Windows 10 Pro edition
Create a username
Set a password (optional)
Click Next
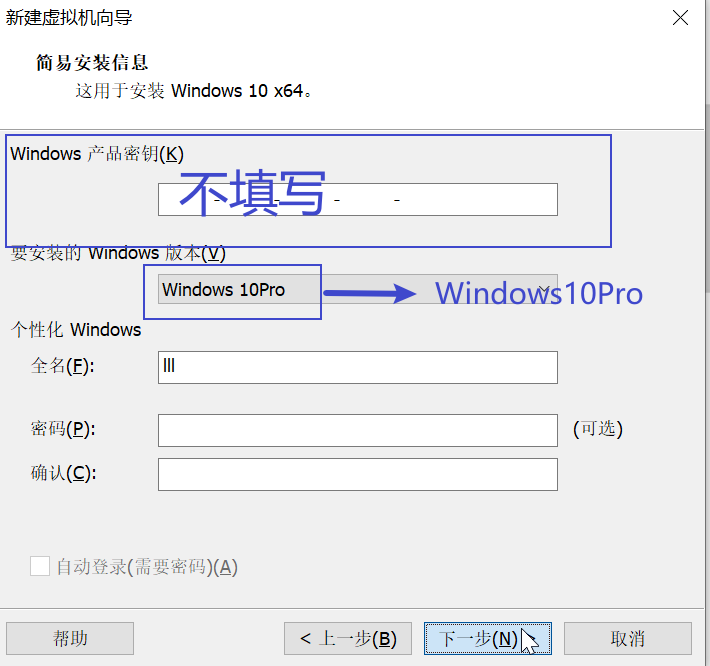
I don’t have a Windows 10 product key — so I just don’t! VMware, don’t be nosy :)
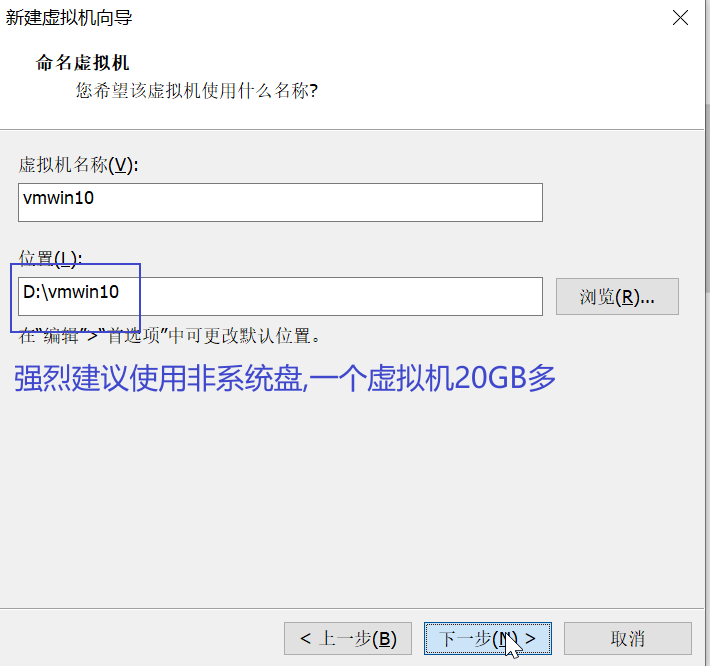
- Name your virtual machine
- Choose the installation location (it’s recommended to select a non-system drive. A Windows 10 installation is about 22GB)
- The “Specify Disk Capacity” page creates a virtual hard disk for storage inside the VM. The default is fine. If you think 60GB isn’t enough, you can increase it.
Don’t deliberately reduce the virtual disk size to save space on your host! The virtual disk file created by VMware on your physical machine (your real computer) won’t immediately take up 60GB of your disk. Instead, it only consumes as much space as the data you import into the VM. So, if you use 20GB inside the VM’s virtual disk, your real computer’s disk will only be consumed by 20GB.
However, the virtual disk file itself won’t shrink. So if you delete 20GB of files from the VM’s virtual disk, your real disk will still show 20GB as used. Be careful when importing data into the VM. Otherwise, your real disk might fill up unexpectedly :)
Click through the remaining steps, click Finish, and start the virtual machine
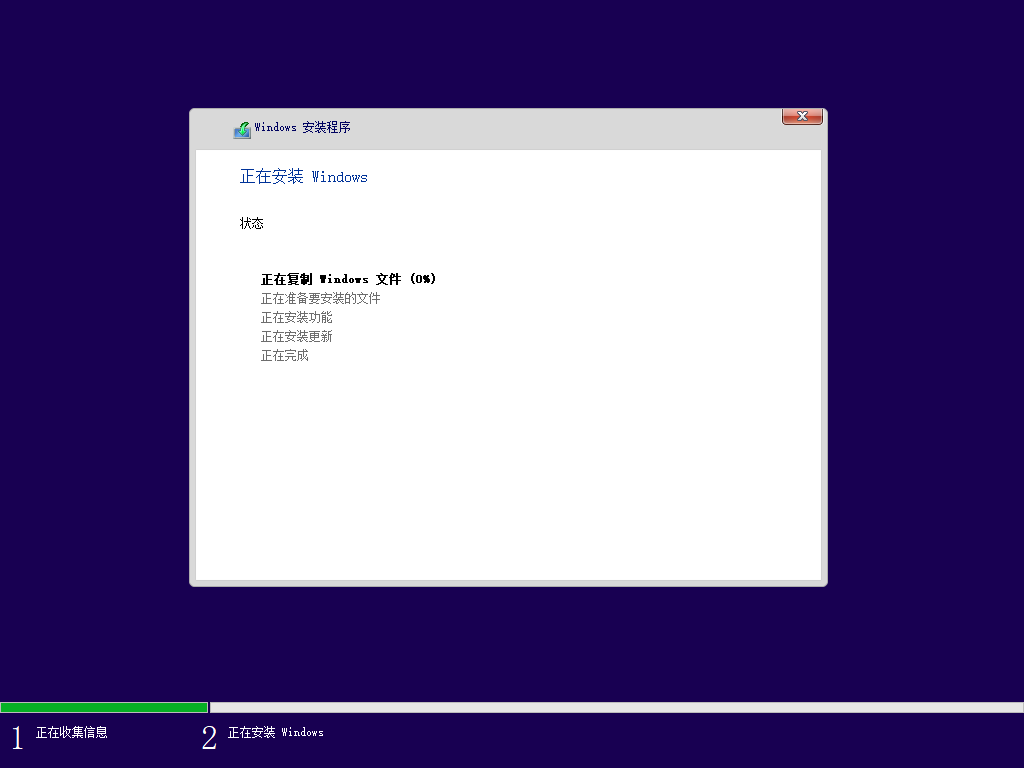
Then you enter a long wait…
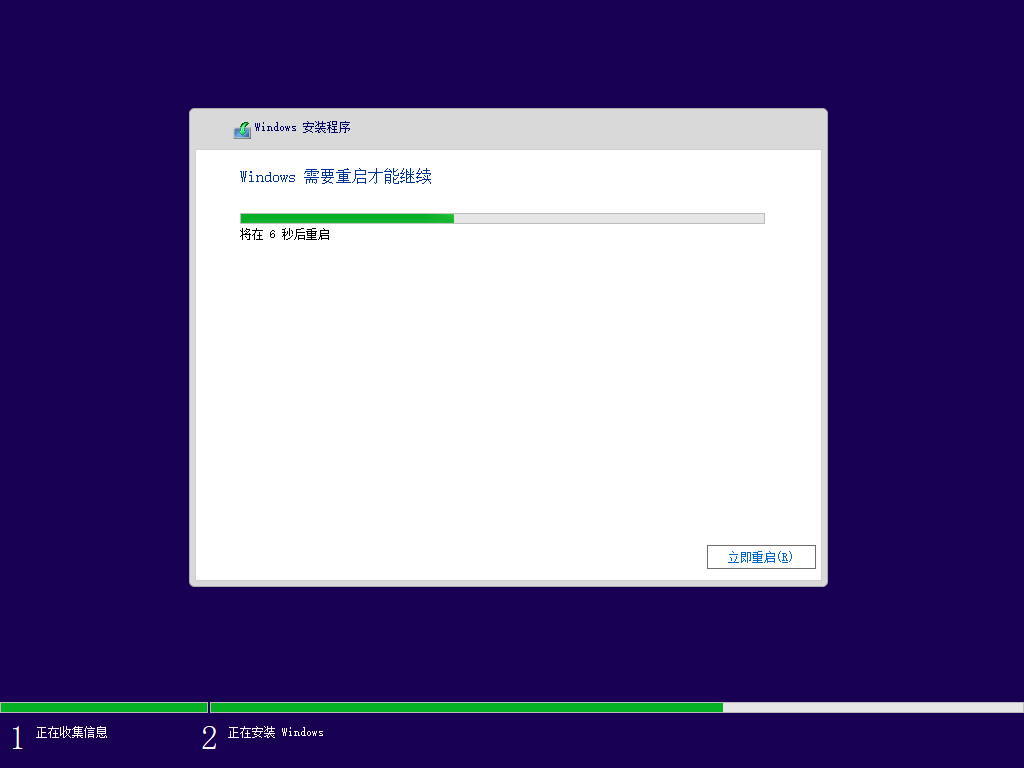
The installer prompts you to restart…
Feel free to “abuse” your virtual machine system — it has absolutely nothing to do with your physical machine. No matter what virus programs you run inside the VM, your physical machine won’t be affected in the slightest.
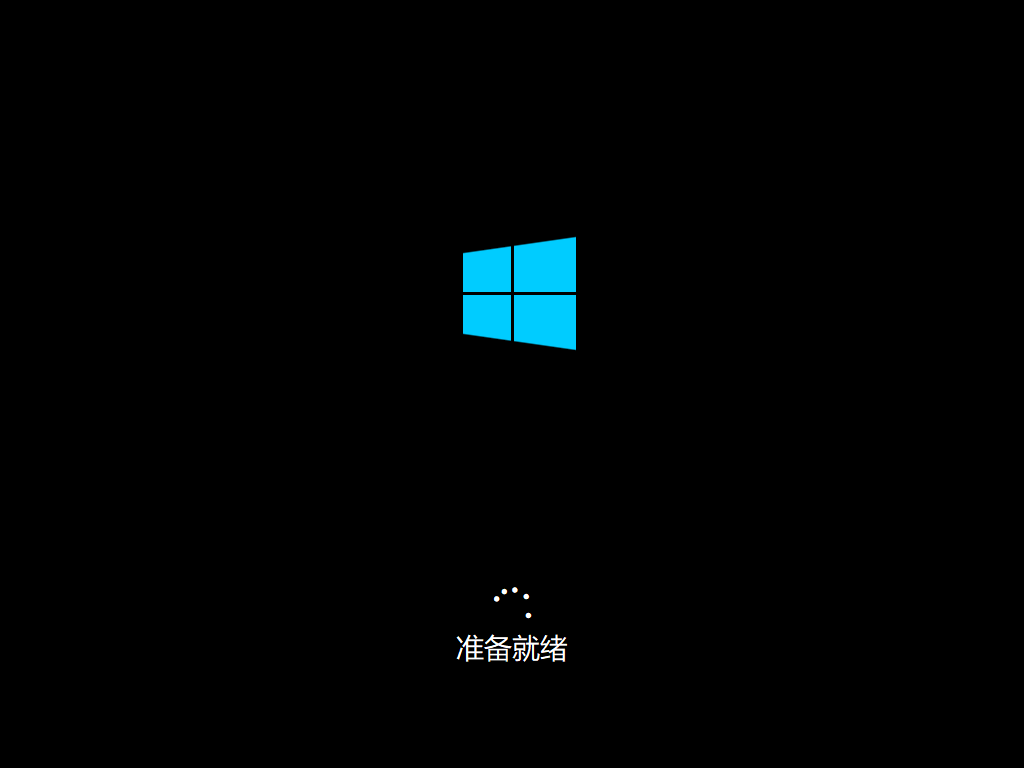
- After the restart, the system enters the Out-of-Box Experience (OOBE) phase and begins Sysprep.
- It’s recommended to disconnect the VM’s network connection. Otherwise, Windows 10 will automatically download update packages, consuming space and time.


You might end up at the VM’s desktop without clicking much of anything. That’s not how it normally works. VMware automatically handles all the settings and skips through them for you.
To experience the “real” installation process, advanced operations are required — which will be covered in the future.