Using U Disk PE System
Using a USB PE System
In the previous section, we created our own PE USB drive. Now, let’s begin our PE journey!
Booting into PE on a Physical Machine
The following steps involve shutting down and restarting your computer. It’s recommended to read this article on another device.
Steps:
1. Look up your computer's boot menu hotkey (just search online).

2. Shut down your computer. Insert your PE USB drive, press the power button, and immediately start tapping your computer's boot hotkey repeatedly.
3. Enter the UEFI boot menu interface.
4. Use the up and down arrow keys to navigate. The first menu item should be your computer's Windows boot entry. Select your USB drive (you can usually identify it by the USB brand or other information).
5. Press Enter to confirm.
After a short wait, you’ll see the PE system’s first screen:

Stay vigilant! You are now operating on your real computer! Any improper operation could lead to catastrophic failure!!
This is how to enter PE. Once you’ve learned it, it’s recommended to restart back into Windows to avoid accidental operations.
Booting into PE in a VM
If you need to use your USB drive to boot into PE from the boot menu when starting a VM, pay close attention. The method is more complex than on a physical machine.
Run VMWare as Administrator!

You can use the following method to always run VM as Administrator.
Steps:
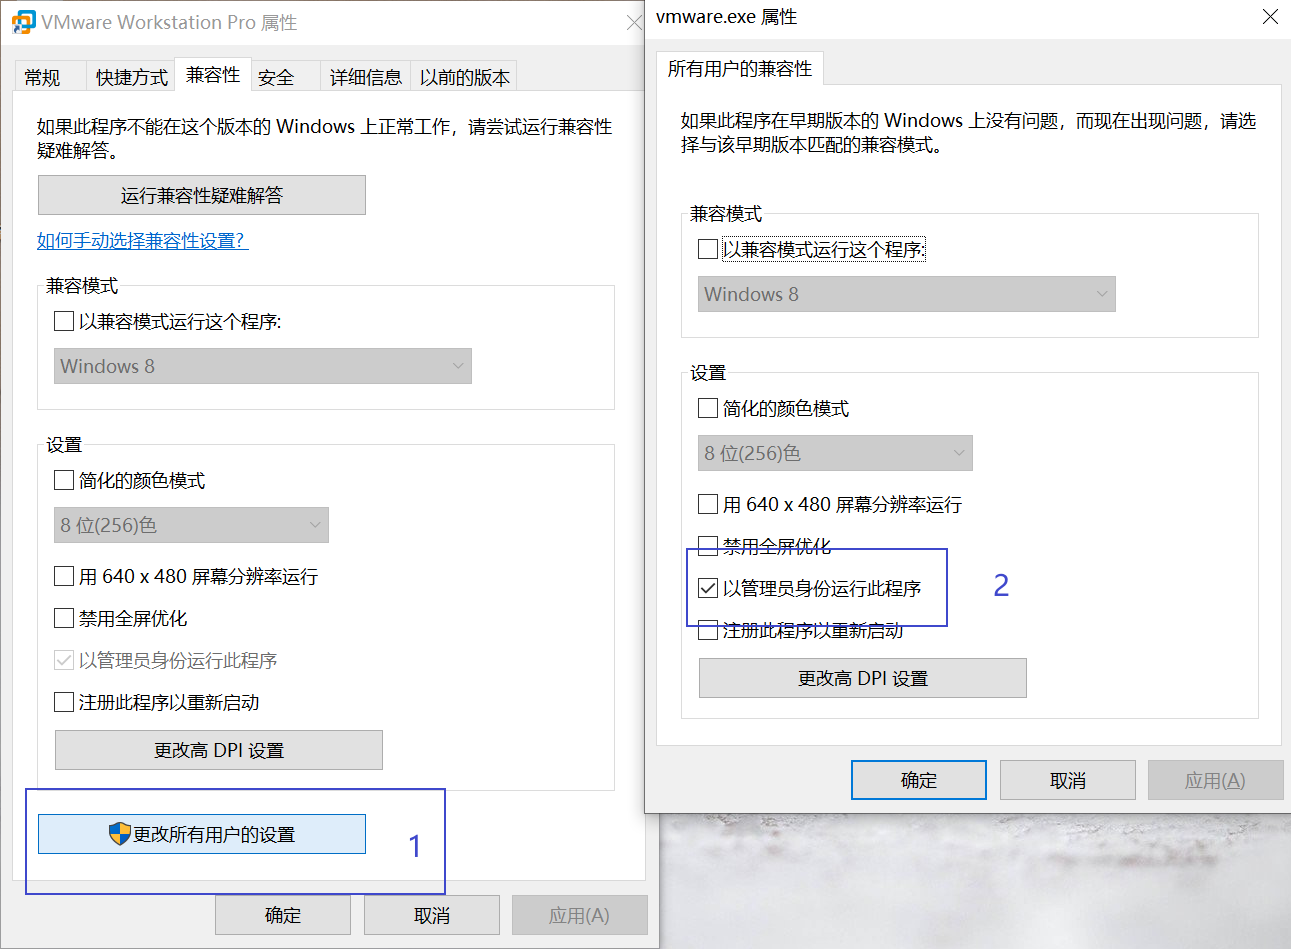
1. Right-click the VMWare icon and click Properties.
2. Click the Compatibility tab -> Change settings for all users.
3. Check Run this program as an administrator.
4. Click OK all the way through.
You can directly use an existing Windows 10 virtual machine as the VM to boot into Micro PE, without needing to create a new one.
Simply plugging the USB drive into your computer and then starting the VM might seem like it should work in theory. But it doesn’t—some extra configuration is required.
You need to add your USB drive to the virtual machine as a virtual disk in the VM settings, and also offline the USB drive on your physical machine.
Steps:
1. Insert the USB drive first, then open the VM software (if you do it in reverse order, VM won't detect the USB drive).
2. Edit the virtual machine settings.
3. Click Add -> Hard Disk -> Next.
4. Keep the defaults and click Next.
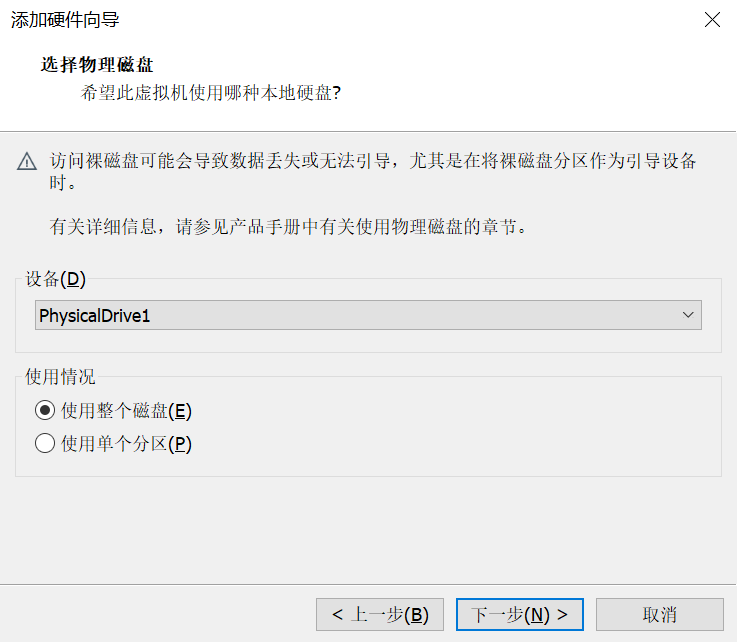
5. Select Use a physical disk (for advanced users) and click Next. (If you get a "Failed to load partition for device, insufficient permissions" error, it means you didn't run VMWare as Administrator.)
6. Select Physical Drive 1 and use the entire disk. (Drive 0 is your computer's internal disk. 0, 1, 2... correspond to Disk 0, Disk 1, Disk 2... in Disk Management.)
7. Click OK all the way through.

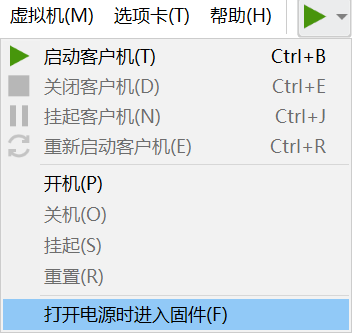
The VM boot hotkey is F8. Since the VM’s UEFI boots very quickly, you might not be able to press F8 in time. Click the small triangle next to the green Start button and select Power On to Firmware (F) to bypass pressing F8.
After clicking Start, you might get a shock:
Physical disk is in use. Cannot open disk or one of its dependent snapshot disks. Module 'disk' failed to start. Failed to start the virtual machine.
What’s going on???
The path to success is always fraught with challenges. You might face obstacles at every step, but remember: persist in solving problems! If issues arise, you can search online or leave a comment.
I completely understand you, because I was once in your shoes.
The phrase “Physical disk is in use” makes us wonder who is using it. That’s right—your physical machine’s Windows system is occupying the USB drive.
Offlining the USB drive is essential.
Steps:
1. Press Windows key + R, type cmd, and press Enter.
2. Type diskpart and press Enter.
3. Type list disk and press Enter.
4. Identify your USB drive by its capacity. Mine is Disk 1.
5. Type select disk 1 and press Enter.
6. Type offline disk and press Enter.
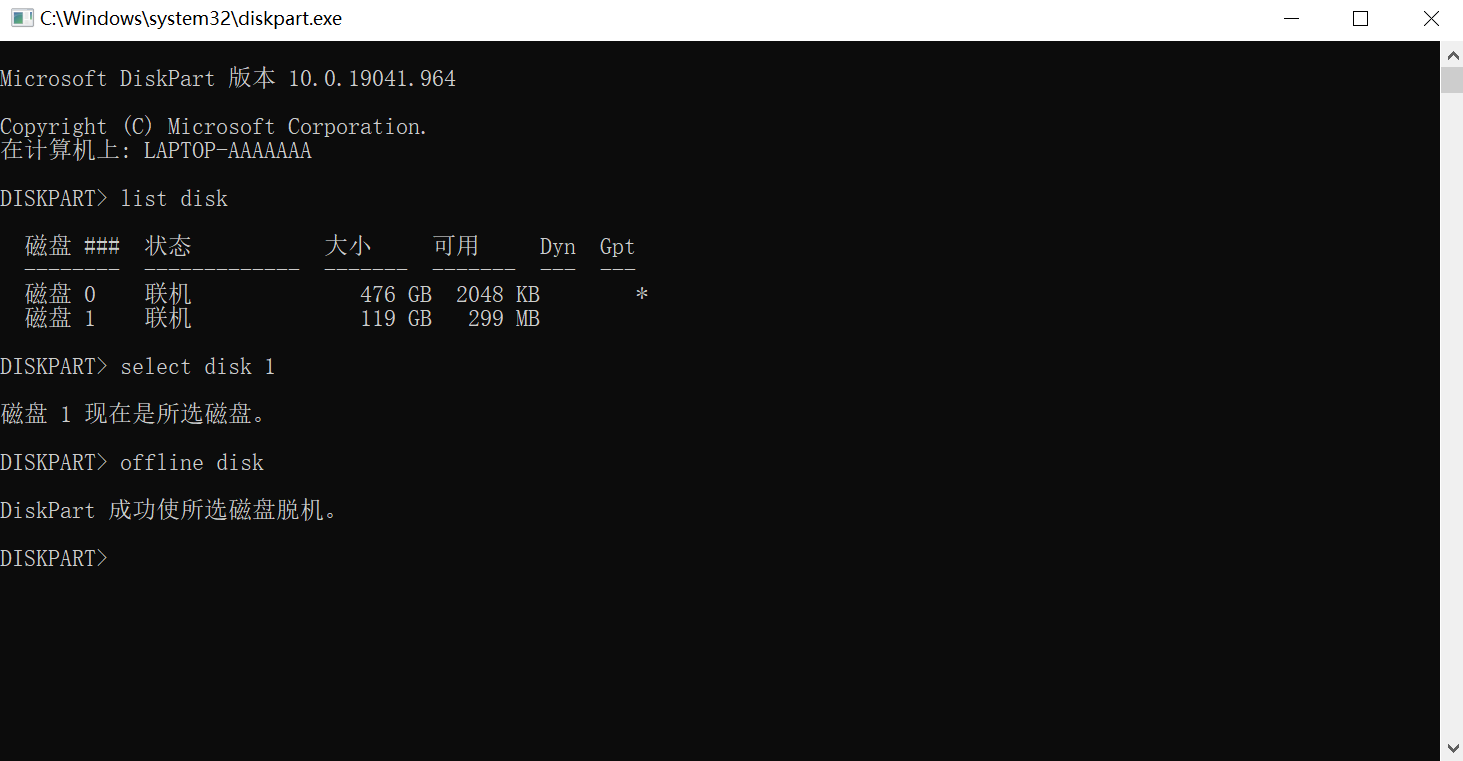
Offlining successful. Offlining means the system can no longer access files on the USB drive.
Now, power on to firmware, and the virtual machine starts normally.
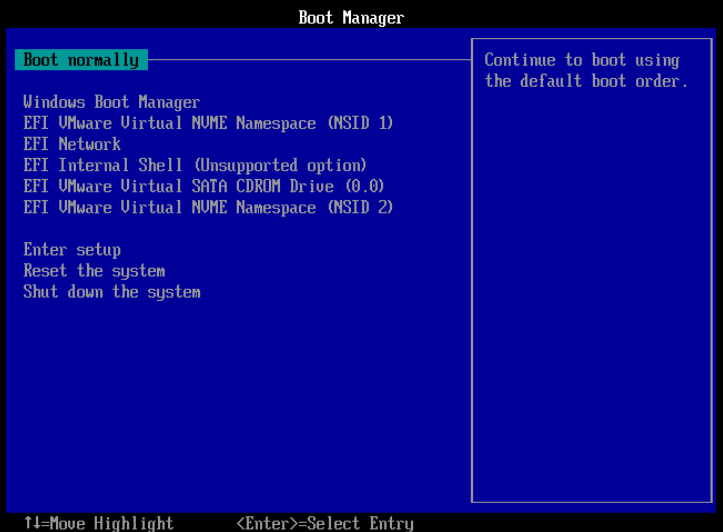
This is a somewhat confusing UEFI boot menu. Since all boot media names are virtualized by VM, you can’t identify the USB drive by brand or other information.
However, there’s a pattern to follow.
1. Boot Normally, Windows Boot Manager, and EFI VMWare Virtual NUME Namespace (NSID1) are all the same—they boot the virtual machine's Windows 10 system. The NSID1 entry refers to the first disk in this virtual machine.
2. Therefore, NSID2 is the second disk in this virtual machine.
3. Use the arrow keys to select the NSID2 entry and press Enter.
CDROM Drive means booting from a CD/DVD. In the next section, we’ll use the Micro PE ISO image to boot the virtual machine.
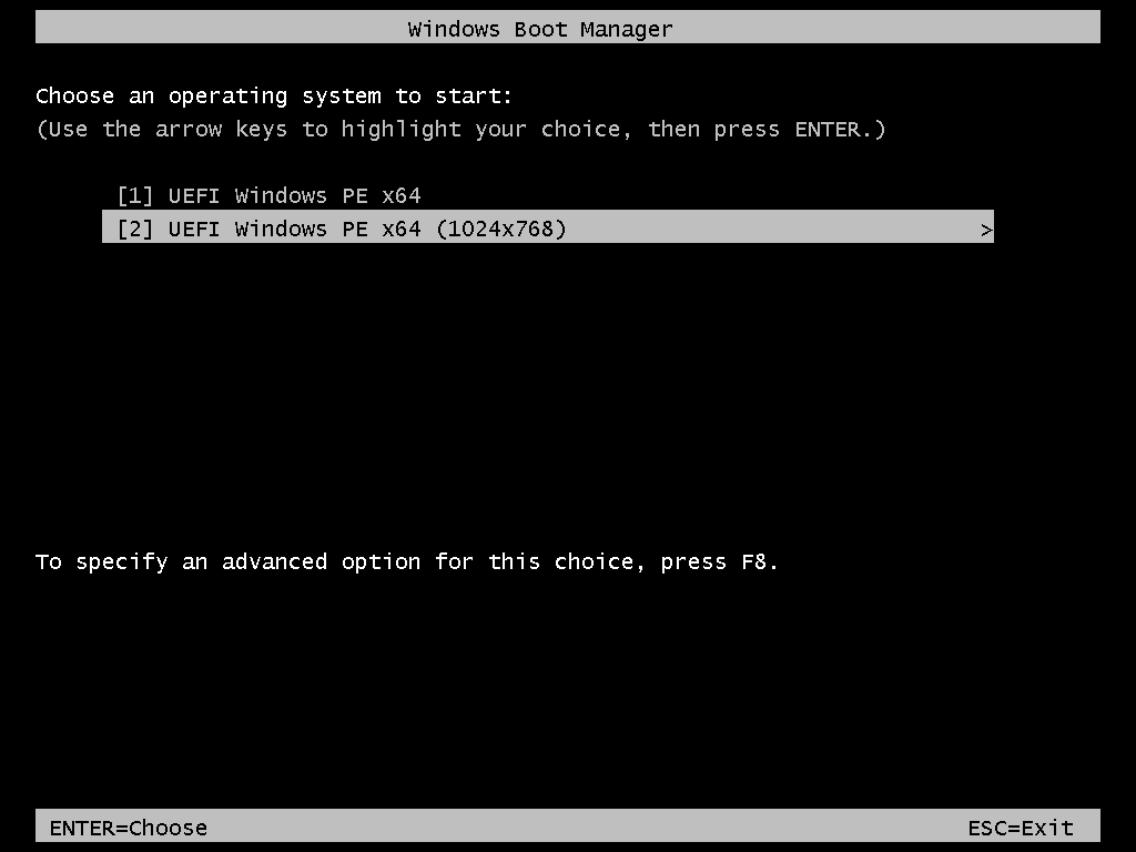
Please note: due to different screen resolutions, when you enter the Windows Boot Manager screen after pressing Enter, immediately press the down arrow key to select 1024x768, then press Enter. This screen appears very briefly, so act quickly!
After you succeed and shut down the virtual machine, your USB drive will still be offline! Here’s how to bring it back online:
1. Open Disk Management.
2. Select your USB drive (offline), right-click, and select Online.