WIMBOOT Boot Mode
WIMBOOT Boot Mode
What is WIMBOOT?
WIMBOOT is a new feature introduced by Microsoft starting with Windows 8, designed to reduce the footprint of system files on the C drive, improve computer performance, and make it easier for PC manufacturers to initialize their machines. For system administrators, the most compelling advantage of WIMBOOT is its superior space efficiency. A computer configured with WIMBOOT can save at least 20GB of C drive space compared to a standard setup. Before using WIMBOOT, my C drive used 40GB; after switching to WIMBOOT, it dropped to 15GB—a clear testament to its savings.
Additionally, due to its inherent design, computers booting with WIMBOOT enjoy an extra “bonus”: the ability to restore the system in case of an accident without needing to reinstall the operating system.
So, what makes WIMBOOT so powerful? In fact, in a WIMBOOT-based operating system, none of the system files on the C drive are actually stored there. What you see in the C drive are files called “pointer files.”
Pointer files act like arrows, pointing to files inside a WIM package. Their size is almost negligible, so the actual disk usage on the C drive is minimal. When you use a system file from the C drive, the system dynamically decompresses and loads the corresponding file from the WIM package into memory. When you’re done, it removes those files from memory. As a result, using WIMBOOT mode may cause your computer’s memory usage to be slightly higher than usual.
Given all these benefits, how do you harness this remarkable boot method? Read on patiently.
Using WIMBOOT to Boot a VM Virtual Machine
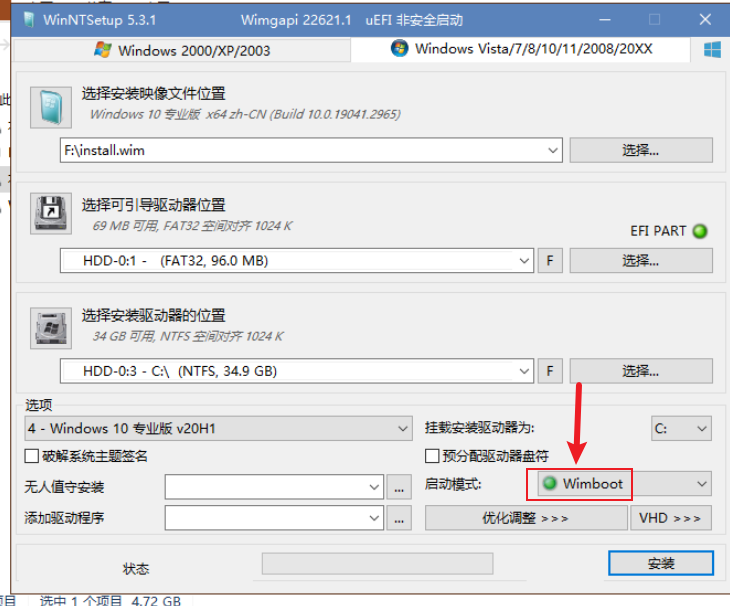
WIMBOOT, as the name suggests, is a way to boot the system using a WIM package. So, the first step is to obtain a WIM package. A WIM package is essentially a *.wim compressed file. In a Microsoft Windows 10 ISO image, you can find this file at sources\install.wim. This is a Windows image WIM package that hasn’t gone through the initial installation setup.
In fact, when you install a system using WinNTSetup, it extracts the files from install.wim to your selected system drive. For experienced system installers, they might even save the install.wim file directly instead of keeping the entire ISO.
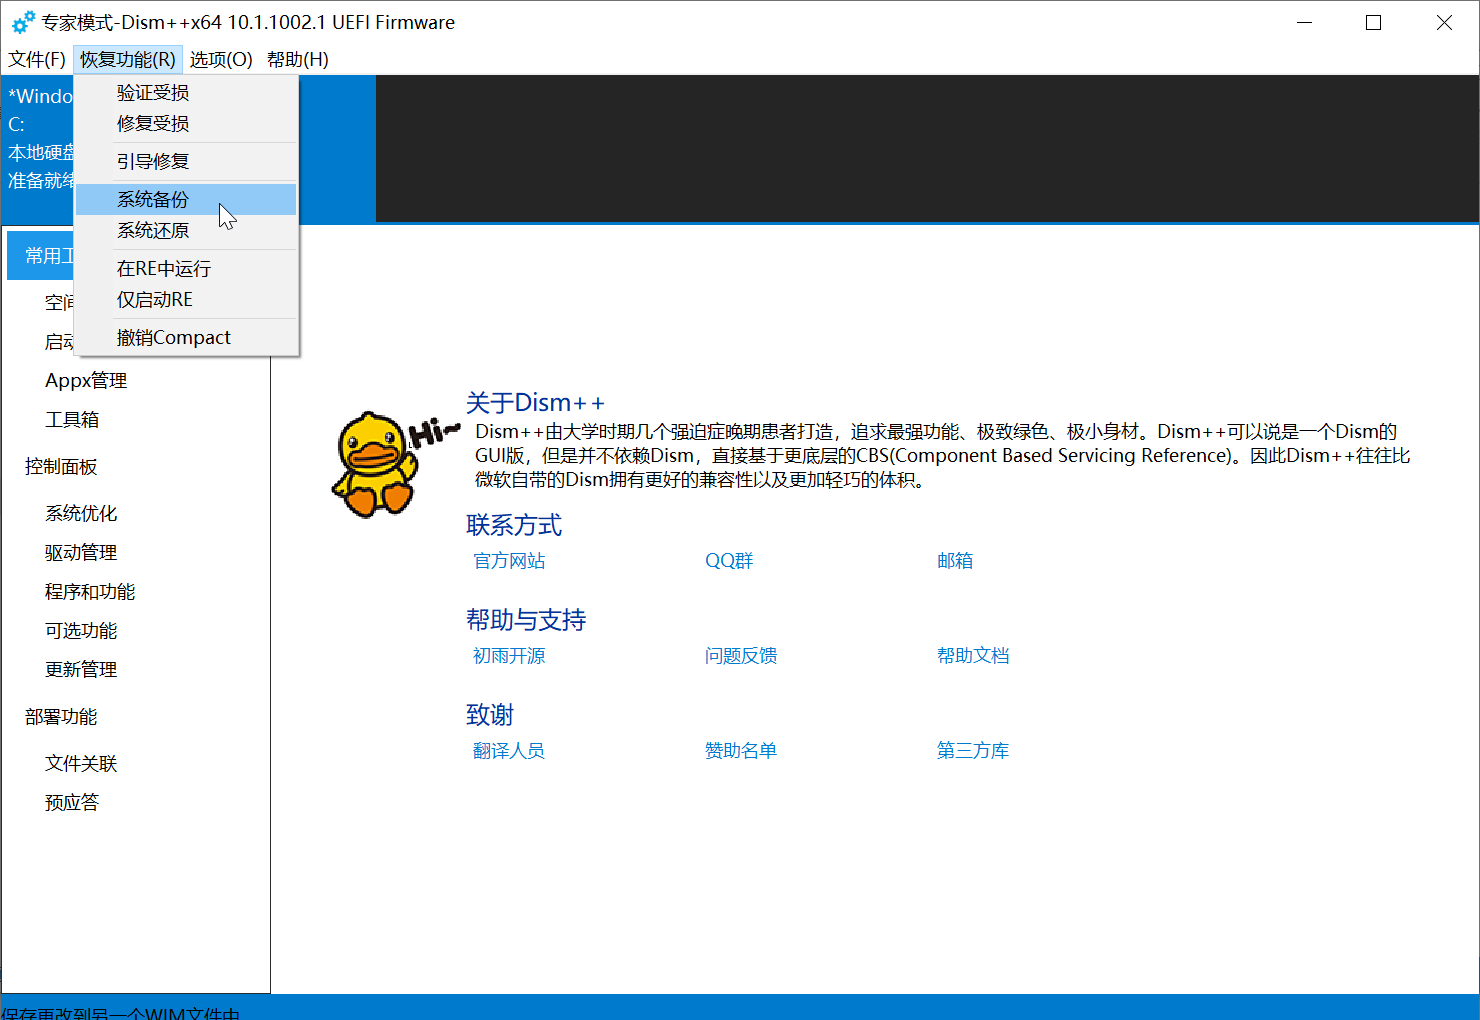
There’s also a second method: creating your own WIM image package. The go-to tool for this is the powerful software Dism++. Using Dism++’s system backup feature, you can “snapshot” your current system and save it into a WIM package. If your system encounters a failure, you can use this WIM package to restore it to the state at the time of the backup.
Booting a VM with the Original Windows 10 ISO WIM Package
Steps:
1 | |
You may notice that installing a system with WIMBOOT is faster than the standard method. This is because creating pointer files doesn’t take much time.
Reboot and enter the Windows OOBE (Out-of-Box Experience) phase.
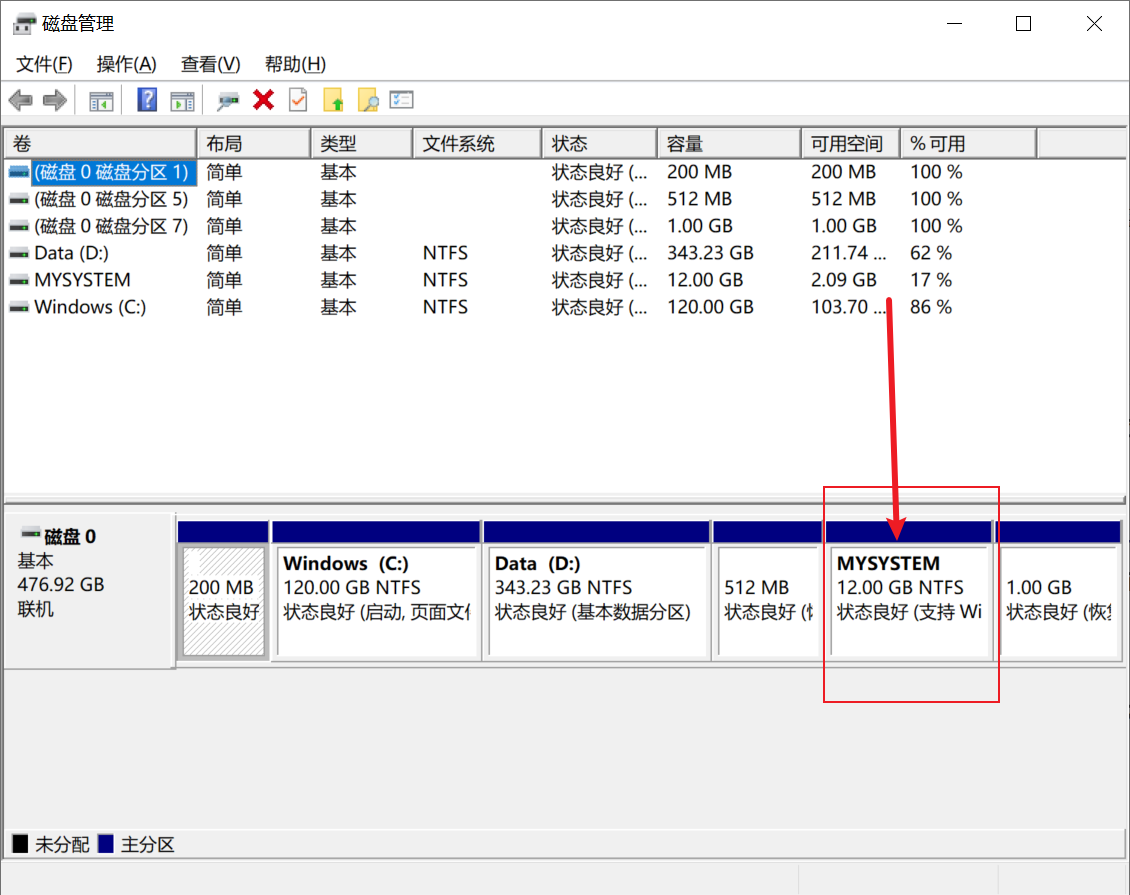
If your PC manufacturer allocated a recovery partition on your hard drive at the factory, you can place the WIM package created by Dism++’s system backup into that partition and use it for a WIMBOOT boot. Huawei computers typically have such a partition—my own machine has a 12GB partition like this.
If the system fails, you can boot into a mini PE environment and redo the WIMBOOT setup.
Although Dism++’s “maximum compression” option can compress the system to a very small size, it produces an
.esdfile, which cannot be used for WIMBOOT booting.
Additionally, Dism++ can also create a WIMBOOT boot directly within a PE environment. The operation is quite simple—feel free to try it yourself if you’re interested.
If you find that partition annoying in File Explorer, you can remove its drive letter in Disk Management. This won’t cause system issues.
Regularly backing up your system is a good habit.