Handcrafting a BIOS+UEFI Dual-Boot PE Bootable USB Drive
Handcrafting a BIOS+UEFI Dual-Boot PE Startup Drive
Before reading this article, I strongly recommend you read my 26th article: “Extra 1: Thoughts on PE Boot USB Drives.” This article builds upon that foundation.
To achieve BIOS+UEFI dual-boot capability, we need to consider:
- What partition table type should the USB drive use?
- What should the partition structure of the USB drive look like?
- Do I need to format the USB drive?
USB Drive Partition Table Type
Since BIOS only supports the MBR partition table, while UEFI supports both MBR and GPT partition tables, the USB drive’s partition table type must be MBR.
USB Drive Partition Structure
BIOS imposes no restrictions on the USB drive’s partition structure, but UEFI requires an EFI partition with a FAT32 or FAT16 file system. Therefore, the partition structure should align with UEFI requirements.
Do I Need to Format the USB Drive?
In my opinion, formatting the USB drive is unnecessary. This is a key difference between handcrafting a boot drive and using tools to create one.
We will build upon the method from my 26th article, “Extra 1: Thoughts on PE Boot USB Drives,” to make the drive BIOS-compatible.
(1) First, use DiskGenius to convert the USB drive’s partition table type to MBR.
(2) Right-click the EFI partition with a FAT32/16 file system, and click “Activate Current Partition” to set the EFI partition as the active partition.
(3) Obtain BOOTMGR (two methods):
- Extract BOOTMGR directly from the official Windows ISO image file.
- Extract BOOTMGR directly from the ISO image file generated by the WePE toolbox.
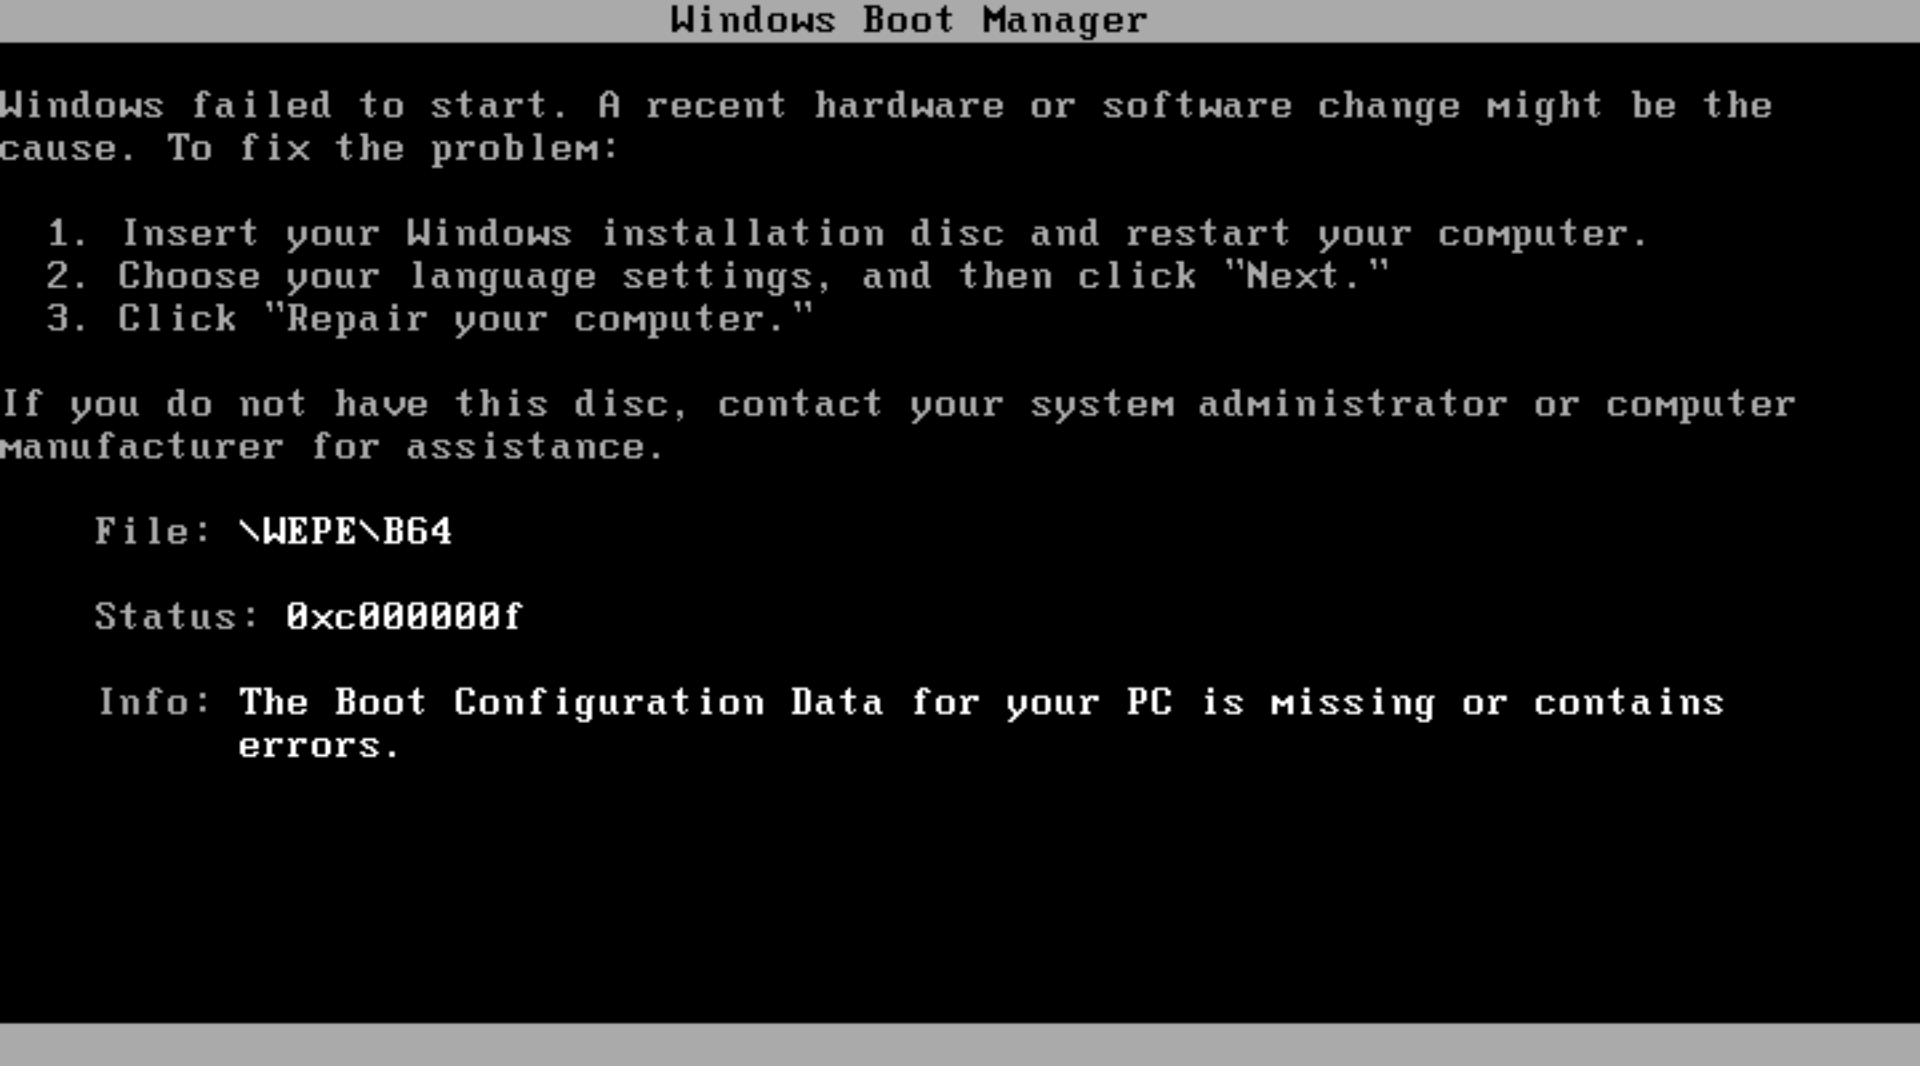
Please note that these two bootmgr files are not identical.
For the official Windows bootmgr, it searches for the BCD file in the \boot folder within the same partition at runtime.
For the WePE bootmgr, it searches for the B64 file in the \WEPE folder within the same partition. (B64 is essentially a BCD file, just with a different name.)
Therefore, using the wrong one may result in the following error:
(4) Right-click the USB drive and click “Rebuild Master Boot Record (MBR).”
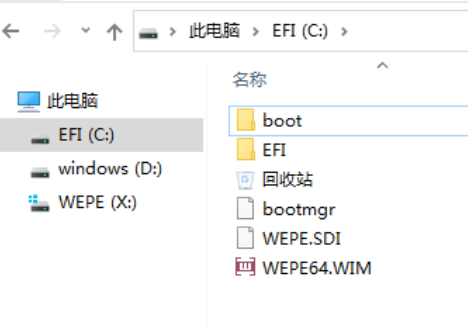
(5) Create the BCD file. It is identical to the UEFI BCD, so you can directly copy and paste \EFI\Microsoft\boot\BCD.
(Again, note the difference between the two bootmgr files. For the official Windows bootmgr, the BCD file should be placed at \boot\BCD in the EFI partition. For the WePE bootmgr, the BCD file should be placed at \WEPE\B64 in the EFI partition—i.e., rename BCD to B64.)
At this point, the BIOS+UEFI dual-boot USB drive is complete.