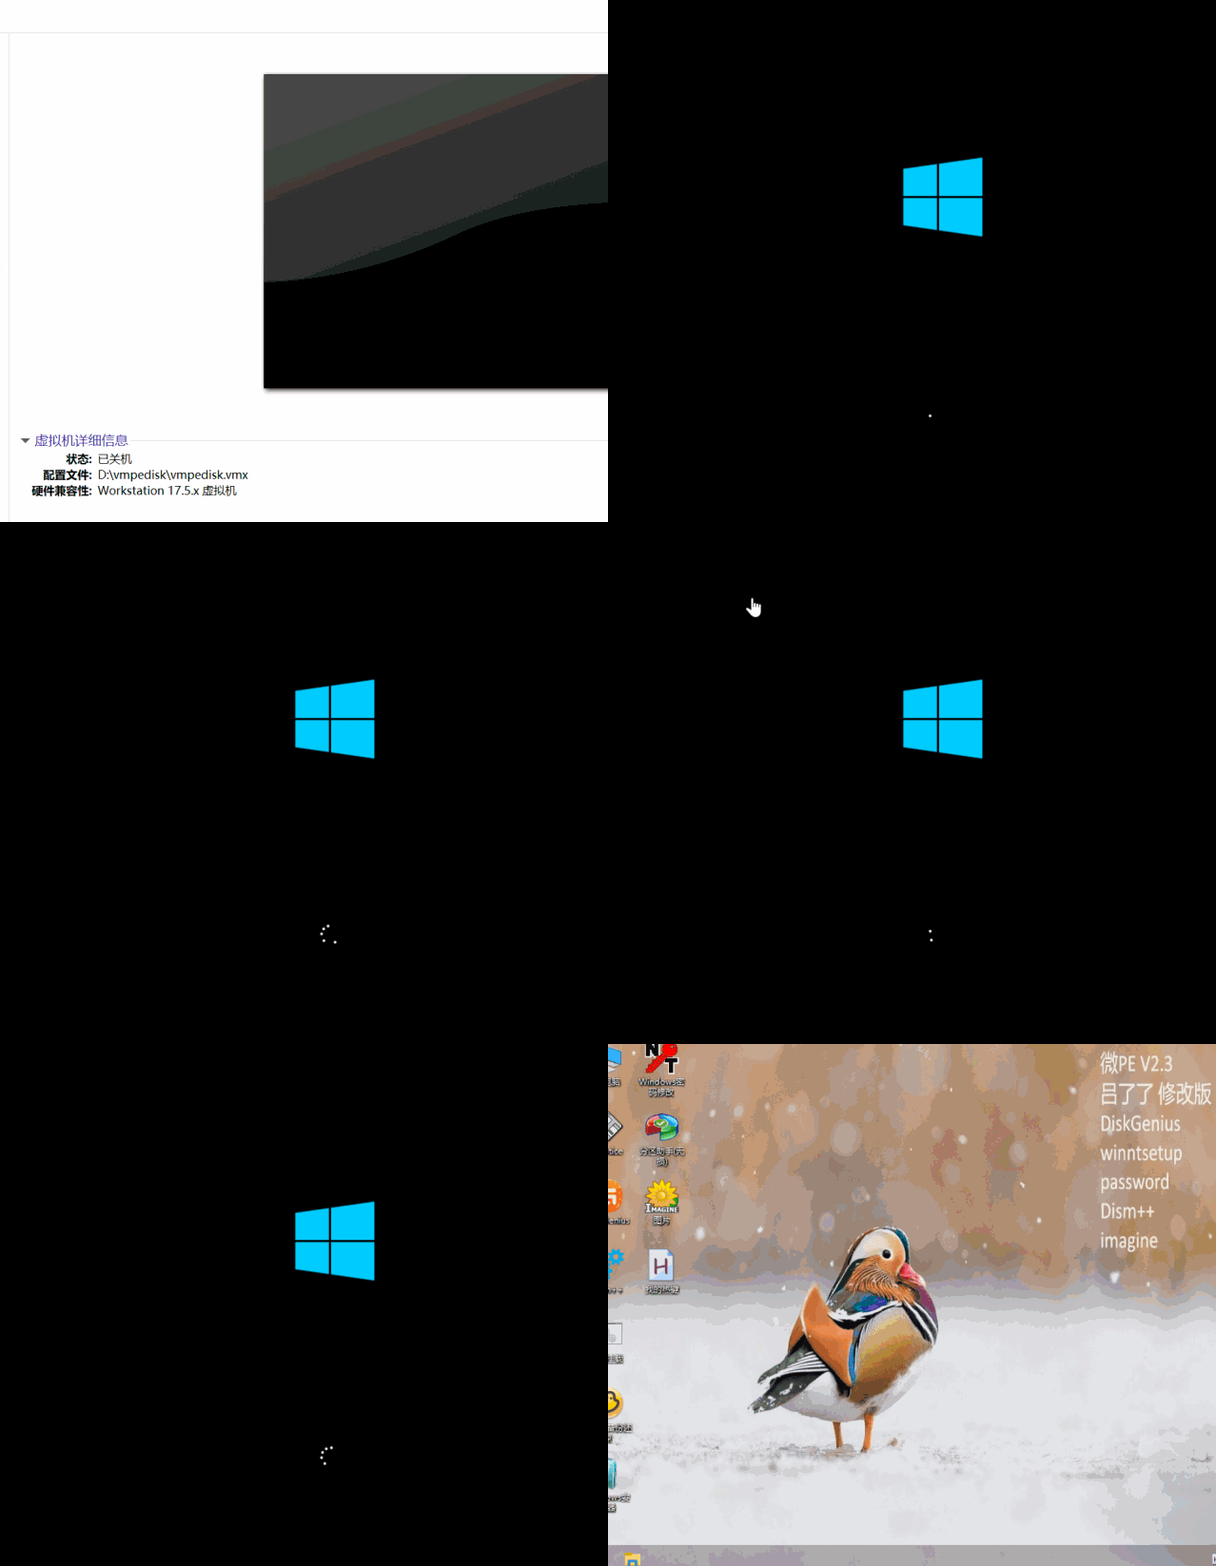
MicroPE Disk-Based Boot: No Longer Using WEPE64.WIM, Directly Booting PE System from Partition
Booting WePE from Disk: Launching the PE System Directly from a Partition Instead of Using WEPE64.WIM
We previously learned that the PE system boots using the Ramdisk mode—a method that virtualizes memory as a disk partition to start the system.
(For details, see my 25th article: “25 Introduction to Ramdisk Boot Mode”)
However, can we deploy the WePE system to a physical disk partition and boot it just like installing a regular Windows system?
The answer is yes.
Principle Explanation
The essence of installing a local Windows system is to decompress the Windows system files from the install.wim package located in the sources folder of the Windows ISO file using a specific algorithm, then extract them to an NTFS-formatted partition on the disk. After that, boot configuration data (BCD) is written to the menu to enable the system to boot.
Similarly, we can extract the WePE WIM package (WEPE folder in the ISO image -> WEPE64.WIM) to a disk partition, then properly edit the BCD menu to boot WePE from the local disk. This eliminates the need for the SDI file required by Ramdisk mode.
Practical Operation
The primary challenge is how to extract the WEPE64.WIM package to a disk partition. We know that tools like WinNTSetup (the Windows installer in WePE) and Dism++ are excellent for installing Windows 10. However, when using WinNTSetup to extract WEPE64.WIM, it cannot recognize the system type within this WIM package (since it’s not an official Windows image), so WinNTSetup cannot be used.
We then try Dism++, and find that it can successfully extract WEPE64.WIM to an empty partition.
Steps:
- Open the WePE ISO disc image file
- Navigate to
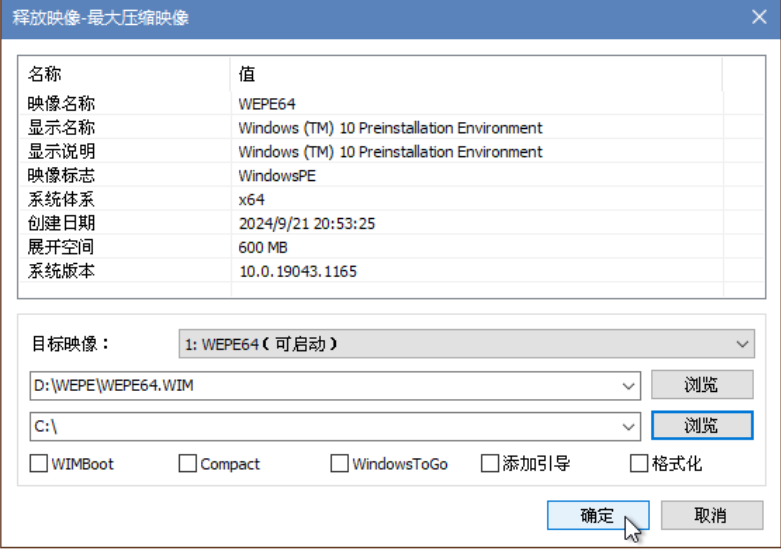
WEPE -> WEPE64.WIM - Open Dism++, click the top-right corner:
File -> Apply Image - Click the first
Browsebutton to select the WEPE64.WIM file; click the secondBrowsebutton to select the target partition where you want to install WePE (non-empty partitions are acceptable) - Uncheck all options below (WIMBoot, Compact, Windows To Go, Add Boot, Format) because Dism++ doesn’t know how to add boot entries for WinPE
- Click
OKto extract WEPE64.WIM to the target partition
At this point, we have completed extracting WEPE64.WIM to the partition. The next step is to add a proper boot entry for this PE system so it can boot.
Adding a BCD Boot Menu Entry for WePE on the Partition
We edit the local BCD file, which resides in the EFI partition of the disk.
If you are installing WePE on an empty virtual machine without an initial system, your disk may not have an EFI (or ESP) partition, or the EFI partition may be empty.
If there is no EFI partition, use DiskGenius to delete all partitions on the virtual disk, then in the Quick Partition feature, check the option “Create ESP Partition.”
If the EFI partition is empty, you can copy the entire
EFIfolder from the WePE ISO file into the EFI partition. This will provide the necessary boot files for the EFI partition.
The EFI partition needs to be mounted. You can use DiskGenius to assign a drive letter to it (right-click the EFI partition -> Assign a new drive letter).
Using the BOOTICE tool, we can easily edit the BCD file to add a boot entry for the PE system.
For detailed usage of BOOTICE, see my 20th article: “20 Analysis of Windows Computer Boot Process 2.”
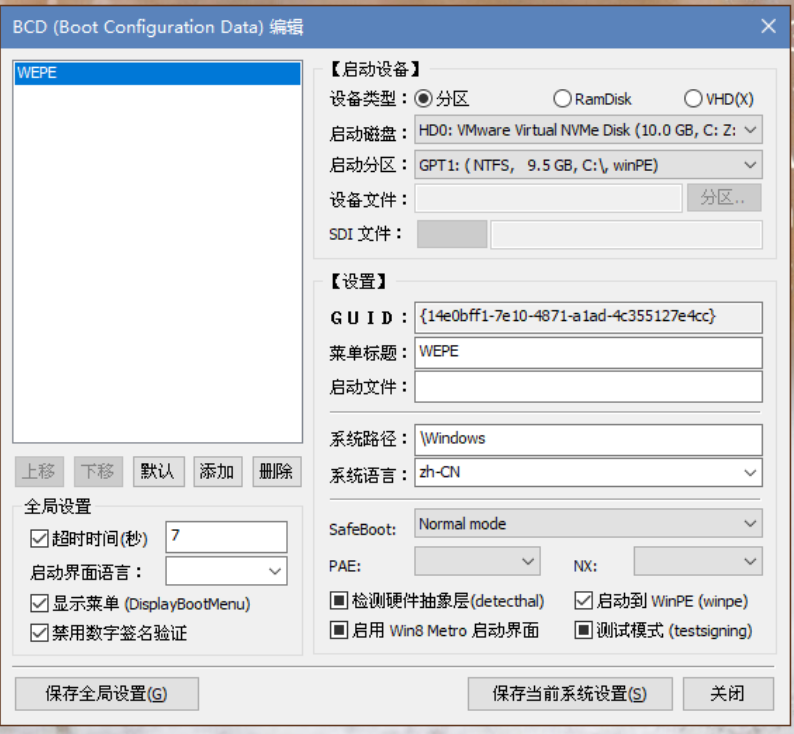
Open BOOTICE, click BCD Edit, select the BCD file in the EFI partition (path: \EFI\Microsoft\BOOT\BCD), and choose Smart Edit Mode.
- Click
Add -> Windows 7/8/8.1 Boot Entry - Edit the menu on the right:
- Device Type: Partition
- Boot Disk: The disk where you extracted the PE system
- Boot Partition: The partition where the PE system was extracted
- Menu Title: Customize (the author named it “WEPE”)
- Boot File: Leave blank, because the PE system’s boot file differs from a normal Windows system—it will boot itself automatically
- Below: Check
Boot to WinPE - Save Current System Settings -> Save Global Settings -> Close -> Exit
We have now completed editing the boot menu for WePE. You can restart and boot into the PE system on the disk.
Verification
To verify that this PE system is booting from the disk rather than being extracted via Ramdisk, use the following methods:
- During boot: After pressing Enter at the Windows Boot Manager screen to enter the PE system, if there is no loading progress bar below, but instead the blue window icon and spinning dots appear immediately, it means the system did not go through WIM extraction—success.
- After boot: In File Explorer, check the system drive of the PE. If it matches the partition you selected earlier, success.
- Boot the PE, try to delete all contents in the
Program Filesfolder on the PE system drive. Reboot and enter the PE again. If the deleted contents are not restored, success.
Significance
This method allows for easier debugging of custom PE systems. You can directly modify files in the PE system partition, and changes take effect immediately—without the need to frequently repack the PE WIM and embed it into an ISO. This streamlines the workflow.
However, I do not recommend using this approach for daily computer maintenance. A PE system booted via Ramdisk ensures that each boot provides a fresh, unmodified environment. In contrast, a PE system extracted to a disk partition could be maliciously tampered with, compromising its maintenance purpose.