Install PE System into VHD? Quite a Creative Move, but Faster than PE to Go!
Installing a PE System into a VHD? That’s Creative, but Faster than PE to Go!
I’ve previously covered how to directly extract a PE system onto a USB drive for use as PE to Go. The creativity of netizens knows no bounds—recently, someone asked about installing a PE system into a VHD. Let’s walk through it step by step.
How It Works
What exactly does it mean to install a PE system into a VHD? It’s essentially the same as installing a normal system—extracting a WIM image to a disk partition. The only difference is that this time, we’re extracting it into a virtual disk partition. Once that’s done, we just add a boot entry for it.
Hands-On Tutorial
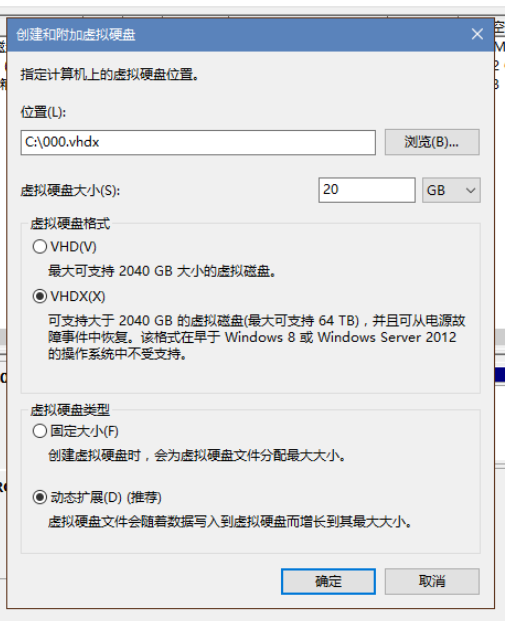
First, create a new VHD virtual disk. I’ll use Microsoft’s built-in method to create the virtual disk, allocating 20 GB of capacity, with a single partition formatted as NTFS.
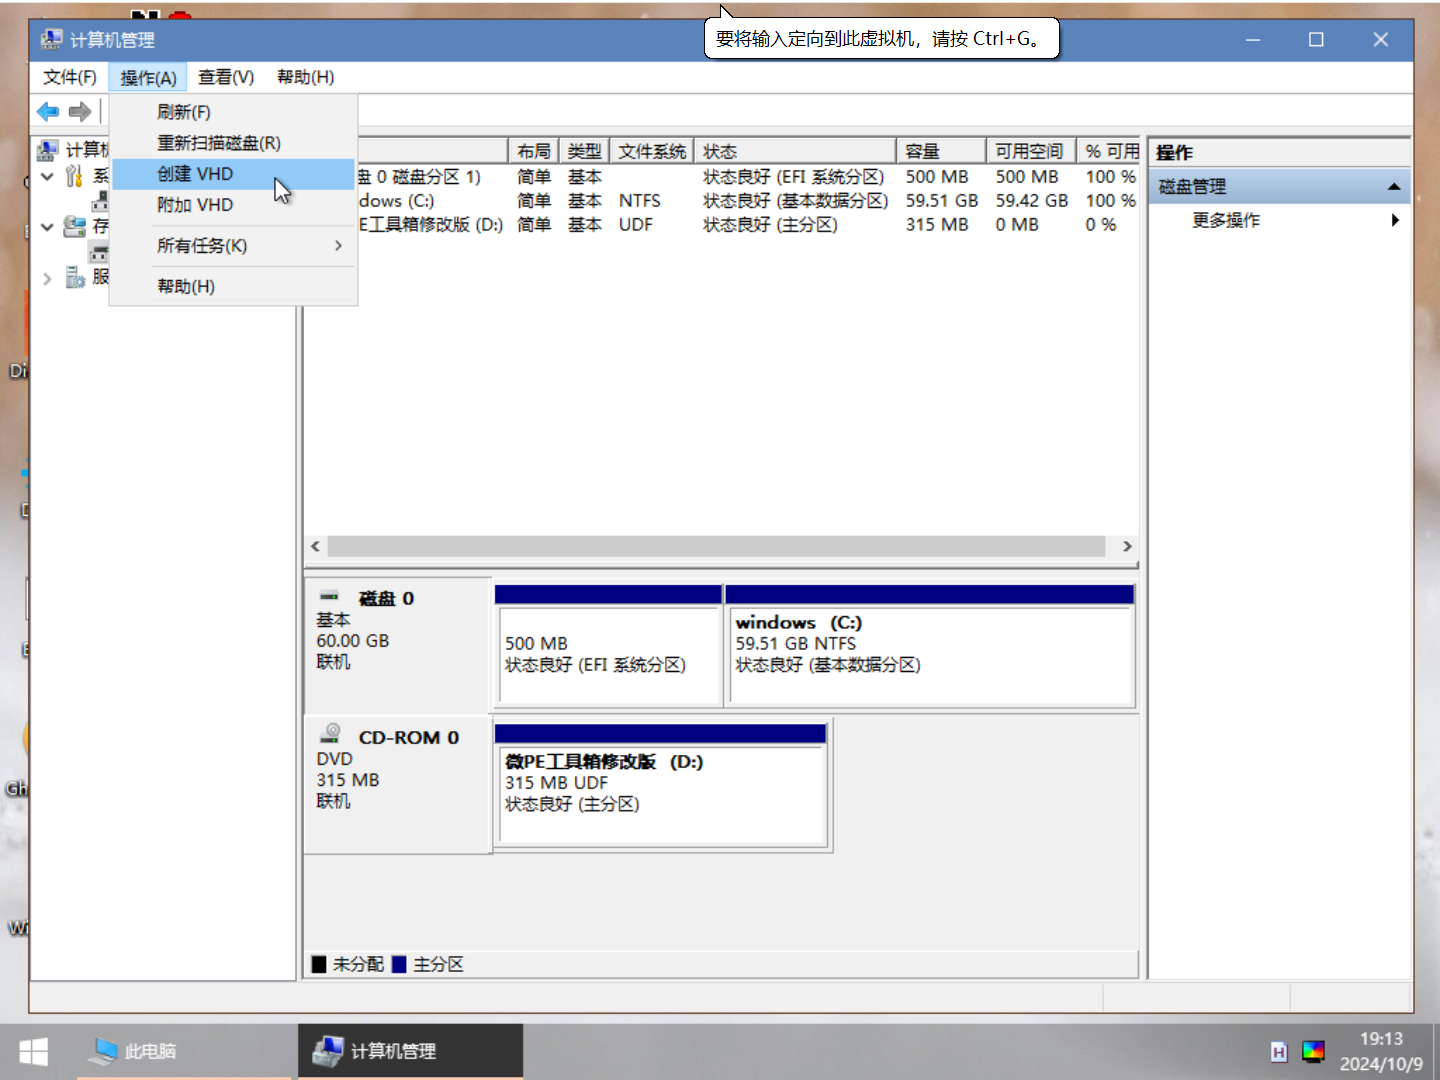
- Right-click on “This PC” and select “Manage”
- Click on “Disk Management”
- Select a disk, click “Action” in the top-left corner, then “Create VHD”
- I created a 20 GB VHDX format virtual disk named
000.vhdx, placed in the root of the C drive
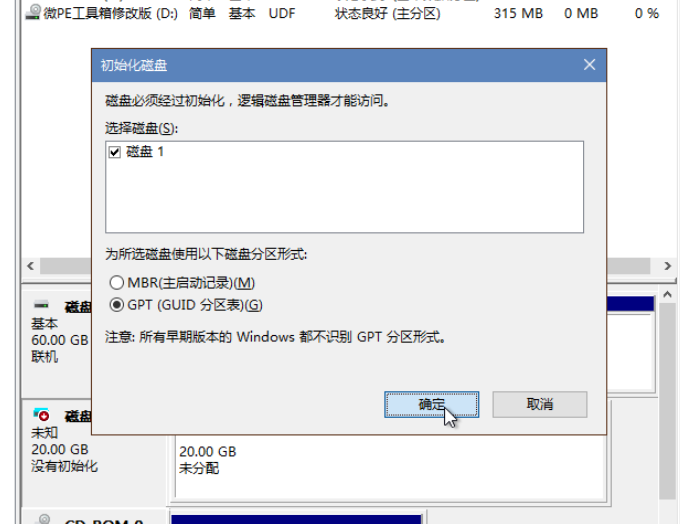
- Right-click the newly created disk, select “Initialize Disk”, choose GPT partition table, and click OK
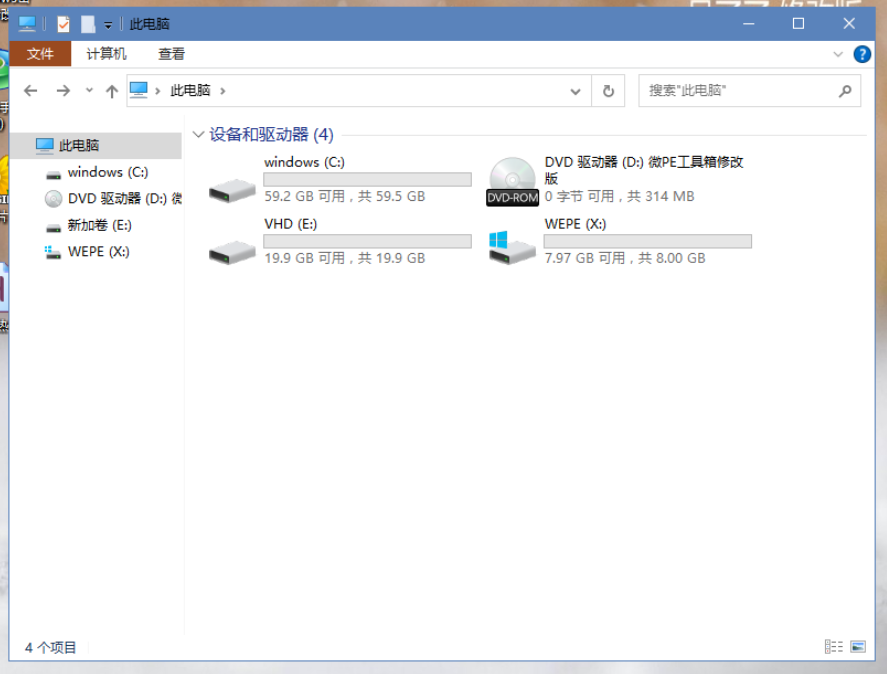
- Right-click the unallocated space, select “New Simple Volume”, and proceed with the defaults. I set the volume label to “VHD” for easy identification
At this point, the VHD virtual disk initialization is complete.
Extracting the WIM Image
- Open Dism++, click “File” in the top-left corner, then “Extract Image”
- In the first “Browse” field, select the location of the WePE WIM package. WePE’s WIM file is located inside its ISO at
\WEPE\WEPE64.WIM - In the second “Browse” field, select the root directory of the VHD virtual disk partition. On my machine, this is the E drive
- Leave all options below unchecked, then click OK to start extraction
- Once extraction is complete, close Dism++ and safely eject the VHD virtual disk from File Explorer
The WePE image extraction is now done. Next, we add the boot entry.
Adding the Boot Entry
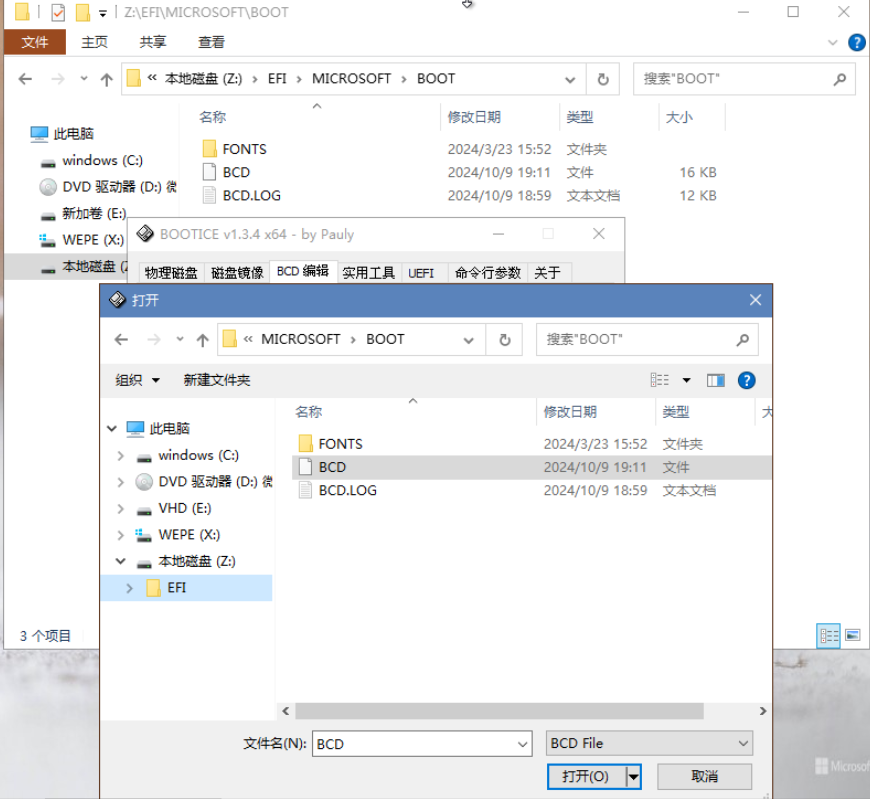
Use a tool like DiskGenius to mount the EFI partition. Copy the EFI folder from the WePE ISO into the EFI partition. Open the Bootice utility, select “BCD Edit”, click the three dots on the right, and navigate to the BCD file inside the EFI folder you just copied. The exact path is:
\EFI\MICROSOFT\BOOT\BCD
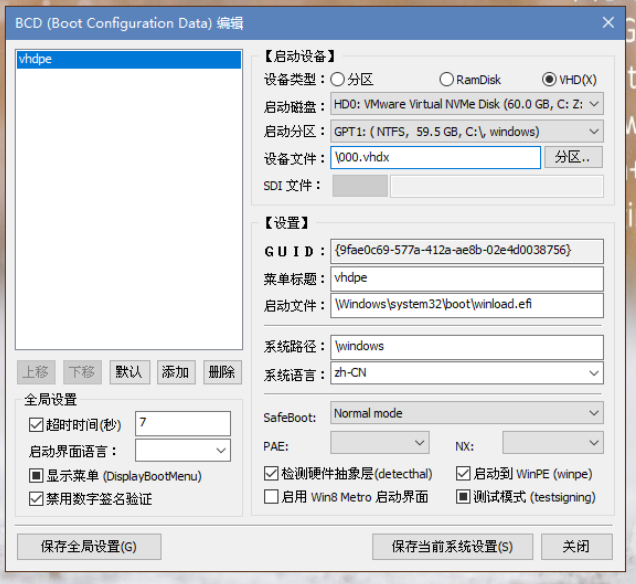
Click “Smart Edit Mode” to edit the BCD.
Boot Disk: The disk where the VHD virtual disk file resides
Boot Partition: The partition where the VHD virtual disk file is located
Device File: The full path and filename of the VHD virtual disk file (without the drive letter)
For WePE, the Boot File is
\Windows\system32\boot\winload.efiI’m not sure why WePE doesn’t place
winload.efidirectly in thesystem32folder, but instead uses the one insystem32\boot. This might be because the normal PE boot process differs from Windows and doesn’t requirewinload.efi.System Path:
\WindowsCheck “Boot to WinPE” below, and leave “Enable Win8 Metro Interface” unchecked
Save current system settings → Save global settings → Close → Exit
And that’s it—the VHD-bootable PE is ready.
Boot Test