GHOST | System Recovery: Unable to Boot After Converting MBR to GPT, Black Screen Error? Principles + Solutions Here!
GHOST | System Recovery: Can’t Boot After MBR to GPT Conversion? Black Screen Errors? Here’s the Principle + Solution!
When veteran technicians use GHO backups to restore systems, they often encounter two hurdles when restoring a system from an MBR partition table to a GPT partition table disk:
- The computer fails to boot (i.e., boot issues)
- After booting, the screen goes black with flickering errors
This article delves into the principles behind both issues and provides solutions.
About the Computer Failing to Boot
I’ve mentioned countless times in previous articles the requirements for booting a system with UEFI firmware and a GPT disk:
A GPT disk must have an EFI (ESP) partition!
The so-called EFI (ESP) partition is essentially a partition with a FAT32/FAT16 file system.
This file system can be recognized by UEFI firmware. Other file systems cannot be read by UEFI firmware. Therefore, the hard drive must have such a partition for the UEFI firmware to read and boot the system.
So, if you’re using UEFI firmware and your disk lacks an EFI partition—meaning no partition with a FAT32/16 file system—the system simply won’t boot, no matter what.
If there’s no EFI partition, you can create one directly. Here’s how:
- Open DiskGenius in the PE environment.
- Select the GPT disk, right-click any partition on it, and choose
"Split Partition". - In the
"Space after partition"field, enter300MB, then select"Create new partition"on the right. - Click
"Start".
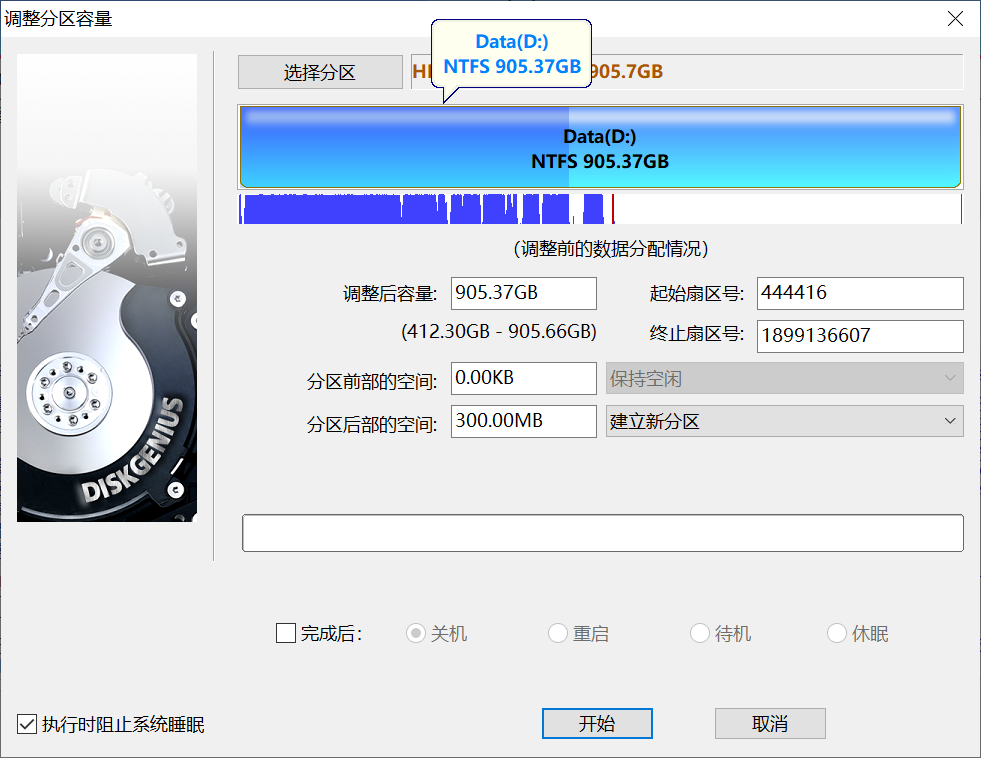
The software will automatically create a small NTFS partition. Now, convert it to a FAT32 file system.
- Right-click the new small partition.
- Click
"Format Partition", and select FAT32 as the file system. - Confirm all the way through.
This manually creates a partition that UEFI firmware can recognize and read.
Next, perform the standard system boot repair.
- Open the Dism++ tool in the PE system.
- At the top, click on the system you want to repair.
- Click
"Recovery → Boot Repair → More". - Ensure the boot files are written to the 300MB partition we just created, so select that partition here. (In my example image, it’s a 216MB partition.)
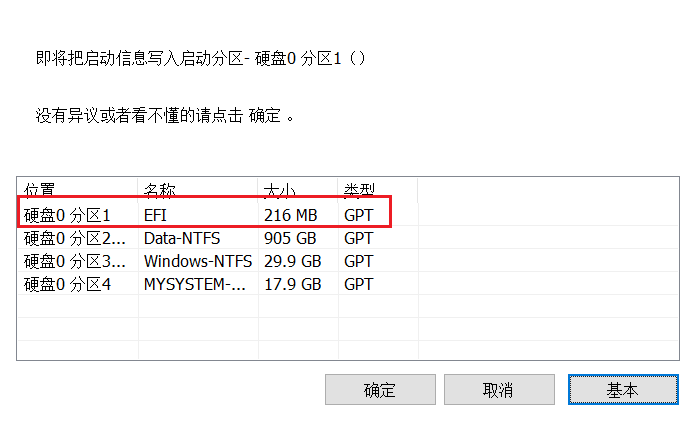
This completes the UEFI firmware boot repair. Windows should now boot normally.
But it still won’t start properly!
Black Screen with Flickering Errors After Boot
When you restart the computer, it boots to the Windows login screen, but then an error appears: unknown hard error. After logging in, the screen goes black with the taskbar flickering wildly.
Why does this happen? First, let’s explain the principle.
We took a normally running Windows system, backed it up as a GHO image, and restored it to a completely different hard drive. This Windows system remembers the hard drive it originally lived on. How does it remember?
It does so by recording the GUID of the original hard drive and its partitions in the registry.
A GUID is a globally unique identifier—think of it as an ID number that is unique and non-repeating. Every hard drive and every partition has its own unique GUID.
So, when you restore this Windows to a new hard drive, Windows detects that the GUIDs it recorded don’t match the GUIDs of the hard drive it’s now on.
Windows then thinks: Since the current hard drive’s partitions don’t contain the previously recorded C drive’s GUID, there is no C drive in the current partitions. This leads to a bizarre situation:
After Windows boots, no partition is assigned as the C drive.
As a result, Windows goes black because the file explorer can’t find where it is. Windows keeps trying to launch the file explorer, and explorer.exe crashes repeatedly. Hence, the black screen with flickering errors after boot.
What to do?
Simply delete the GUIDs recorded in the Windows registry.
Enter the PE system again.
Open the “Registry Editor” in the PE environment. At this point, the Registry Editor shows the PE system’s registry. We need to edit the registry of the Windows system that isn’t currently running, not the PE’s registry.
So, we need to mount the Windows system’s registry.
Method:
- First, click on any registry root key in the PE system’s Registry Editor (e.g., click
HKEY_LOCAL_MACHINE). - Click
"File → Load Hive"in the top-left corner.

- Select the Windows system’s registry file:
- Choose the file
D:\Windows\system32\config\system. - Note: The D drive in the path above should be replaced with the actual drive letter of the Windows system disk as it appears in the PE.
- Choose the file
- Then, enter any name, e.g.,
1111, and confirm.
Delete the GUID information from the registry:
- Double-click
1111, then click on theMountedDevicesentry. You’ll see many registry keys on the right. - Except for the very first key (Default), delete all the registry keys on the right.
- Click on
1111again to select it. - Click
"File → Unload Hive"in the top-left corner.
That’s it.
After restarting the computer, the Windows system should work normally.
The registry modification method above works for both MBR to GPT and GPT to MBR partition table conversions.