System Installation Toolkit | Comprehensive Feature Overview | A System Installation Power Tool from the DriverPE Author
System Installation Toolkit | Comprehensive Feature Breakdown | A Powerful System Installation Tool from the DriverPE Author
System Installation Toolkit is a comprehensive tool developed by QingShenMengYuan, focused on Windows system installation, system backup, system maintenance, and optimization configuration.
Despite its compact size of only 6.61MB, this toolkit packs an incredibly rich and powerful set of features, covering system installation, system optimization, driver import/export, boot repair, boot menu management, UEFI menu management, disk partitioning, local PE deployment, and many other practical utilities.
In simple scenarios, this single tool can accomplish tasks that previously required multiple tools working together.
This article provides a thorough, room-by-room breakdown of the System Installation Toolkit features, aiming to offer guidance and assistance to desktop maintenance professionals.
Download System Installation Toolkit:
Follow the official account and reply with
System Installation Toolkitto get the Lanzou cloud download link.
01
Basic System Installation
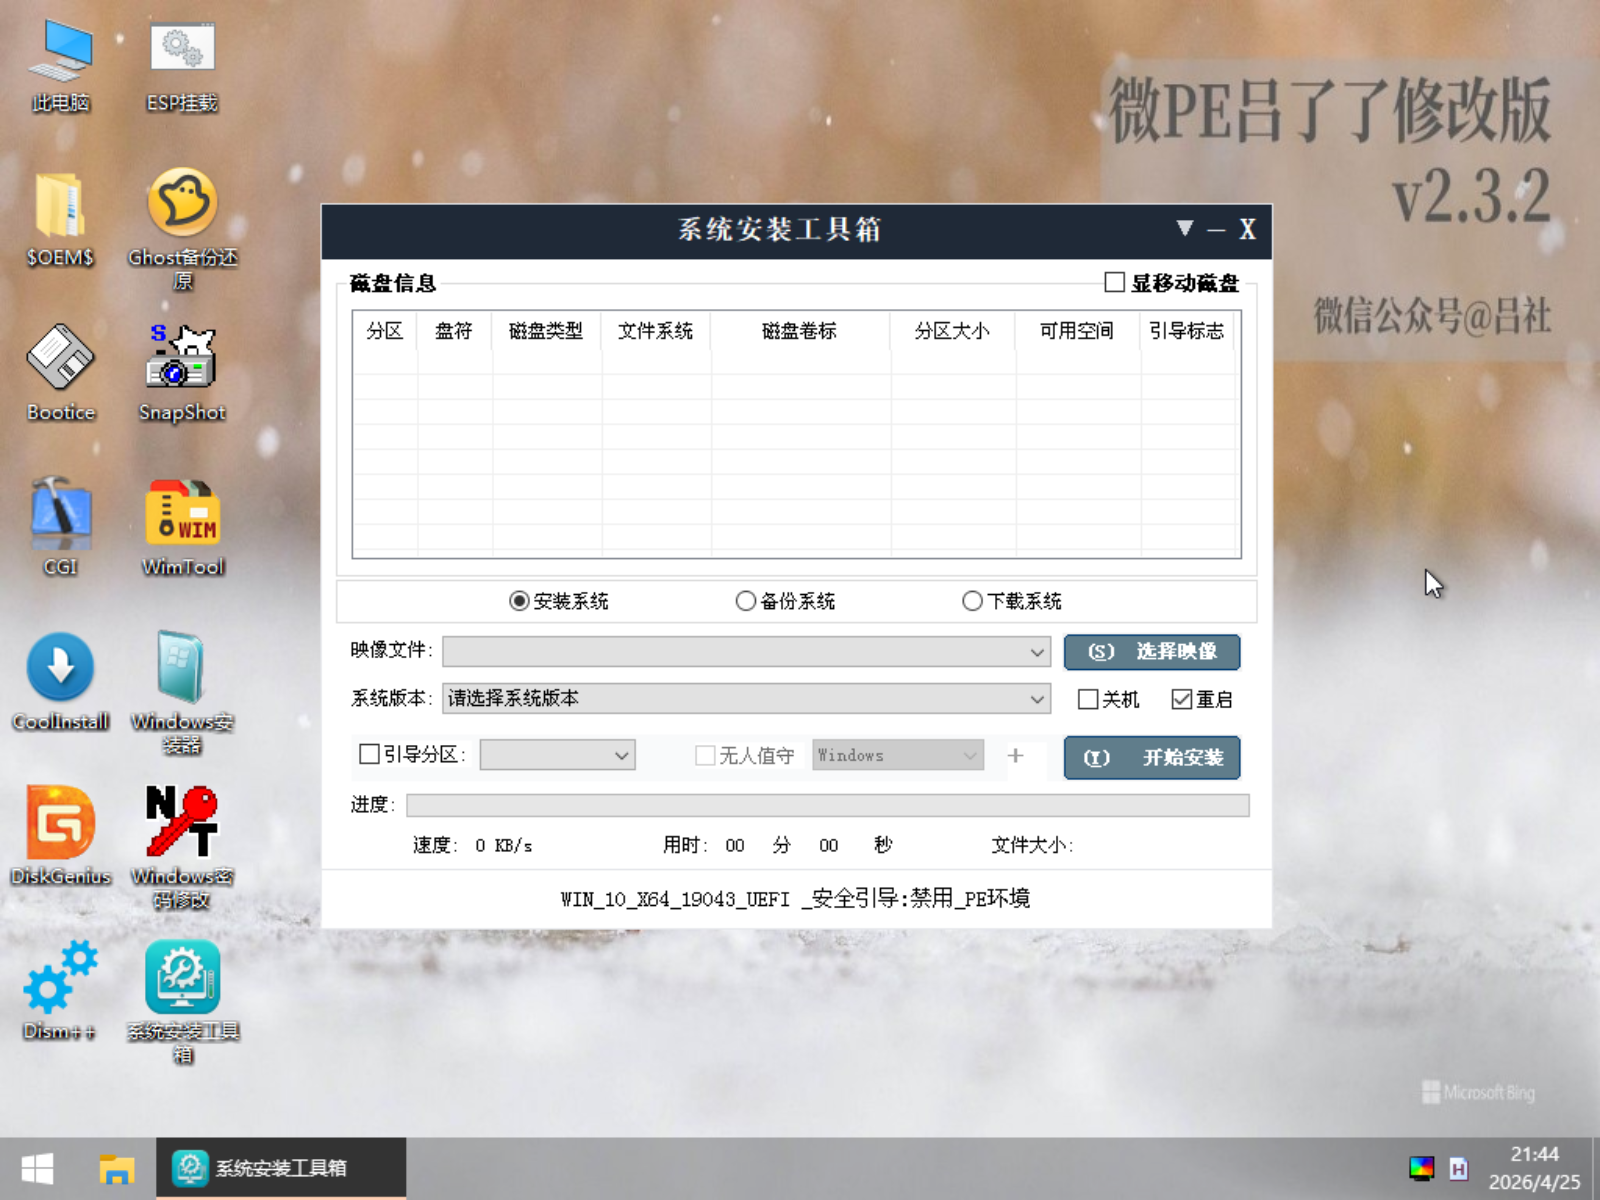
Open the System Installation Toolkit and start with disk partition planning.
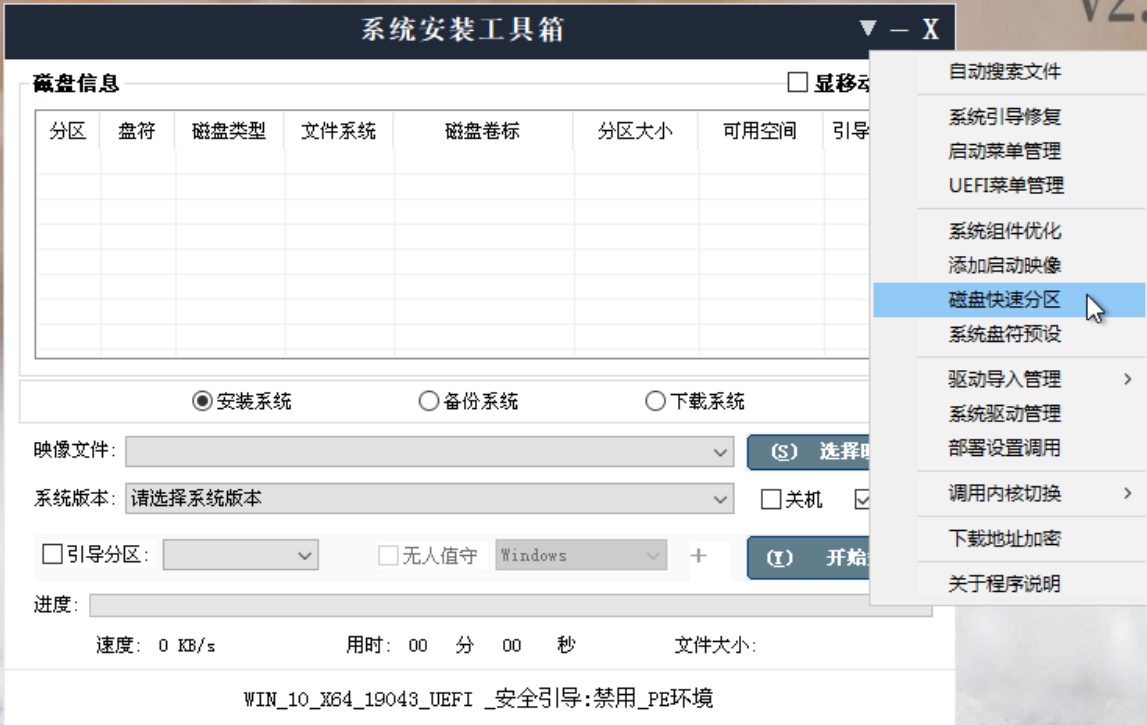
- Click on “Quick Disk Partition”
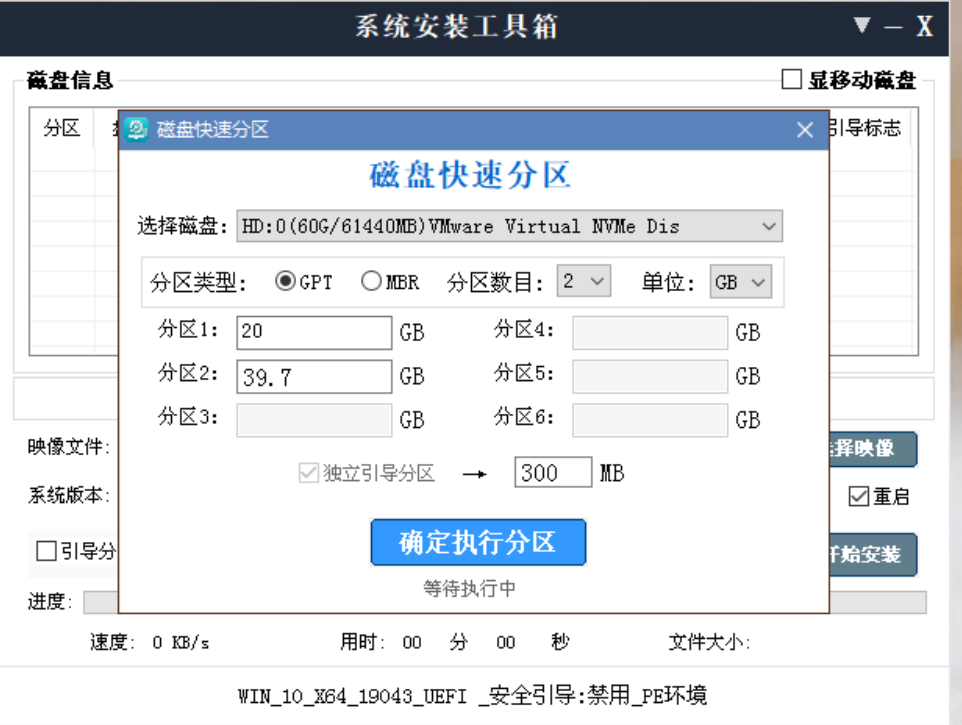
- First, choose the partition table type: GPT or MBR.
- Generally, modern motherboards with UEFI firmware use GPT, while Legacy BIOS firmware motherboards use MBR.
- Enter the size for
Partition 1(e.g., 20) - Select the number of partitions (e.g., 2)
- Continue to enter the size for Partition 2 (the software will automatically fill in the remaining disk capacity)
- “Independent boot partition” refers to the EFI partition (ESP partition). This is mandatory for UEFI firmware to boot Windows. Setting it to 300MB is sufficient.
- Computers using legacy BIOS firmware do not need to check this option. BIOS firmware does not require an EFI partition to boot Windows.
- Confirm to execute the partitioning
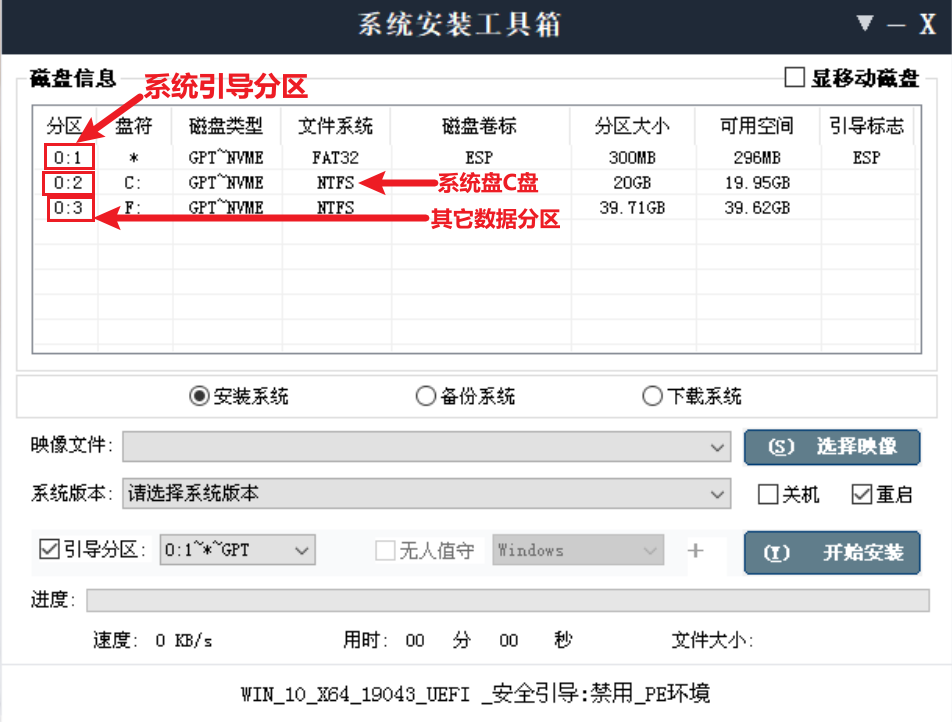
Disk partition planning is now complete.
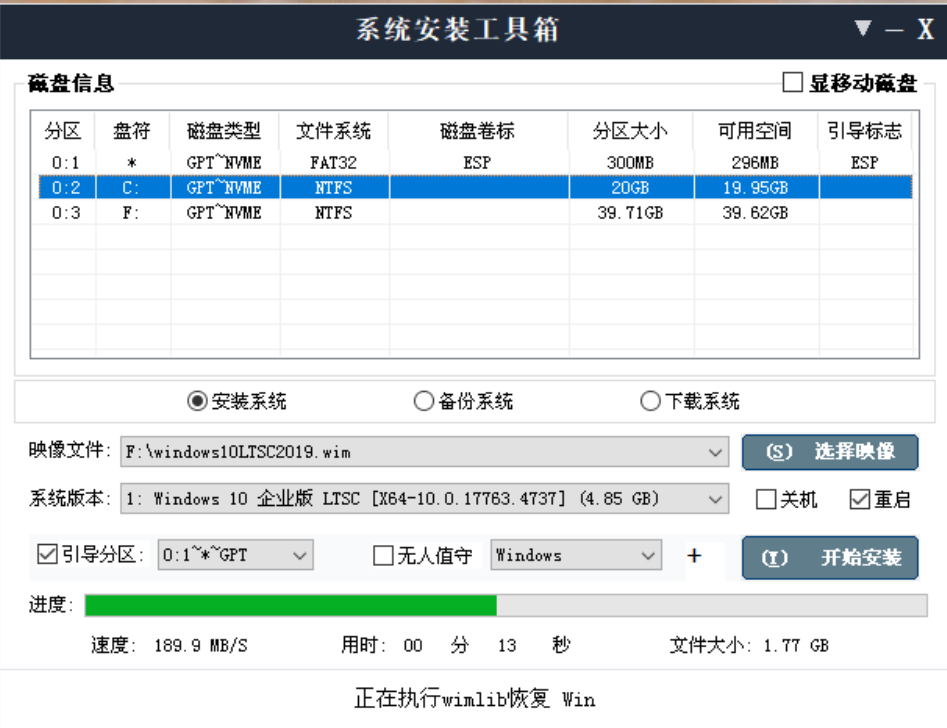
Below is the system installation method:
- Return to the main interface of the software.
- In the list above,
clickto select a partition as the system drive, i.e., the C drive.- For example, I select Partition 0:2
- Under “Image File”: Select the Windows system image file.
The System Installation Toolkit supports the following system image file types:wim, esd, GHO, sna, ISO, ws, swm. This wide variety is a significant advantage of this tool. - Under “System Version”: Select the system version to install.
The system version is embedded within the system image file (wim, esd). The number of versions displayed here corresponds to the number of versions contained in the image file. Generally, for personal users using the original system, the order of preference is: IoT LTSC > LTSC > Enterprise > Pro. - “Boot Partition”: When checked, the system boot will be automatically repaired after installation.
- “Unattended”: When checked, you don’t need to manually go through the OOBE phase during the first boot. The built-in unattended file automates this configuration.
- Note: If the selected system image file already contains an unattended file, checking this option in the software will overwrite the original file, potentially causing compatibility issues.
- The “Plus” sign
+next to “Unattended”: Configure the contents of the unattended file, including default username, default computer name, workgroup, system activation key, etc. - “Shutdown”/“Restart” options: Automatically shut down or restart the computer after system installation.
- After configuring the above, click
Start Installation.
After installation, restart to enter the Windows system.
This feature can be used in both PE and the Windows desktop environment.
02
System Backup
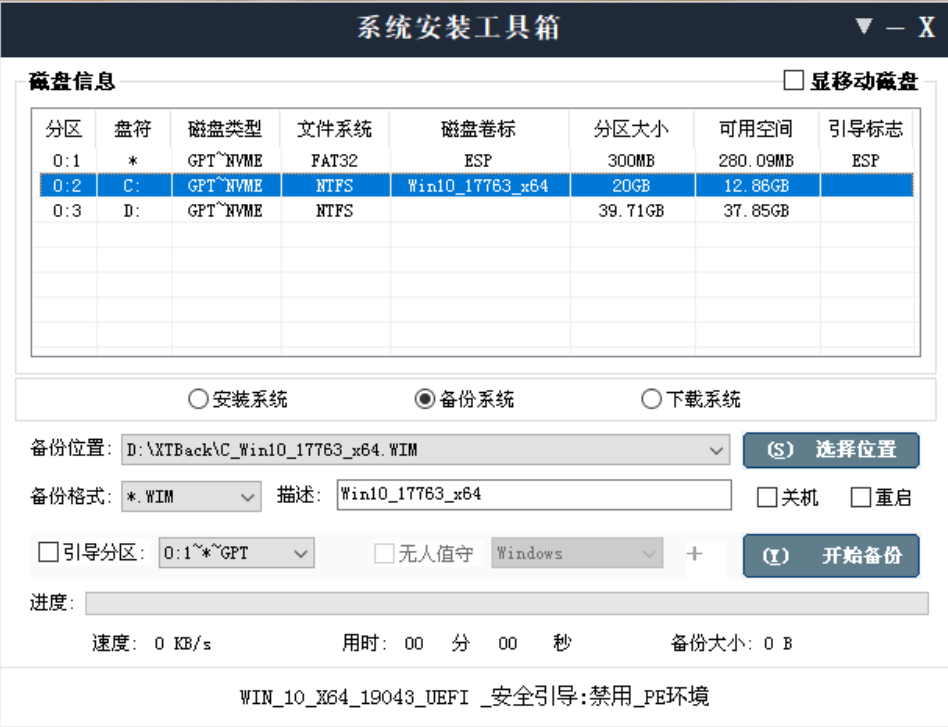
- Click on “System Backup” in the middle of the software.
- The supported system backup formats include: wim, esd, GHO, sna
- Select Backup Location: Choose the storage location for the generated system backup file and set the filename.
- Select Backup Format: wim, esd, GHO, sna
- Click “Start Backup” and wait patiently.
The system backup feature in the System Installation Toolkit does not offer many configurable parameters. For system backup tasks, the author still recommends Dism++ and wimtool.
This feature can be used in both PE and the Windows desktop environment.
03
Menu Features Overview
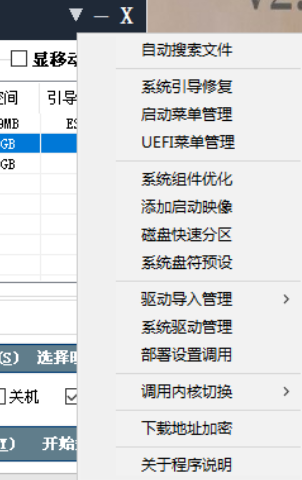
- Auto Search Files: Automatically searches all disks for Windows system image files.
- Kernel Switch: Choose between the DISM or WIMLIB kernel. The default “Auto” selection is recommended.
- System Drive Preset: This feature is not yet available.
- Download URL Encryption: This feature is not yet available.
04
System Boot Repair
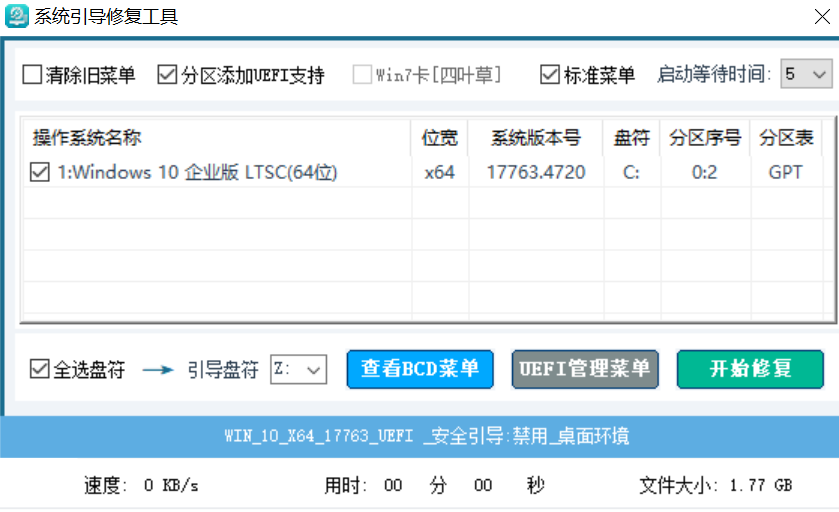
This feature can repair the system boot files for systems on all partitions.
- Click “System Boot Repair,” and the software will automatically scan and list all systems on all partitions.
- In the list, check the systems you want to repair the boot for.
- “Boot Wait Time”: The countdown time for the
Windows Boot Managerwhen multiple systems are present. - “Win7 Clover Fix”: Fixes the issue where Windows 7 gets stuck on the clover logo when booting on UEFI firmware.
- The “Boot Drive Letter” below refers to the drive letter of the EFI partition. The software will automatically mount the EFI partition; generally, the default Z drive is fine.
- “Standard Menu”: Uses the “classic” traditional boot menu.
- “Clear Old Menu”: Deletes all boot entries from the BCD file.
Click Start Repair to fix the system boot.
This feature can be used in both PE and the Windows desktop environment.
05
Boot Menu Management
This is BCD editing.
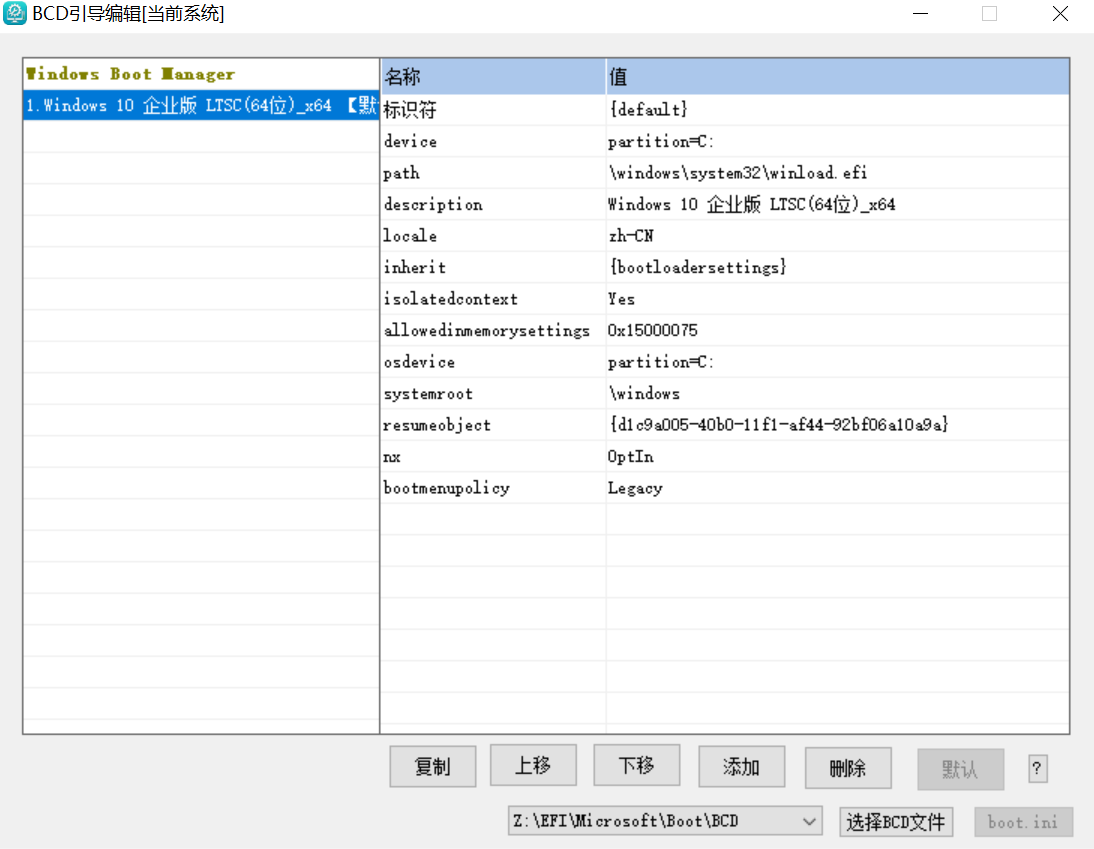
The knowledge required for editing BCD is extensive and complex, and is beyond the scope of this tutorial. Please refer to other resources.
This feature can be used in both PE and the Windows desktop environment.
06
UEFI Menu Management
This involves editing UEFI boot entries in NVRAM.
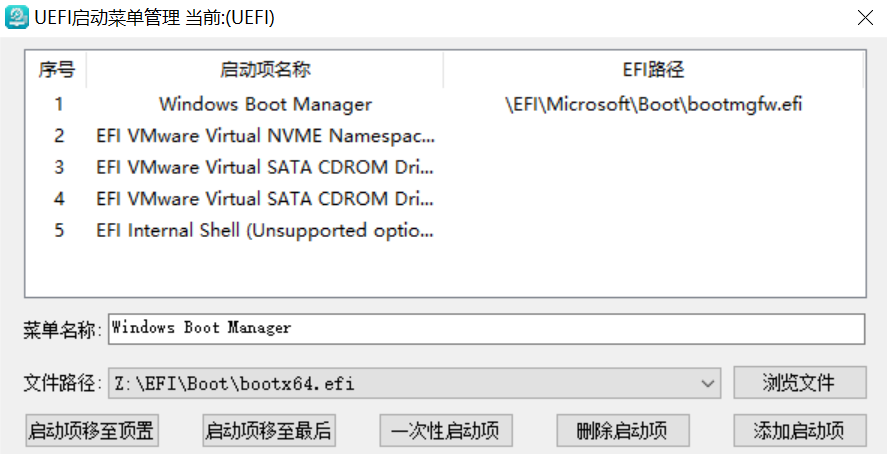
- Move Boot Entry to Top: Set as the default boot entry.
- Move Boot Entry to Bottom.
- One-Time Boot Entry: Boot from this entry only on the next restart.
- Delete Boot Entry.
- Add Boot Entry: Select an efi file to add to NVRAM.
This feature can be used in both PE and the Windows desktop environment.
07
System Component Optimization
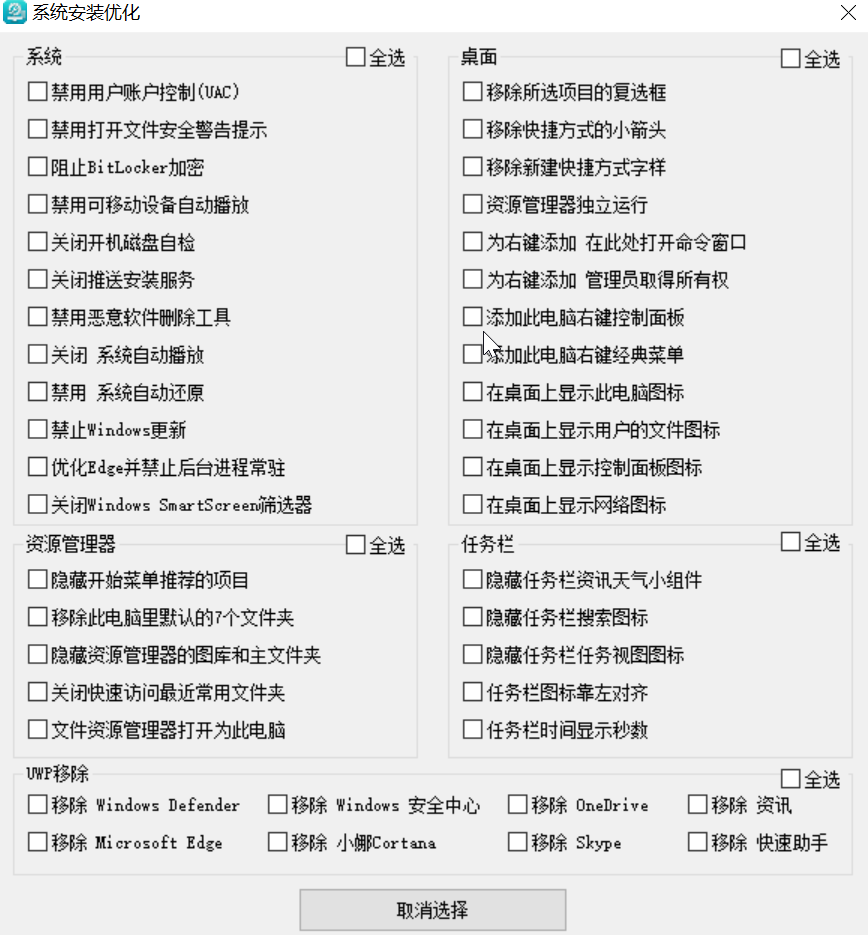
Pre-optimize the system before booting it up.
Each option’s function is clearly described. No further explanation is needed.
This feature can only be used in PE, before installing the system.
08
Add Boot Image
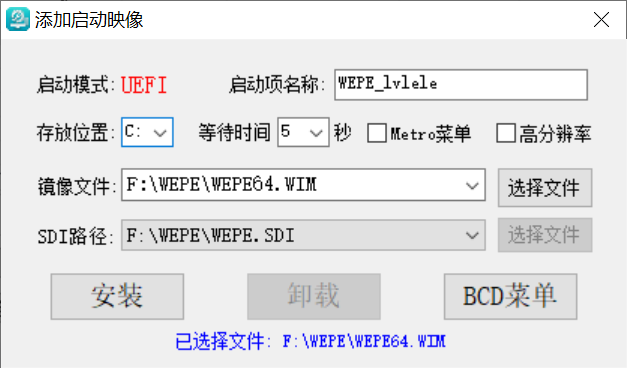
Install a local PE system or VHD system on the current computer.
Prerequisites: You have an ISO disc image file or WIM file of the PE system, and you have a VHD/VHDX virtual disk file.
- Boot Entry Name: The menu name displayed in the
Windows Boot Manager. - Storage Location: Select the partition for installing the local PE system. Any partition is fine.
- Wait Time: The countdown time for the
Windows Boot Manager. - Metro Menu: Use the Windows 8 tile-style boot menu (not recommended due to slower speed).
- High Resolution: Boot the PE system or VHD system at the highest resolution.
- Image File: Select the WIM file.
Note! The folder containing your WIM file must also contain the PE system’s SDI file; otherwise, the SDI file path below cannot be recognized.
It is recommended to directly double-click to mount the PE system’s ISO file, then select the WIM file within it. - SDI Path: The software will automatically select it.
- Click “Install” to install the PE system on the local computer.
This feature can be used in both PE and the Windows desktop environment.
09
Driver Import Management
- Import Intel RST Driver
- If the system blue-screens with the error
INACCESSIBLE_BOOT_DEVICEafter booting, it is highly likely due to a missing RST driver.
- If the system blue-screens with the error
- Import USB 3.0 Driver
- A feature provided for Windows 7 systems.
This feature can be used in both PE and the Windows desktop environment, but it is strongly recommended to use it in PE.
10
System Driver Management
This involves backing up and restoring system hardware drivers.
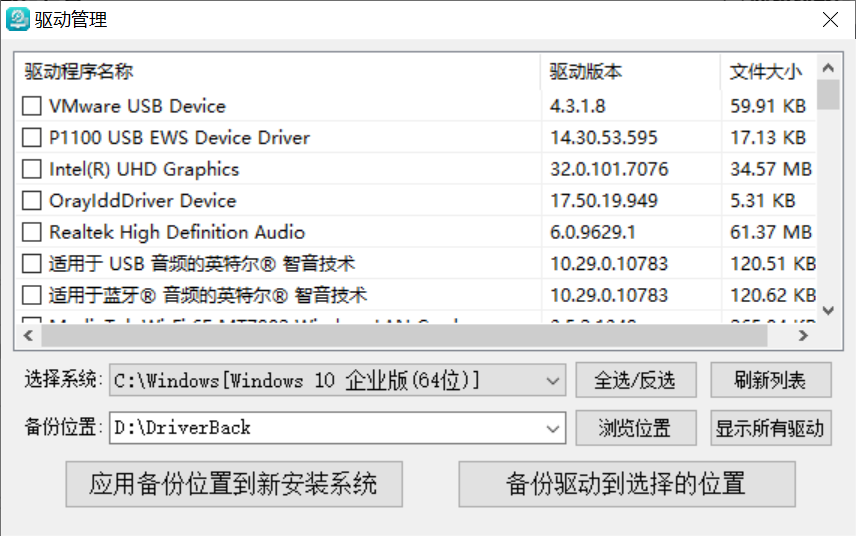
Self-explanatory, no further explanation needed.
This feature can be used in both PE and the Windows desktop environment.
11
Deployment Settings Invocation
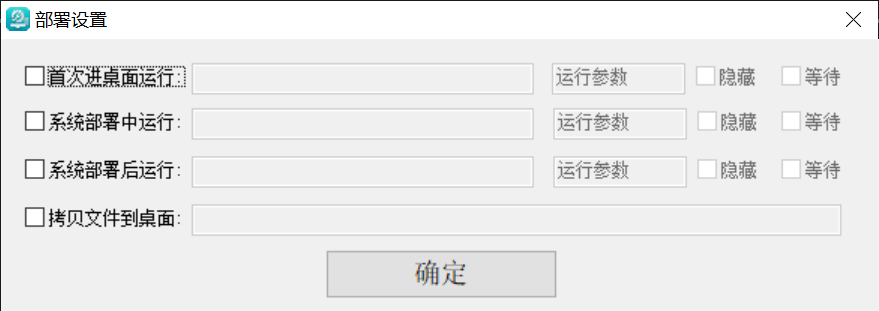
An infrequently used feature.
Configure programs, scripts, etc., to run automatically during the system deployment phase, OOBE phase, first boot phase, and first login phase.
Download System Installation Toolkit:
Follow the official account and reply with
System Installation Toolkitto get the Lanzou cloud download link.