Subverting Perceptions: A New Masterstroke in System Cloning
Mind-Blowing: A Revolutionary New Approach to System Cloning
What methods of system cloning are we familiar with?
AOMEI Partition Assistant, DiskGenius, WinToHDD, and so on.
Feel free to share your thoughts in the comments—I’m sure you know more than I do.
But today, I’m going to introduce a peculiar, almost “unorthodox” method of system cloning. This approach completely overturns everything we once knew about system cloning technology.
First, let me unveil the core powerhouse behind this technique: wimlib
What Exactly is wimlib?
Similar to the well-known DISM and WimGAPI, wimlib is a tool that goes far beyond simply processing and editing WIM and ESD image files.
wimlib official website:
- wimlib is an open-source, cross-platform library, meaning its source code is visible to anyone. It can run on Linux, Windows, and macOS systems.
- wimlib was originally a project started by Carl Thijssen in 2009.
- Apply (extract) WIM images
- Capture (create) WIM images
- Append, delete, and export WIM images
- Modify WIM images
- Extract files or directories from WIM images
- Optimize WIM archives by removing wasted space and optionally recompressing
- Split or merge WIM archives
- Mount WIM images
Now, let’s talk about the key differences between wimlib and DISM/WimGAPI.
- Open Source.
- DISM and WimGAPI are Microsoft tools, completely closed-source. wimlib is a tool created by Linux developer
Eric Biggersthrough reverse engineering.
- DISM and WimGAPI are Microsoft tools, completely closed-source. wimlib is a tool created by Linux developer
- No Legacy Baggage.
- Microsoft’s WimGAPI dates back to Windows Vista. For compatibility reasons, it contains a massive amount of redundant code. wimlib is designed for modern Windows, with lightweight and efficient code.
- High Efficiency.
- DISM operates in single-threaded mode. wimlib works in multi-threaded parallel mode. wimlib is significantly faster and more efficient than DISM.
The WIM format was developed by Microsoft, but the one who has mastered it to perfection is not Microsoft—it’s wimlib.
After all this introduction about wimlib, what does it have to do with today’s system cloning?
This brings us to one of wimlib’s ultimate features: support for pipe-based operations.
Why does wimlib’s pipe operation make system cloning possible?
First, let’s imagine how we would “clone a system” using Dism++.
- Use Dism++ to back up the system to be cloned as a WIM file.
- Use Dism++ to apply the WIM file to a new hard drive partition, then repair the boot.
We notice that the steps above require an “intermediary”: a physically existing WIM file.
However, wimlib doesn’t need this “intermediary” step. wimlib has its own “special ability.”
1 | |
We don’t need to memorize the code above. System administration is never about memorizing and typing code.
We just need to know that capture captures a snapshot, \\?\GLOBALROOT\Device\HarddiskVolumeShadowCopy1 represents the C drive, apply applies the WIM, and | is the pipe operator. So, the code above means: use wimlib to copy the system from the C drive to the D drive.
Did you notice? No intermediary WIM file was generated in this process. This is because wimlib temporarily transfers the C drive system into memory, and then directly releases the data from memory to the D drive, completing the system copy. This method of directly using memory to transfer the system is something WimGAPI cannot achieve.
So, we can understand it this way: wimlib, like WimGAPI, uses the WIM file generation algorithm. However, wimlib dynamically places the WIM file in memory and then “streams” it to the target disk.
What’s the advantage? Speed. This avoids the use of an intermediary WIM file. Memory is extremely fast, and the transfer time is negligible.
Hands-On: wimlib System Cloning
Since wimlib has this capability, it’s only natural that someone has integrated it into their software. We don’t need to type any code—just a few mouse clicks to get the job done.
That software is WinNTSetup.
WinNTSetup has many lesser-known features; it’s far more than just a system installation tool. This is a truly “profound” piece of software.
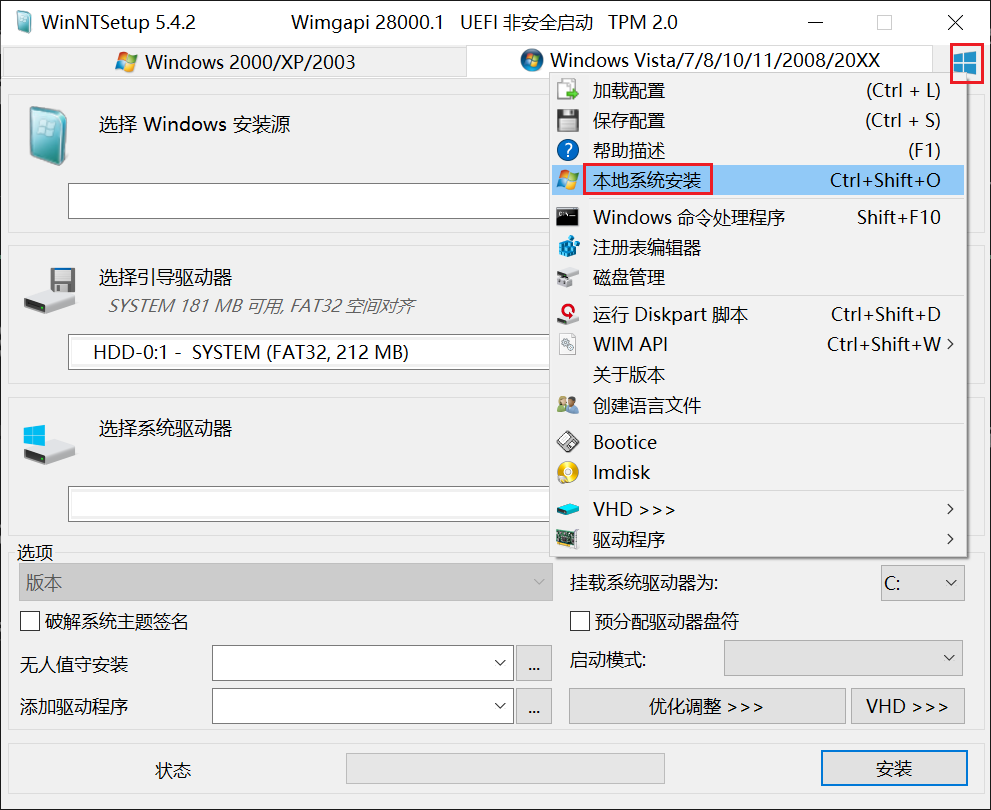
- Click the Windows logo button in the upper-right corner of WinNTSetup.
- Click “Local System Installation.”
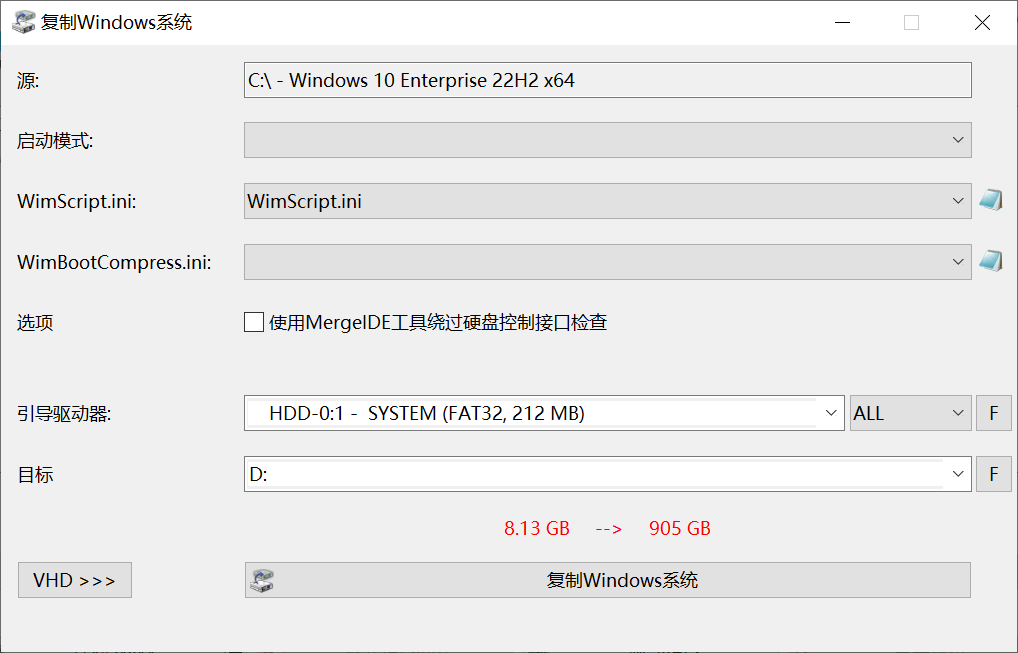
- Right-click the system you want to clone and click “Copy Windows System.”
- You can leave the boot mode unselected, or choose CompactOS. CompactOS is a feature that compresses system files to save disk space.
wimscript.iniis the built-in exclusion list for copying system files; the default settings are fine.wimbootcompress.inidoes not need to be selected.- The
MergeIDEfeature is useful for older systems and computers. If the hard drive interface changes, you can select this to prevent blue screens. Boot Driveselects the boot drive you want to use (typically the boot partition of the new hard drive).Targetis the target partition for the system clone.- Simply click “Copy Windows System” below.
On an SSD, a 19GB Windows system was cloned in approximately 1 minute.
Advantages Over Other System Cloning Methods
Other system cloning methods are based on hard drive sectors and cannot provide fine-grained control over file exclusion lists. Sector-based system cloning sometimes requires the new partition to be equal to or larger than the original partition.
wimlib system cloning is fundamentally file-based, not sector-based. It allows fine-grained control over file backup exclusion lists, meaning temporary files, cache files, system virtual memory files, and system hibernation files are not cloned during the process.
wimlib system cloning only requires the target partition to be larger than the entire system. Compared to WimGAPI, wimlib system cloning offers tremendous advantages.