How to Back Up an Entire Windows System? Don’t You Know These Methods Yet?
How to Back Up Your Entire Windows System? Still Struggling with All These Methods?
When using a computer, system failures are inevitable. Wouldn’t it be great if we could restore the system to a previous state when something goes wrong, like traveling through time?
To enable this “time travel” for our system, we need to be proactive and back up our Windows system in advance.
So, how do you back up a Windows system? What should you pay attention to when backing up Windows? Today, I’ll walk you through multiple methods and important considerations for system backup.
How Often Should You Back Up Your System?
I recommend backing up your system once a month. This doesn’t take much time because only the first backup is a full backup; subsequent backups are incremental backups. Incremental backups are very fast.
For more on incremental vs. full backups, see the explanation below.
How to Back Up Windows System?
Please note: Before backing up your system, clean up your C drive by deleting unnecessary files, system caches, and app caches. This prevents useless temporary files from being included in the WIM backup, saving time and space.
Using Dism++ Software for System Backup (Recommended)
I’ve recommended the powerful tool Dism++ multiple times in previous articles. Here’s the open-source official website:
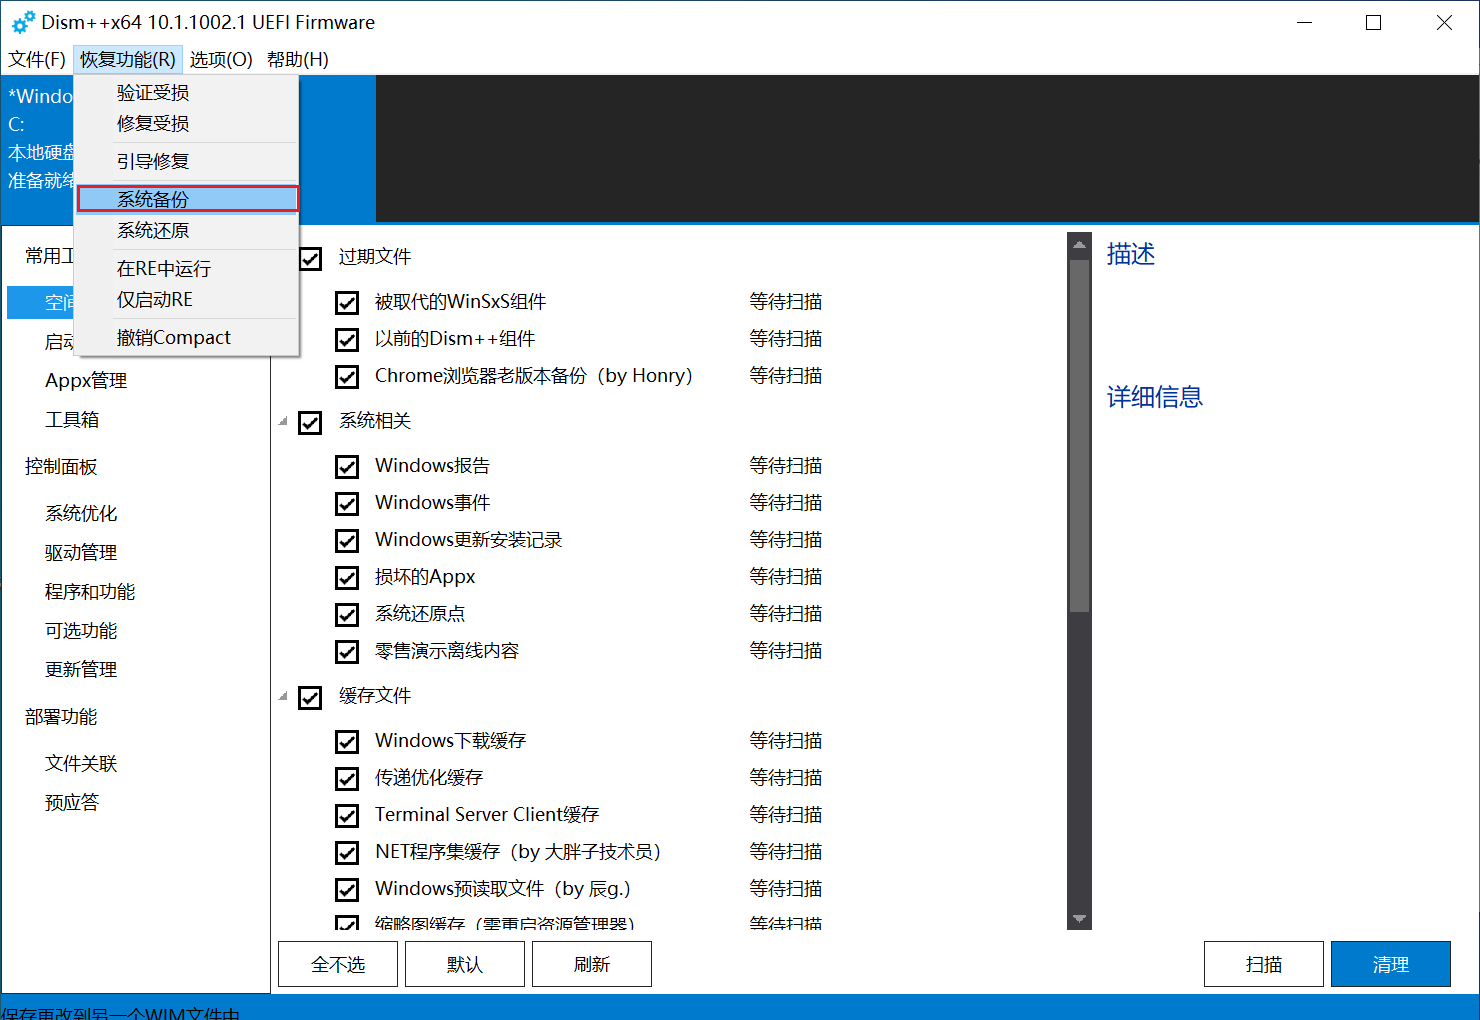
- Open Dism++, click the dropdown at the top to select the Windows system you want to back up, then click
Recovery -> System Backup. - Click
Browseto choose where to save the backup package. You can select any location.
- In the
Save Typedropdown below the path, you’ll find options: No Compression, Fast Compression, WIMBoot Compression, Maximum Compression, and Extreme Compression.
No Compression: Packs the C drive directly into a WIM file without compression. The WIM file will be almost as large as the C drive. Fastest backup speed.
Fast Compression: Compresses the C drive files into a WIM with low compression ratio.
WIMBoot Compression: According to Dism++ developers, this compression method is suitable for WIMBoot but not very useful, and its compression ratio is lower than Maximum Compression.
Maximum Compression: Compresses C drive files into a WIM with a higher compression ratio. (Recommended)
Extreme Compression: Uses the ESD format instead of WIM, compressing C drive files to the maximum. It offers the highest compression ratio but produces an ESD file, which cannot be used as a source file for WIMBoot (i.e., cannot be used to create WIMBoot). Slowest backup speed, suitable for long-term backups.
- Click
Save. - Wait patiently for the system backup to complete.
Dism++ supports hot backup, meaning you can back up the current system while it’s running.
However, hot backup may encounter errors.
If an error occurs, boot into a PE environment and use Dism++ to perform the system backup. The operation is the same as hot backup.
Once the backup is complete, you’ll have a WIM file of your system. You can then use a Windows installer (like WinNTSetup, Dism++, etc.) in PE to select this WIM or ESD file and install the system.
After installation, simply restart your computer, and the system will be restored to the state at the time of backup.
Editing the Backup Exclusion List
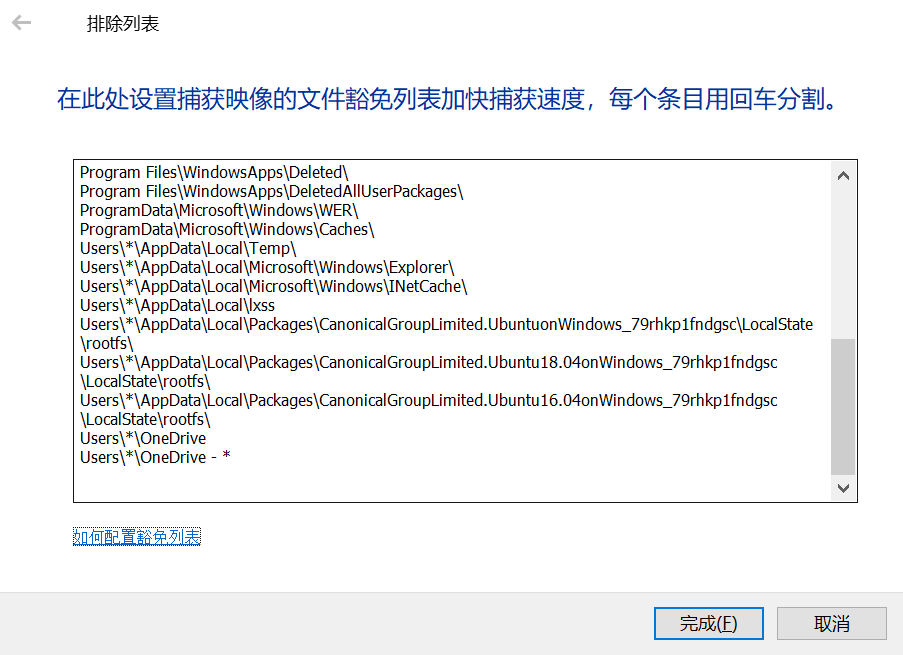
Sometimes you may not want to back up certain folders on the C drive. You can add these folders to Dism++’s exclusion list, and they won’t be included in the WIM package.
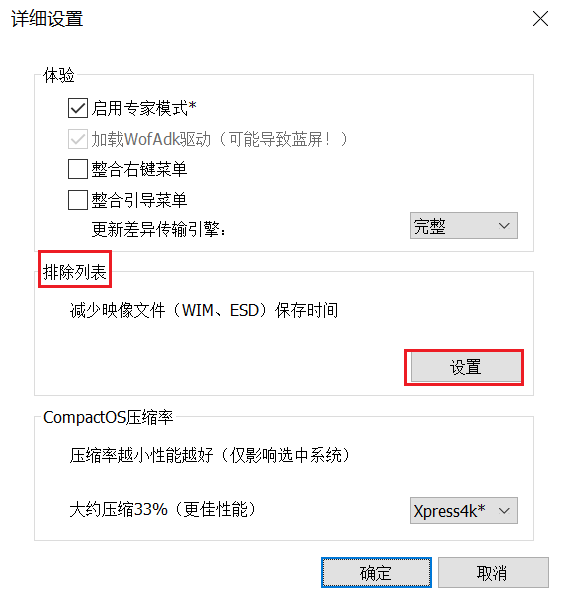
- Click
Options -> Detailed Settings. - Under “Exclusion List,” click “Settings.”
- Following the existing format, add the paths of files or folders at the bottom. Add one per line.
- Save.
Using the DISM Tool for System Backup
While Dism++ is an excellent tool, it is no longer maintained for various reasons, which may cause issues on newer versions of Windows 11. You might encounter problems like backup failures or sudden crashes.
In such cases, you can use Microsoft’s continuously maintained tool: DISM.
DISM is a command-line tool. Simply put, you need to type commands in CMD to operate it.
Here’s how to back up your system using DISM:
Run CMD as administrator:
- Press Win+S to open search.
- Type
cmd. - Click “Run as administrator.”
In the CMD window, enter the following command to run the system backup:
1
Dism /Capture-Image /ImageFile:D:\000\1.wim /CaptureDir:C:\ /Name:Windows10backup1 /Description:myfirstimageIn the code above,
D:\000\1.wimis the location where you want to save the WIM file. You can set it to any path.capturedir:C:\refers to the C drive of the Windows system, i.e., the system drive to back up.Name: Image name.description: Image description (optional).Press Enter to back up the Windows system. Wait for the progress bar to complete. A message saying
The operation completed successfullyindicates a successful backup.
How to Perform Incremental Backups of Windows System?
Using Dism++ for Incremental Backup
The method is almost identical to a full backup.
The only difference is that when selecting the save location for the WIM file, choose the WIM file generated from a previous backup.
After an incremental backup, a single WIM file can contain multiple system images. However, identical files across different images only occupy space once in the WIM file. This means even if a WIM file contains several system images, its size won’t be excessively large.
However, we often only need to keep the latest system version, not older ones. In this case, you can export the latest backup from the WIM file.
Here’s how:
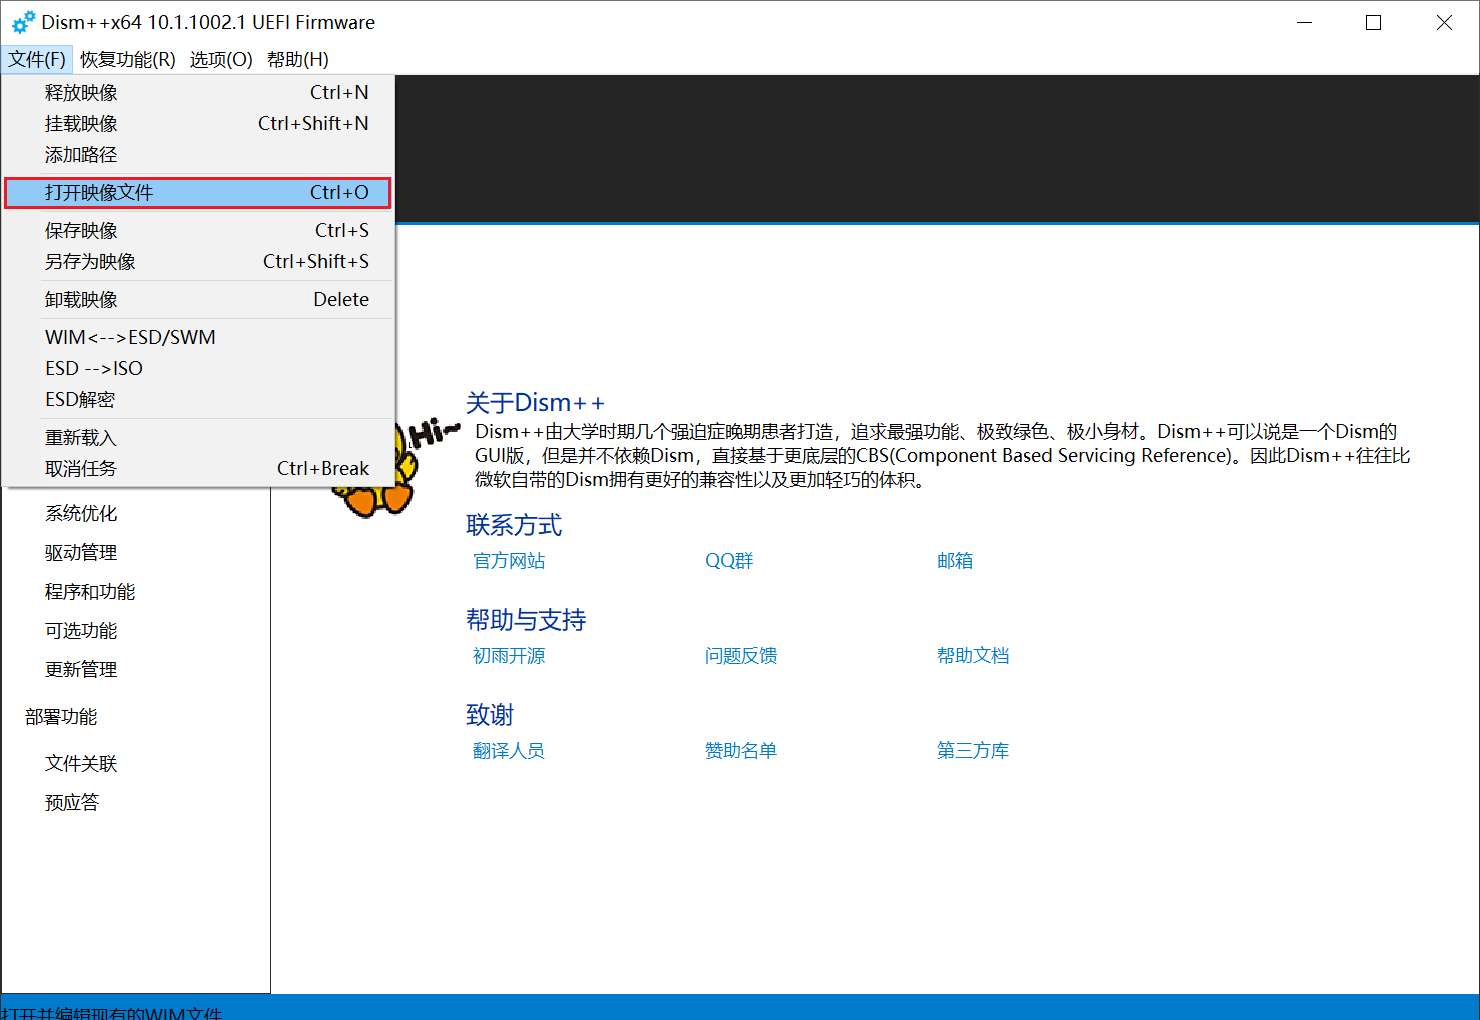
- Click
File -> Open Image File -> Browseand select the WIM file you just incrementally backed up.
- Identify the newly created system backup based on the creation date.
- Click
Export Image. - Choose a location for the exported image, name it, and click OK. The image will be exported quickly.
The exported image is also a WIM file, which will be slightly smaller than the source file.
Using DISM Commands for Incremental Backup
The command is as follows:
1 | |
In the code above,
D:\000\1.wimis the location of the WIM file generated from a previous backup.The
/Append-Imageparameter is used for incremental backup.
To view information about the WIM file’s images:
1 | |
To delete a specific volume image from a WIM file containing multiple images:
1 | |
index:2means deleting the second volume image in the WIM file.
Please note: Deleting an image does not reduce the WIM file’s size.
To export an image:
1 | |
The
/DestinationImageFileparameter is followed by the desired location and name for the exported image.