How to create a file that can only be read but not deleted
How to Create a Read-Only File That Cannot Be Deleted
In certain scenarios, creating a file that can only be read but not deleted is a useful operation. For example, leaving contact information on a centrally managed operations computer. So how can this be achieved? Without using any third-party tools, we can simply leverage the permission control features of the NTFS file system.
First, Set the File to Read-Only
This is the first step in the entire process. Since the permissions we set later may prevent the current user from setting the file to read-only, it’s important to do this in advance.
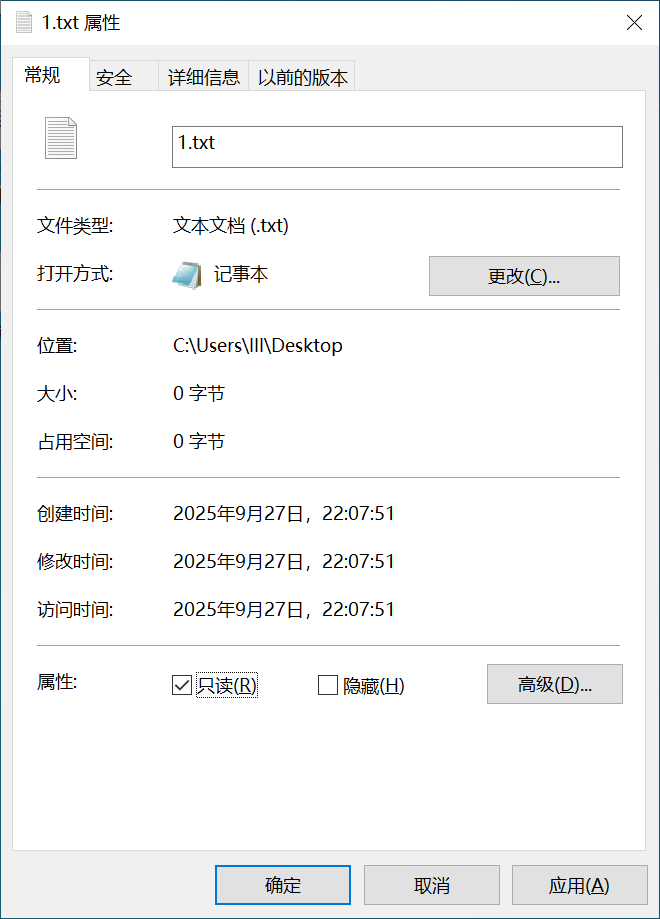
How to set read-only:
- Right-click the file and select Properties
- Check the “Read-only” box at the bottom
- Click OK
Advanced File Permission Settings
After setting the file to read-only, right-click the file, select Properties, then click Security.
For example, let’s say we have a file named 1.txt on the desktop. We want only the currently logged-in user account to be able to read this file, with no write or delete permissions.
In the Security tab, you’ll see a list of user accounts and groups at the top. These accounts and groups have various permissions to perform different operations on the file.
Click the “Advanced” button in the Security tab.
Once the Advanced Security Settings window opens, click “Disable inheritance” at the bottom. Then select “Remove all inherited permissions from this object.” Click “Apply” and then OK.
At this point, the user list will be blank—no user has permission to operate on the file. However, the file’s owner can assign permissions to users.
If the current file owner is displayed, there’s no need to reassign ownership. If the owner is not displayed, follow the steps below to assign an owner.
To assign an owner to the file:
- Click “Change” next to the owner field
- Enter the current user account name, then click “Check Names”
- The system will automatically match the account; click OK
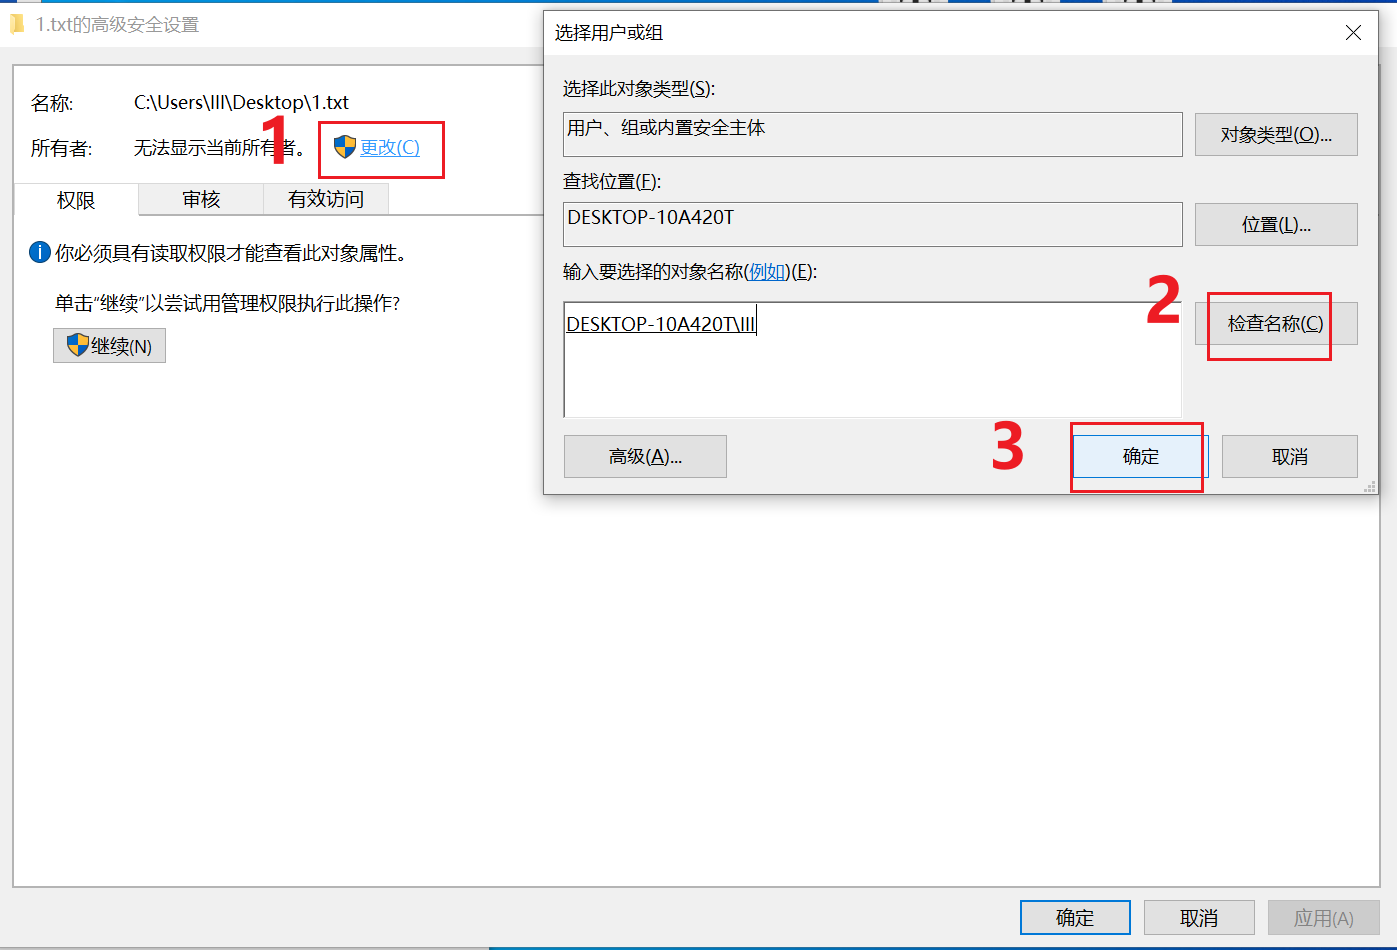
The file’s owner is typically the account that created it.
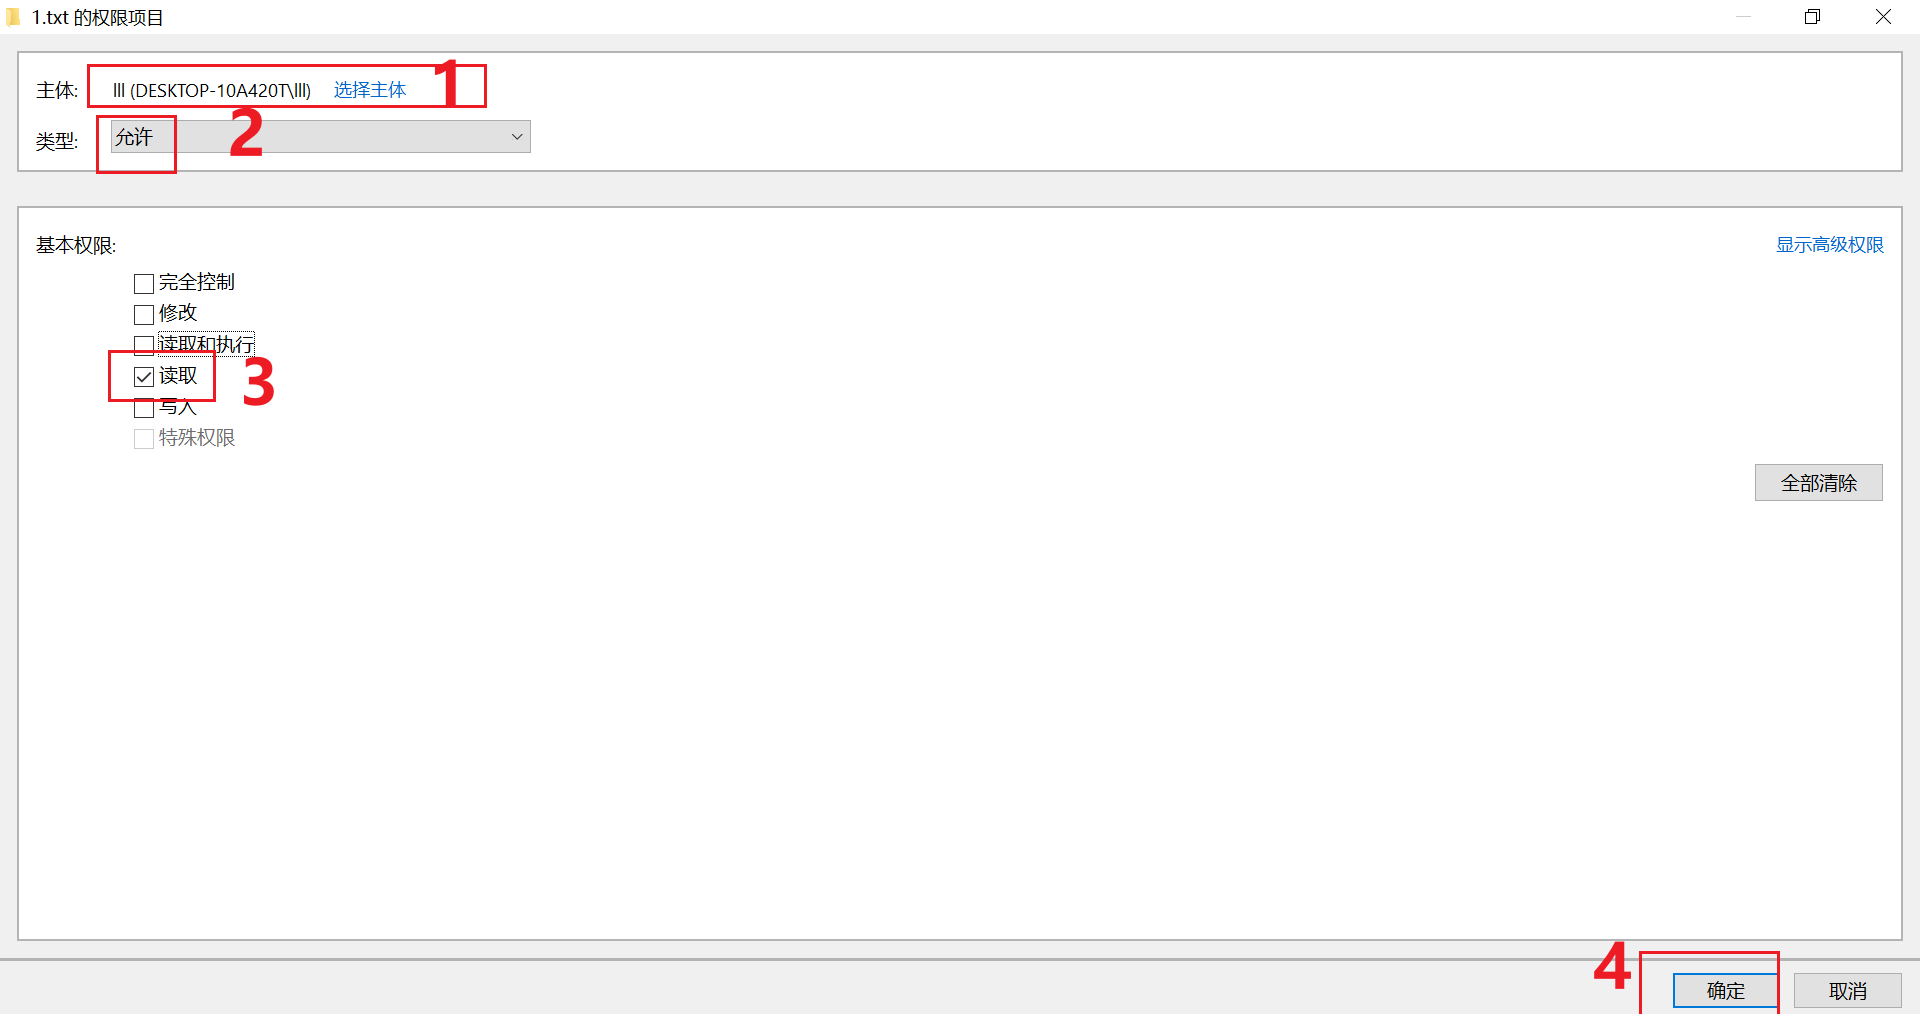
Next, add the current account and configure it so that it can only read the file, without the ability to edit or delete it.
Click “Add” at the bottom left. In the input box, enter the current user account name. After entering the name, click “Check Names” on the right—the system will automatically match the user account’s path and full name. Click OK.
Then, in the permissions section below, select “Allow” at the top, and check only “Read” at the bottom.
Save and exit by clicking OK all the way through.
Now we’ve successfully created a file that can only be read but not modified or deleted.
When attempting to delete the file, File Explorer will display an error message stating that the file cannot be deleted and requires permission from
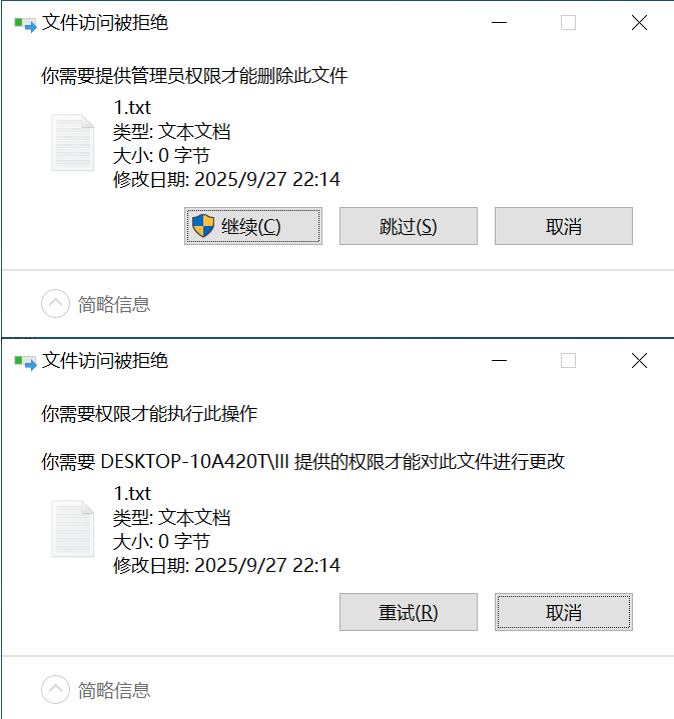
If you want to delete this file, simply go back into the Advanced Security Settings, change your account’s permission from “Read” to “Full Control,” and you’ll be able to delete it. Alternatively, you can bypass all permissions by using a PE (Preinstallation Environment).
The NTFS file permission management mechanism is quite complex. A small mistake can lead to file access being denied, so always exercise caution when managing permissions.