Excellent System Image Management Software: Complete Guide to Using Dism++
Comprehensive Guide to Dism++: The Ultimate System Image Management Tool
Dism++ Open Source Repository:
https://github.com/Chuyu-Team/Dism-Multi-language/releases
Dism++ is an open-source system optimization tool built on Microsoft’s DISM engine. In addition to DISM’s core capabilities, it offers a wealth of extra features such as powerful junk file cleanup, user account management, and permission control.
This article focuses on Dism++’s system image management features (for wim, esd, iso, swm formats) and other practical utilities.
About DISM:
Deployment Image Servicing and Management (DISM.exe) is a command-line tool used to prepare and service Windows images, including images for Windows PE, Windows Recovery Environment (Windows RE), and Windows Setup. DISM can repair Windows images (.wim) or virtual hard disks (.vhd or .vhdx).
DISM is built into Windows and can be used via the command line or Windows PowerShell.
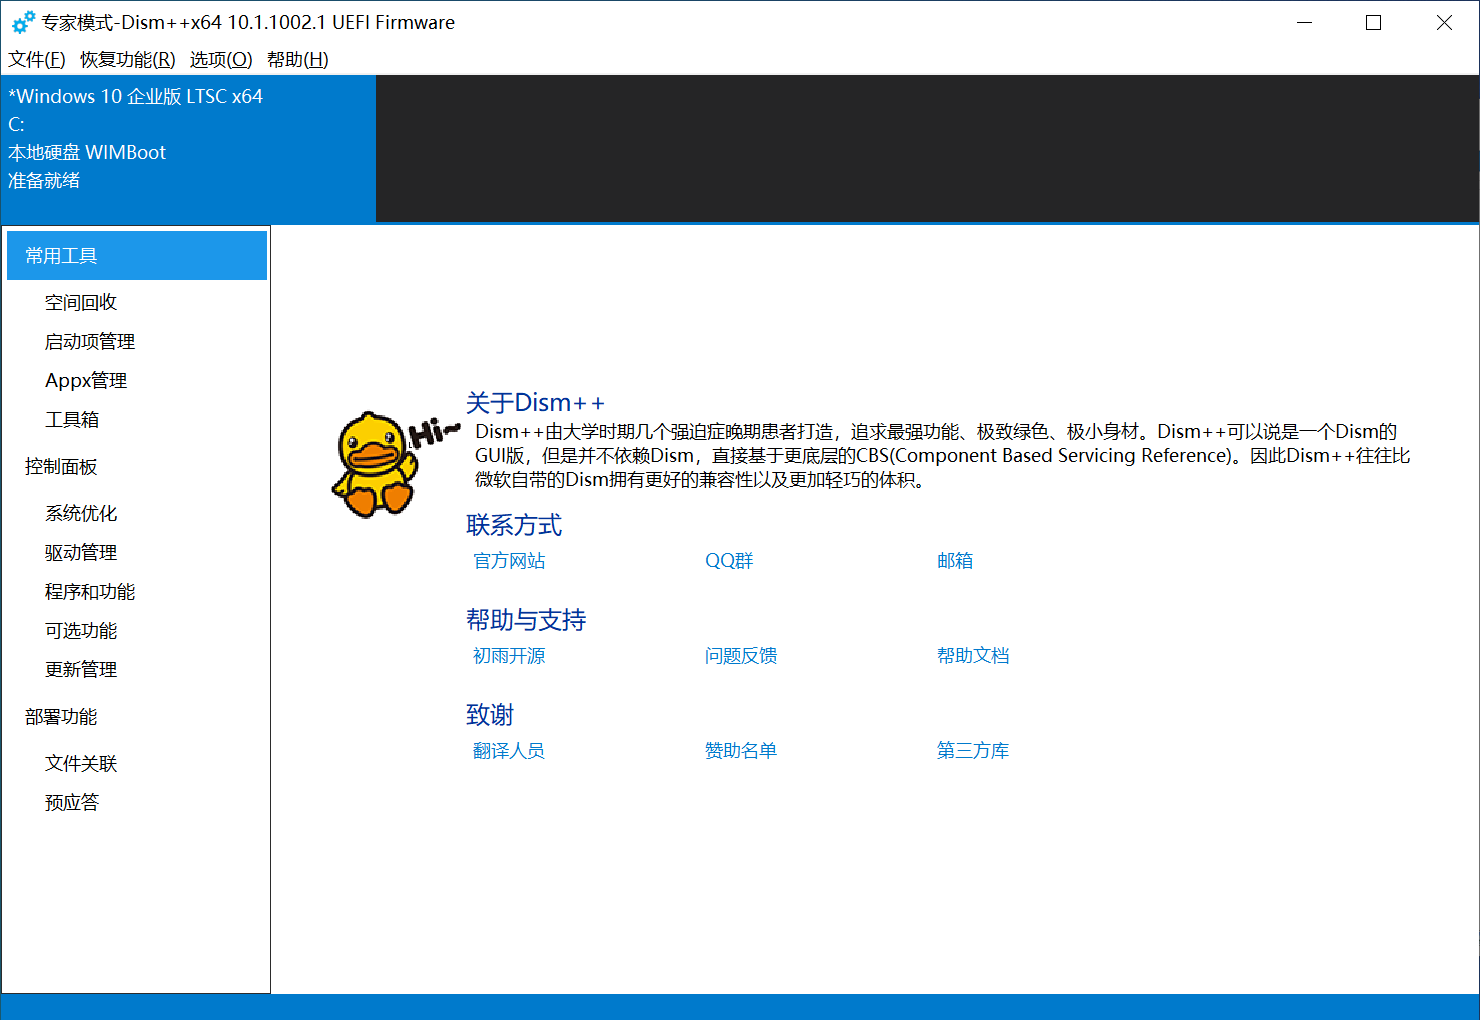
Dism++ is the GUI version of DISM.
Dism++ Interface
System Image Management
Dism++ provides comprehensive system image management capabilities, supporting various image formats including wim, esd, iso, and swm.
Apply Image
Apply Image, as the name suggests, extracts and deploys a Windows image (wim, esd, swm files) to the root directory of a disk partition.
Applying an image is essentially the process of installing a system, so the partition requirements are the same as those for installing a system.
This function is identical to
Restore Function -> System Restore.
- Click
File -> Apply Imagein the top-left corner. - First
Browse: Select the location of the system installation package (iso, wim, esd, swm). - Second
Browse: Select the system drive location (e.g., C:). - Target Image: Choose the system version you want to install (e.g., Windows 10 Pro).
- WIMBoot: Install the system using WIMBoot mode.
- Compact: Install the system using Compact mode.
- Windows To Go: Install the system on a removable storage device.
- Add Boot: Add boot files for the new system.
- Format: Format the selected system drive before installation.
Under normal circumstances, you can simply follow the configuration shown in my screenshot for a standard system installation.
For WIMBoot and Compact mode installations, you can search for the keywords WIMBoot and Compact (note: not via backend reply) in my public account to read previous articles where I’ve covered these topics in detail.

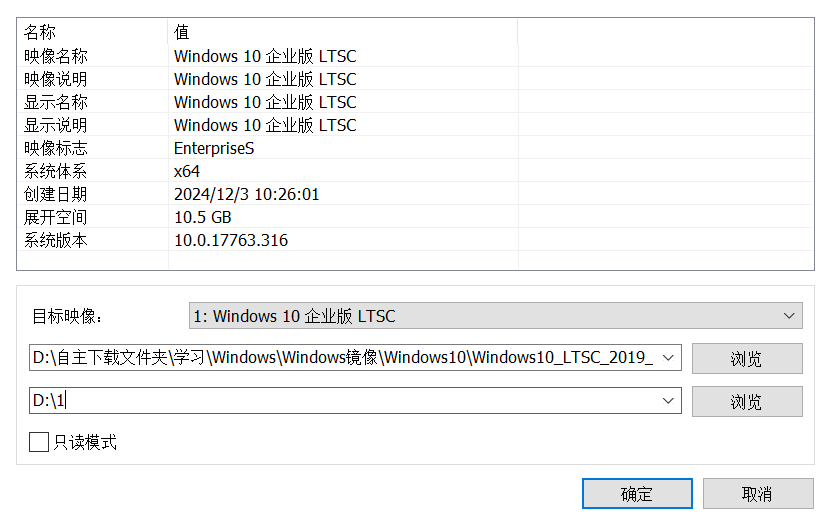
Mount Image
Mount Image means extracting a system image file (wim, esd, swm) into a folder on your computer, rather than installing the system in the traditional sense.
Once mounted, you can manipulate the system files within the mounted folder just as you would with files in your system drive.
After making changes, you can save them back to the original image or save as a new image.
- Click
File -> Mount Image. - Select the image to mount and the system version within it.
- Choose the folder location for mounting (e.g., D:\1; it’s best to avoid Chinese characters in the path).
- Check Read-only mode if you don’t want to allow changes to the mounted folder’s files.
After operations, save the image:
- Click
File -> Save Imageto overwrite the original image. - Click
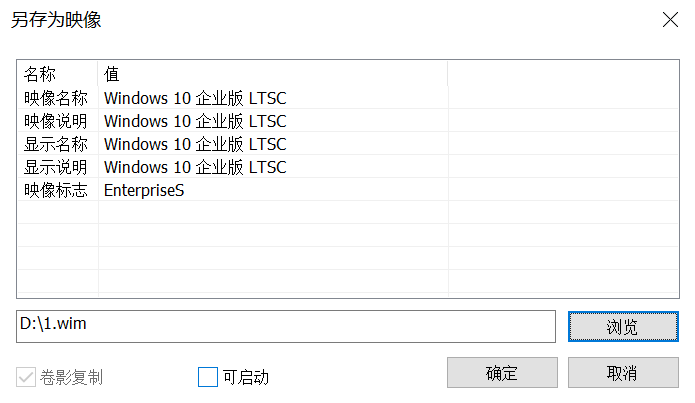
File -> Save Image Asto save as a new image.
- Click
After saving, unmount the image:
- Click
File -> Unmount Image.
- Click
If you forget to unmount, the mounted image will remain in the folder, consuming disk space.
If you forget to unmount, you can do the following:
- Click
File -> Add Path.- Select the mount folder.
- Click
File -> Unmount Image.
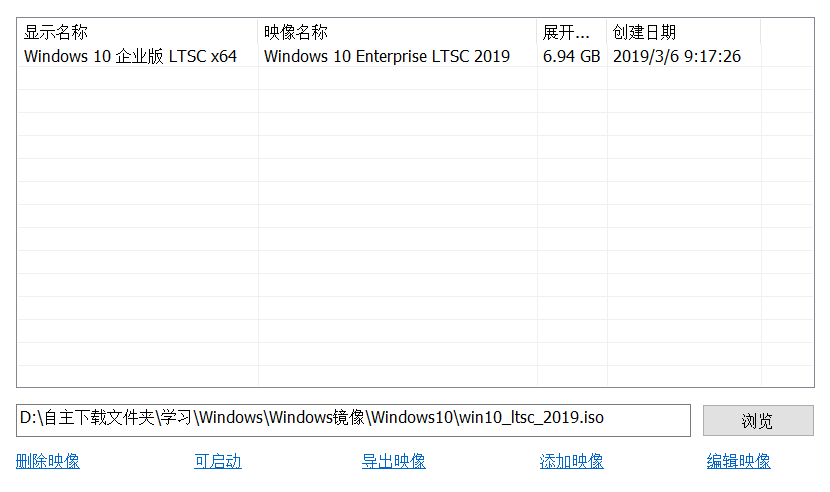
Open Image File
Opening an image file allows you to edit its metadata, such as image name, description, display name, display description, image flags, system architecture, creation date, expanded size, and system version.
- Click
File -> Open Image File. - Select and open the image file.
- Click to select a specific image within the file.
- Five options appear below:
- Delete Image: Delete the selected image.
- Bootable: Mark a PE system image as bootable.
- Export Image: Export the selected image individually.
- Add Image: Add other system images to this image package.
- Edit Image: Edit the selected image’s name, description, display name, display description, flags, architecture, creation date, expanded size, and system version (double-click an entry to edit).
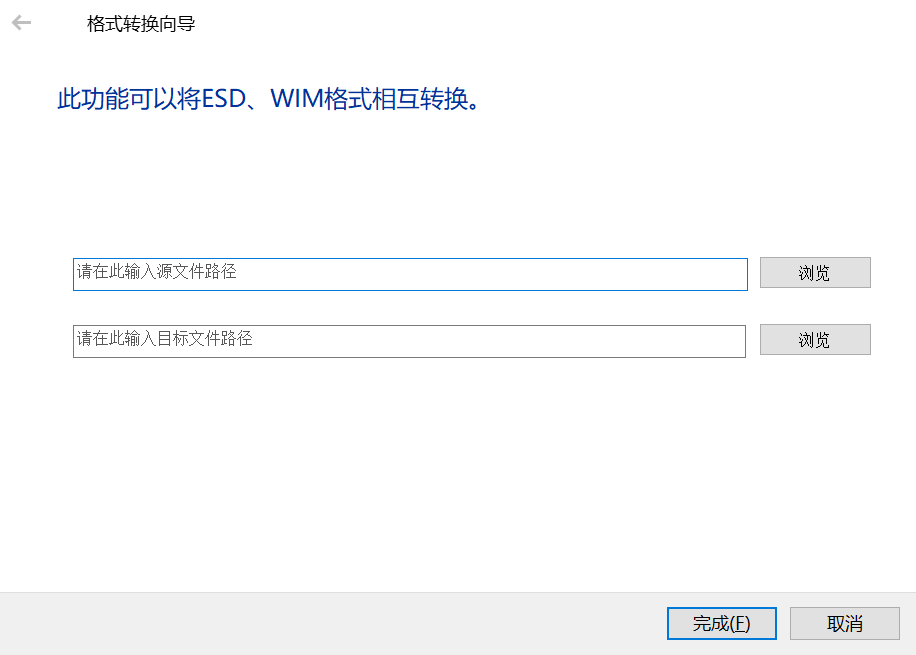
WIM, ESD, SWM Conversion
- Click
File -> WIM <--> ESD/SWM. - Convert between WIM, ESD, and SWM image formats.
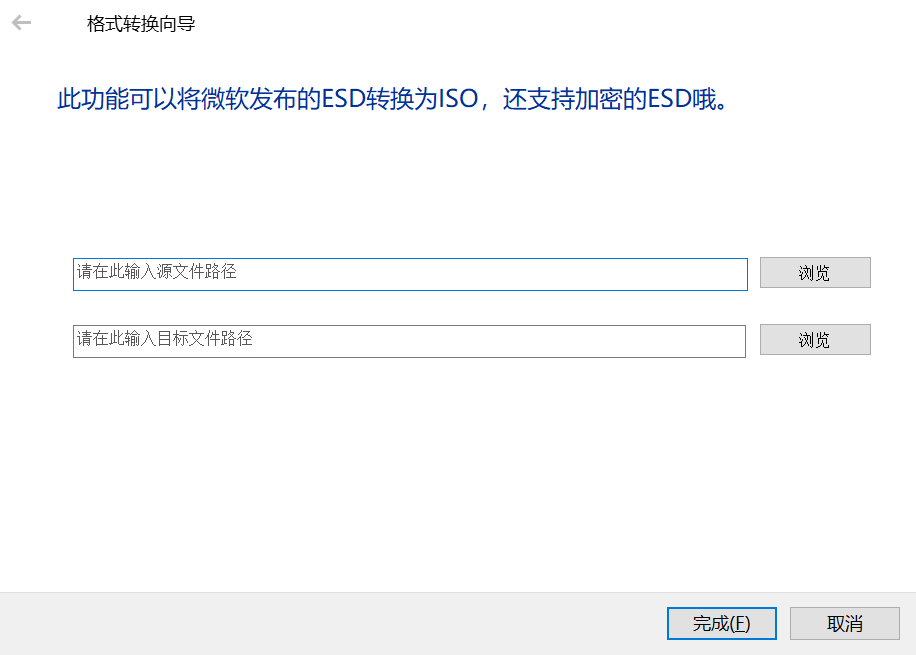
ESD to ISO Conversion
- Click
File -> WIM --> ISO. - Convert a WIM image to an ISO disc image.
ESD Decryption
Decrypt encrypted ESD files.
- Click
File -> ESD Decryption. - Select the encrypted ESD file.
Restore Functions
Boot Repair
Boot repair can fix the system boot for the selected system.
Since there are two types of firmware (BIOS and UEFI), boot repair uses two different methods.
Dism++ determines which type of boot to repair by detecting the disk partition table type.
If the disk where the system resides uses an MBR partition table, it defaults to repairing the BIOS boot.
If it uses a GUID (GPT) partition table, it repairs the UEFI boot.
If you have special requirements, such as using an MBR partition table on UEFI firmware, this boot repair function will not work as expected—it will repair the BIOS boot instead of the UEFI boot.
- Click
Restore Function -> Boot Repair. - Confirm.
System Backup
Back up the system as a WIM or ESD image for easy restoration or file extraction.
- Click
Restore Function -> System Backup. - Click
Browseto select where to save the backup package. - In the “Save As” dialog, click the
Save as typedropdown to choose from 5 compression types:- No Compression: Save system files directly to WIM without compression.
- WIMBoot Compression: A compression method suitable for WIMBoot. However, according to Dism++’s official documentation, this has a very low compression ratio and is of limited use.
- Fast Compression: Higher compression ratio than WIMBoot. This is the default method, and I recommend it.
- Maximum Compression: Saves as ESD format with the highest compression ratio, longest processing time, and smallest file size.
※ Note: ESD files cannot be used to create WIMBoot.
- Click Save.
- If you are backing up the current system from within that system, Volume Shadow Copy is checked by default (hot backup).
- If you are not backing up a PE system, do not check Bootable.
- If you are backing up Windows from within a PE system, you do not need to check Volume Shadow Copy.
- Click OK.
System Restore
Restore Function -> System Restore
This function is identical to File -> Apply Image.
Run in RE
Run Dism++ within the Windows Recovery Environment (RE).
Windows RE is Microsoft’s WinPE.
Boot RE Only
Boot directly into Windows RE without running Dism++.
Undo Compact
If the system was installed using Compact mode, this option removes the Compact compression.
Options
Detailed Settings
- Click
Options -> Detailed Settings.
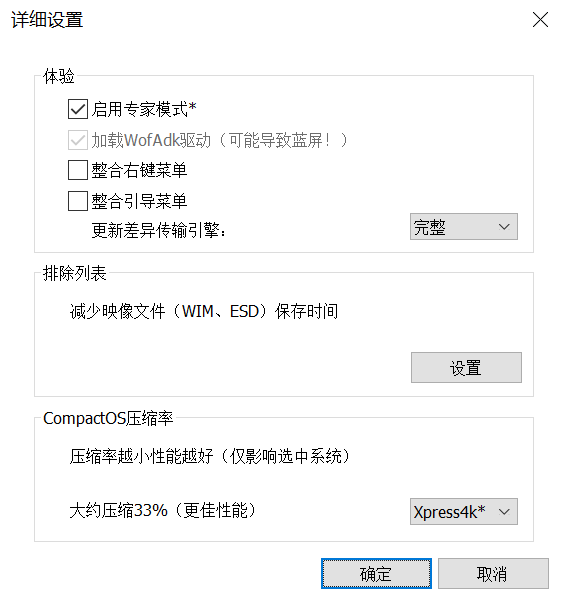
- Integrate Boot Menu: Add Dism++ to the BCD menu, making it appear in the Windows Boot Manager before Windows starts (may slow down boot time).
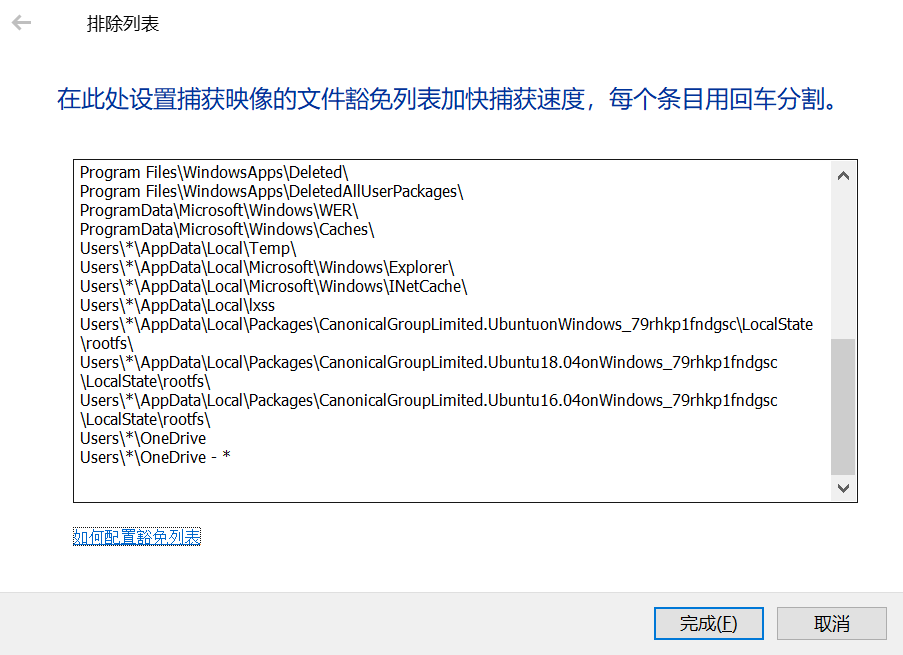
- Exclusion List: Items to exclude when backing up the system (used to reduce WIM size and speed up backup time).
- CompactOS Compression Ratio: From top to bottom, the compression ratio increases. LZX is the highest.
Left Sidebar
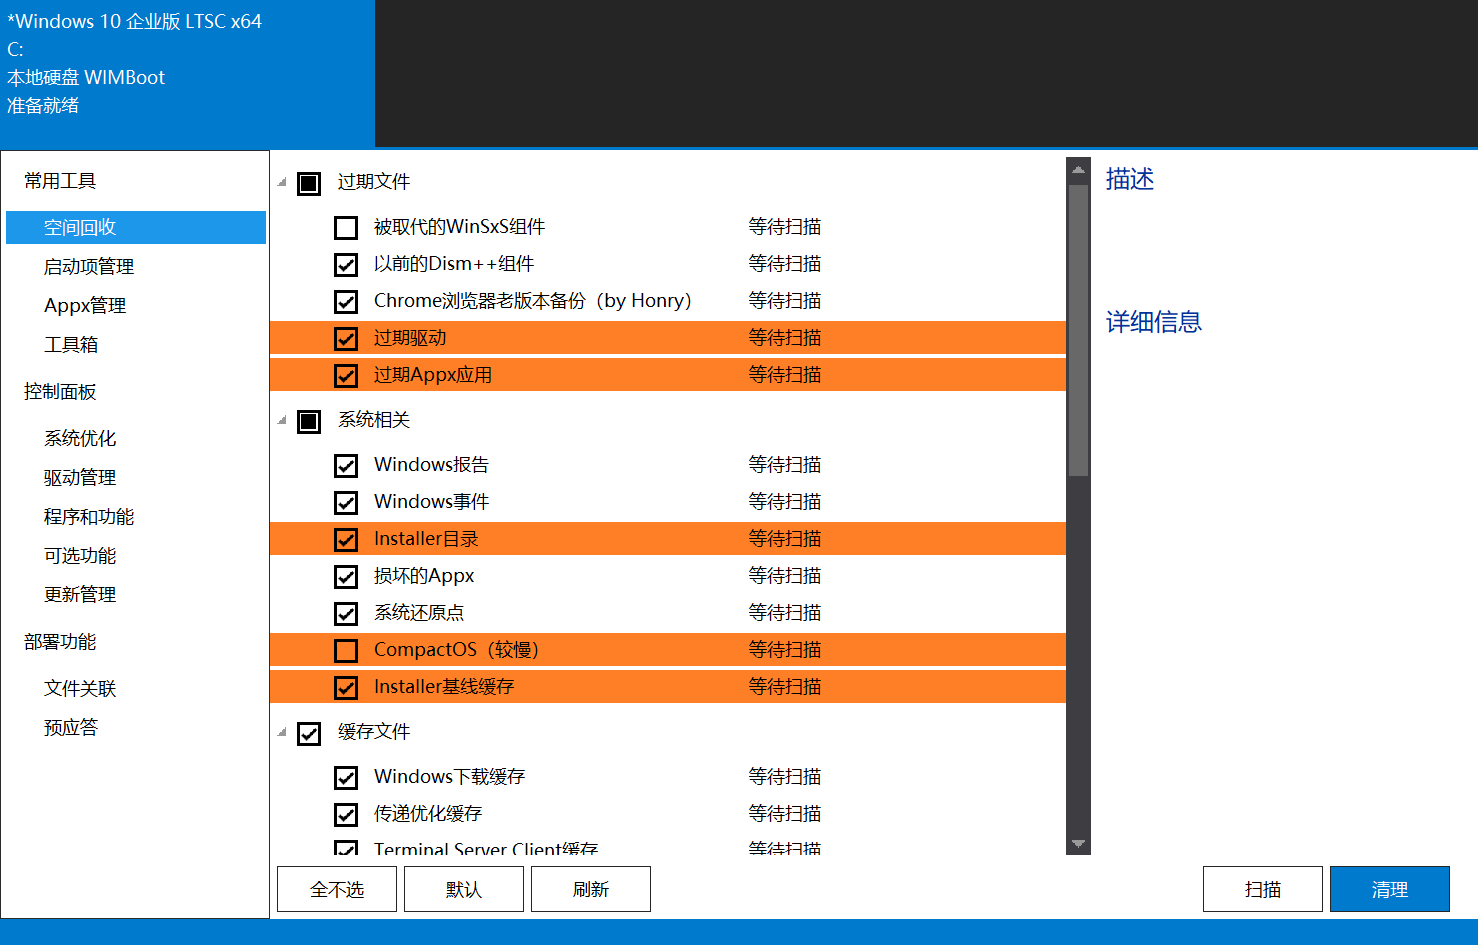
Space Recovery
System cleanup tool.
Check the items you want to clean, then click Scan in the bottom-right corner. Dism++ will scan for junk files. After scanning, click Clean.
File Explorer may restart.
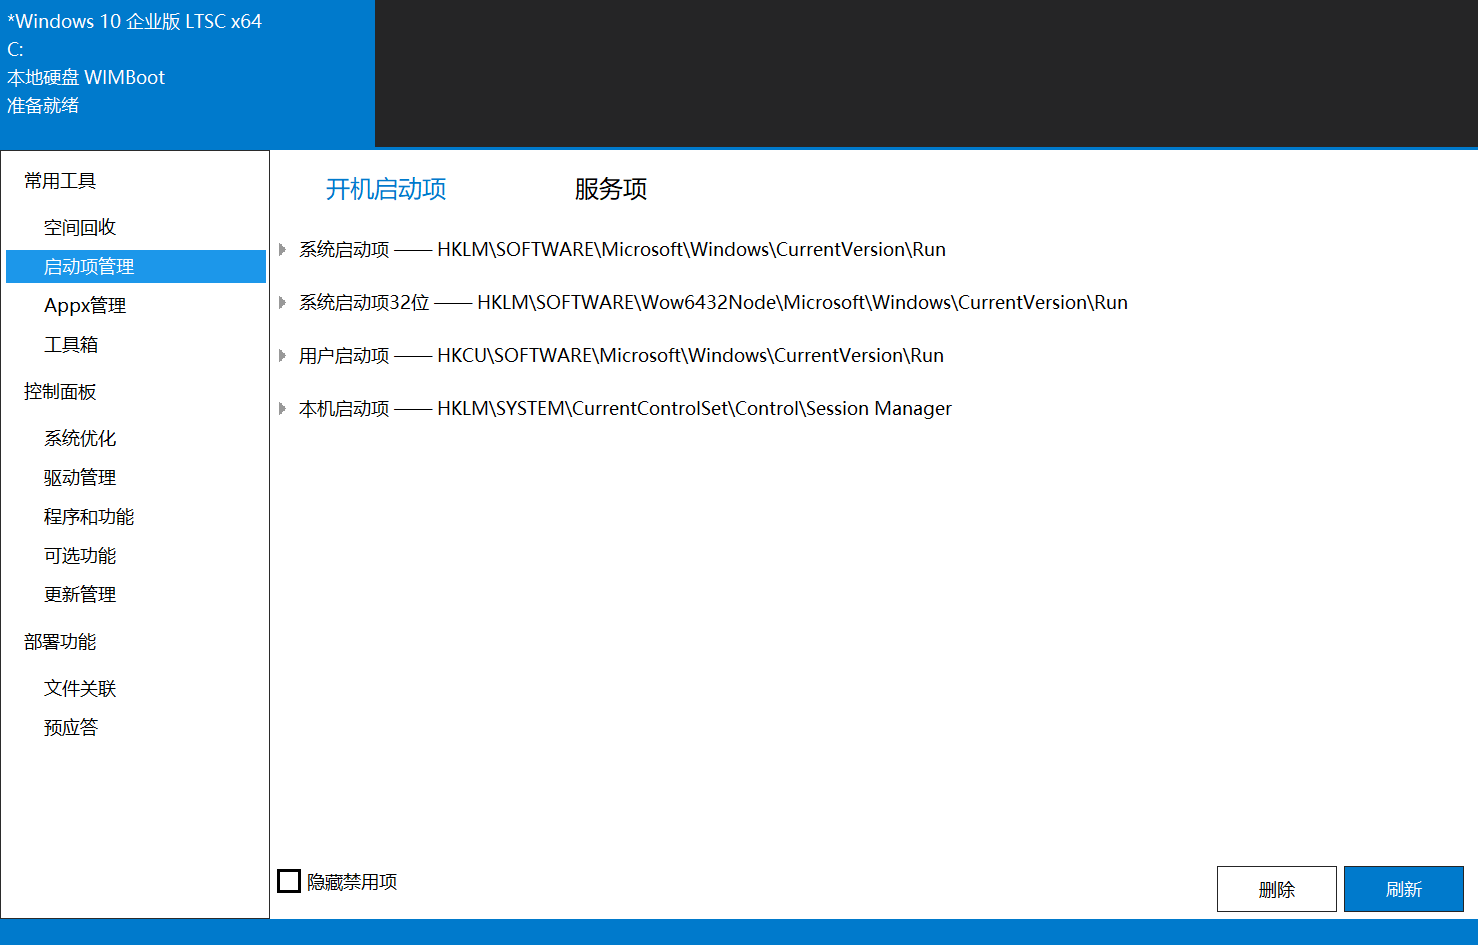
Startup Management
Enable or disable startup items and services.
Dism++ retrieves startup items by scanning the registry.
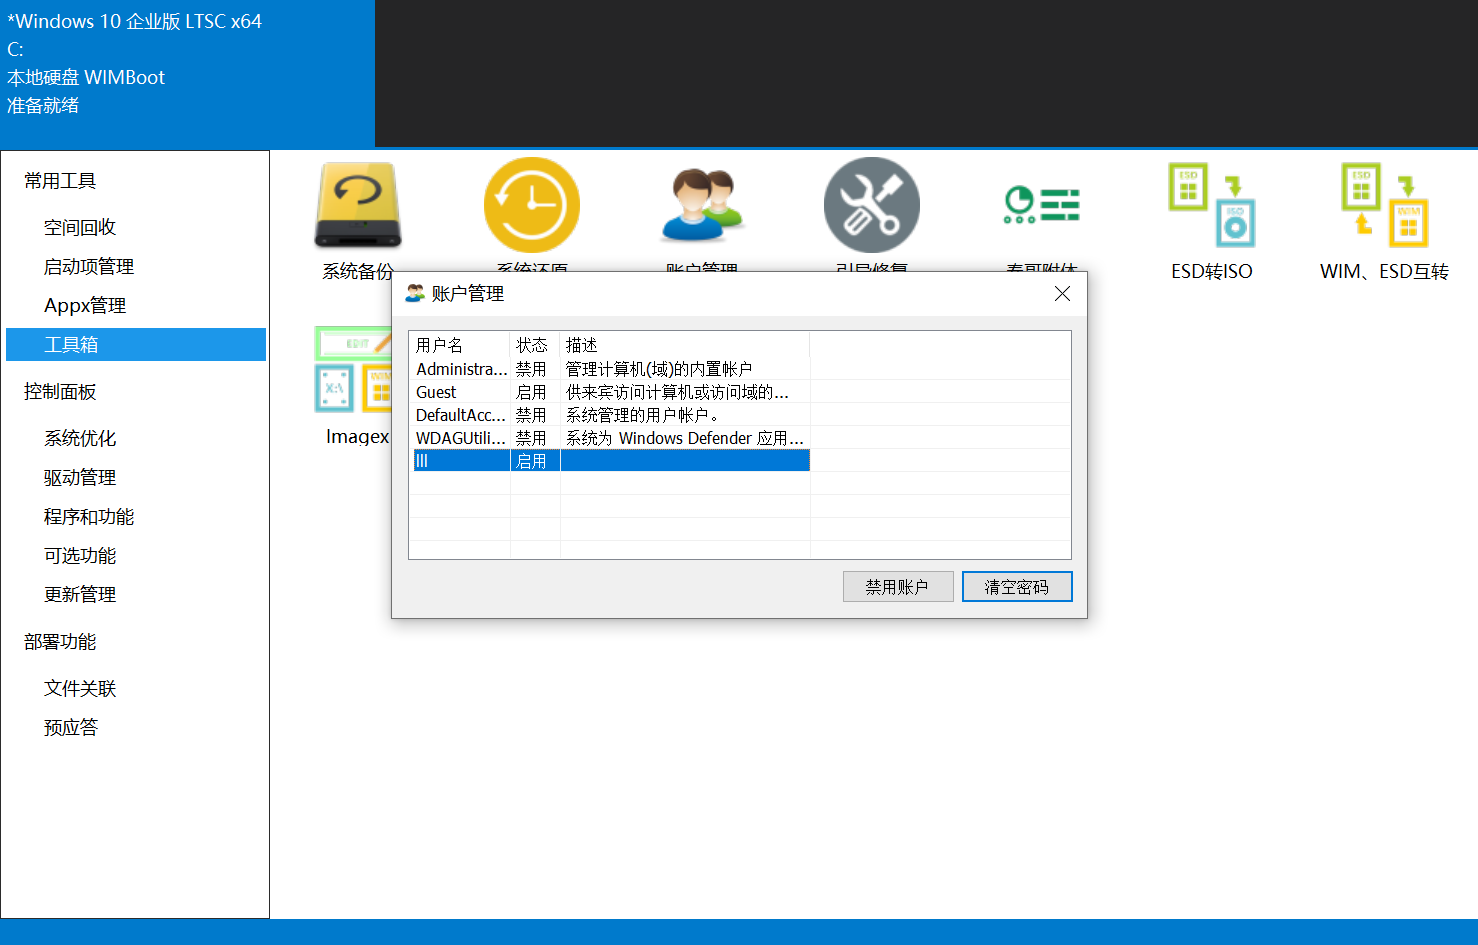
Toolbox
Account Management
Primarily used to delete user account passwords for password recovery.
Chunshen Possession
Run applications in a mode that bypasses permission restrictions.
Hosts Editor
Edit the local hosts file.
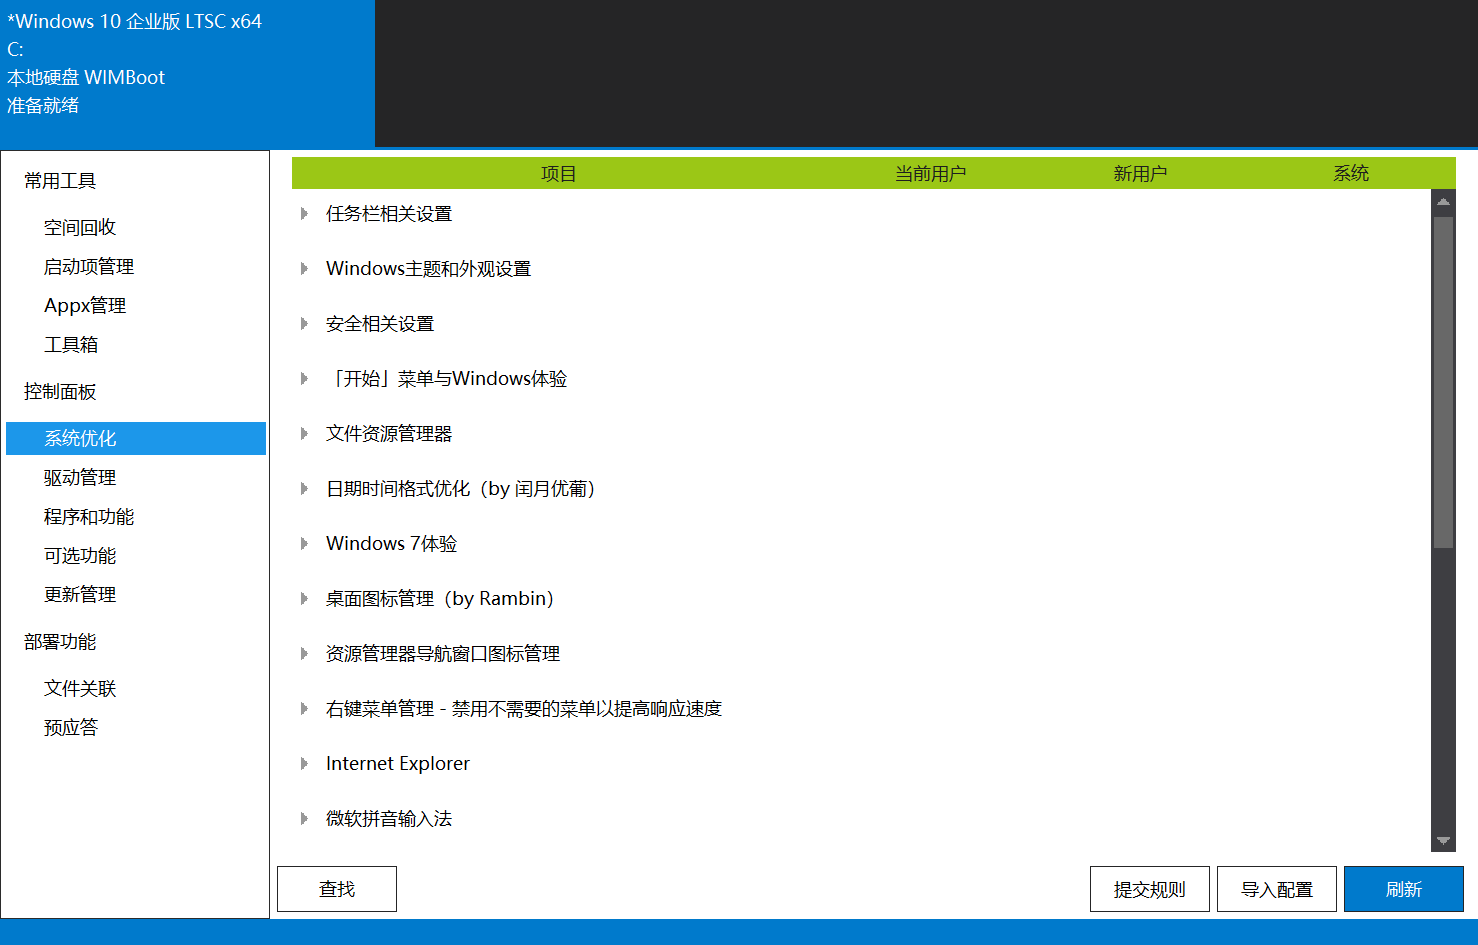
System Optimization
Quickly adjust system settings. Select as needed.
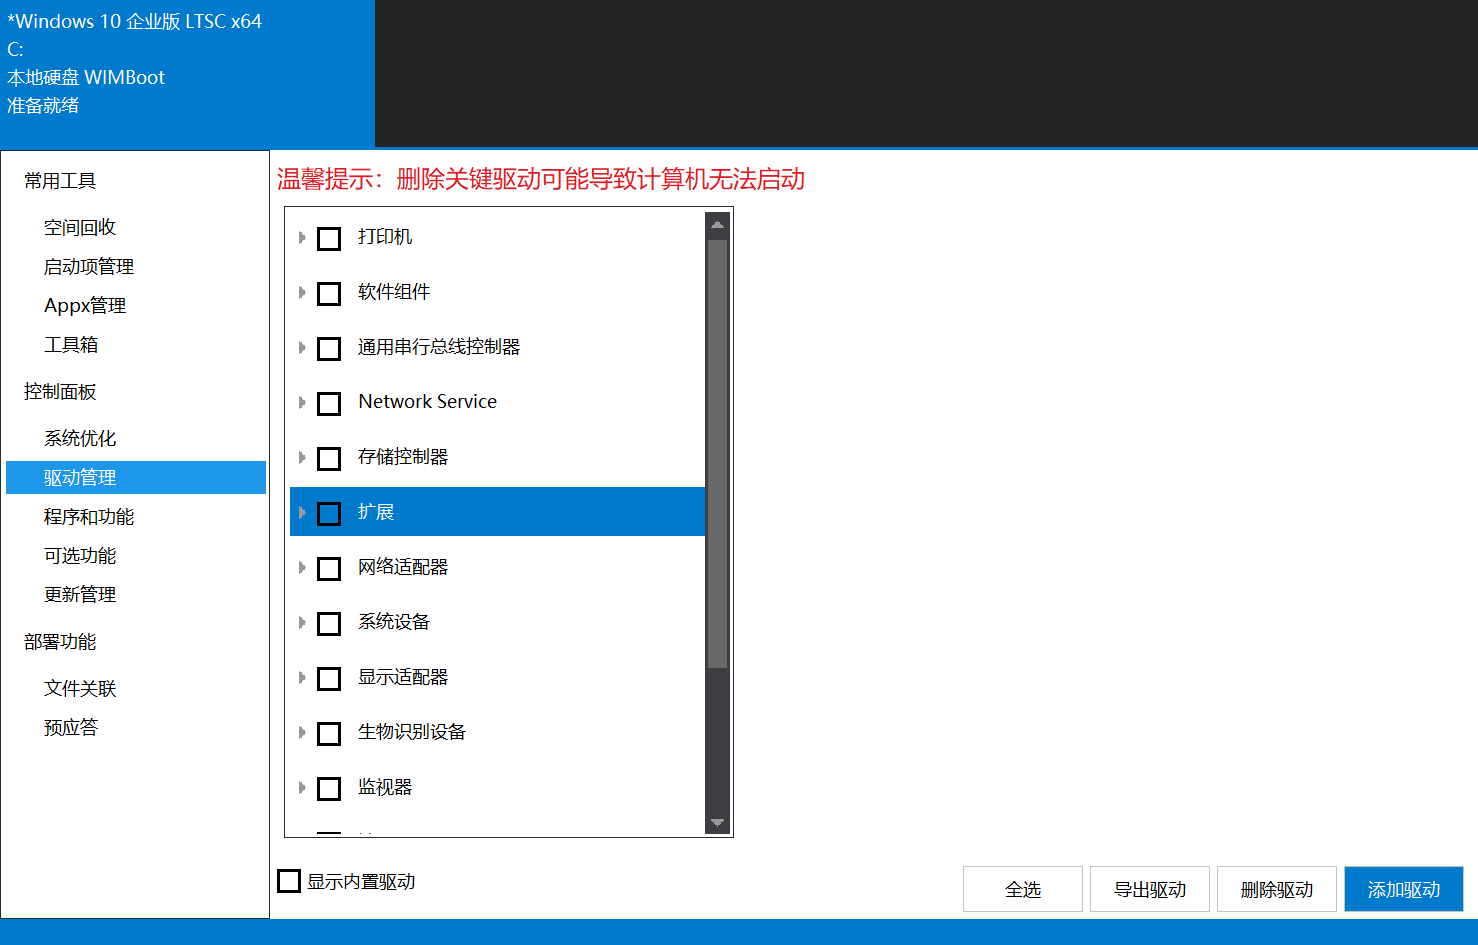
Driver Management
Add, remove, or export backup drivers for the system.
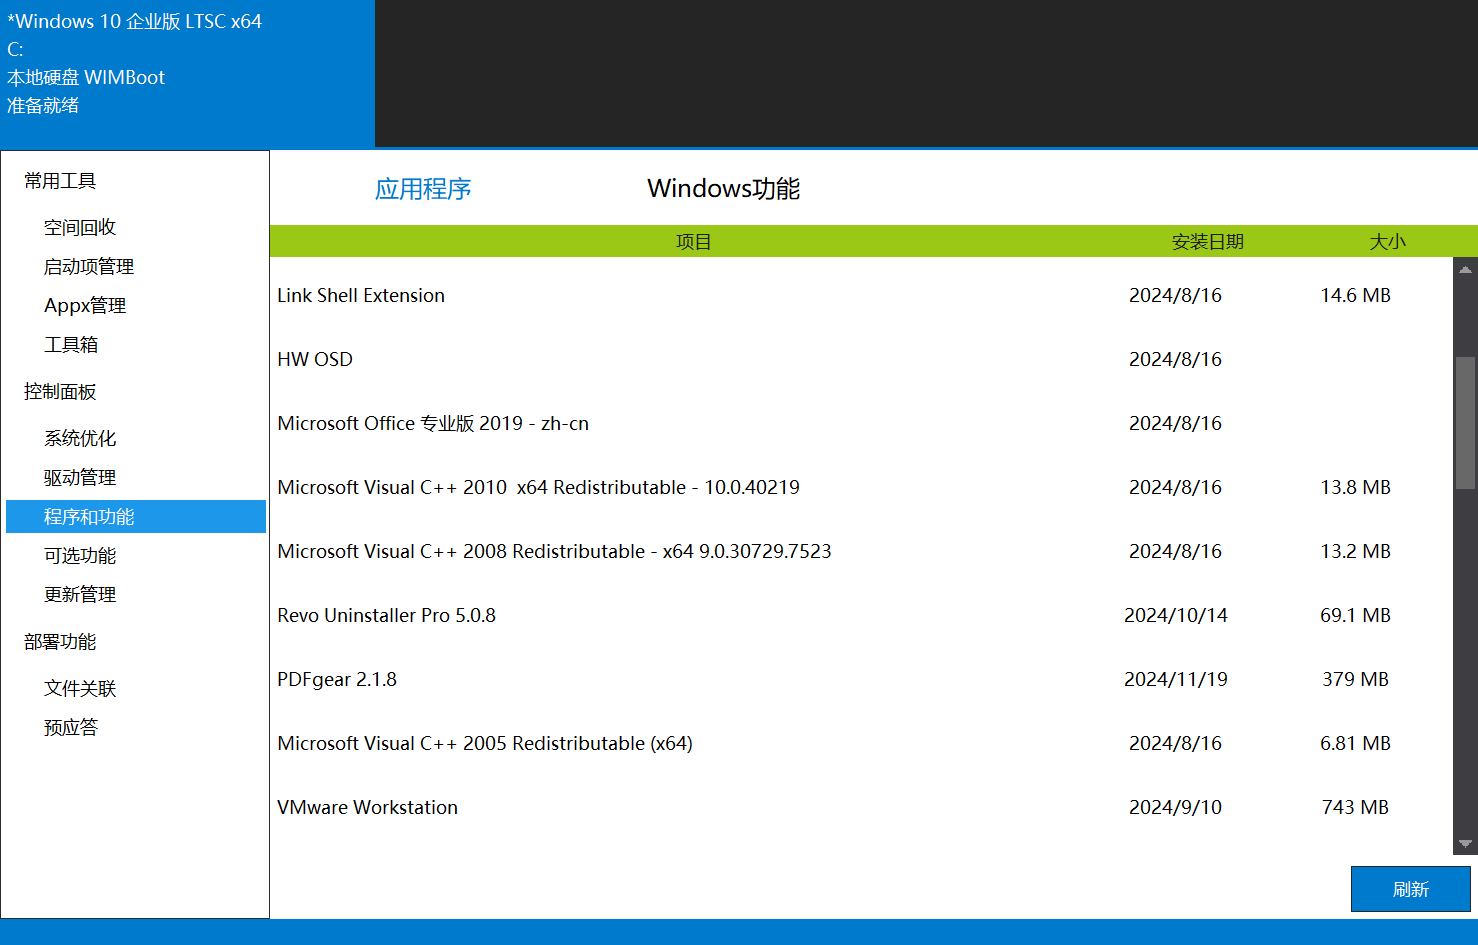
Programs and Features
Similar to the “Programs and Features” in the Control Panel.