Create a Multi-PE Bootable USB Without Ventoy? Fearless Firmware, DIY a Multi-PE System USB to Keep Your PE Company!
No Ventoy? No Problem: Build a Multi-PE Bootable USB Drive Without Ventoy – Fearless Firmware, Handcraft Your Own Multi-PE System USB, So Your PE Is Never Alone!
As we all know, Ventoy is an EFI tool that can boot multiple PE systems. We simply place various PE system ISO images or bootable WIM packages into the USB drive, and Ventoy automatically recognizes these PE images and lists them in a menu for us to choose from at boot time.
So, without Ventoy, can we still achieve the dream of a “single USB, multiple PEs”?
Today, we’ll technically accomplish this goal, partially replicating Ventoy’s functionality.
Why “partially”? Because booting various PE images requires a robust EFI program. With just Windows Boot Manager, we can only boot standard WIM, VHD, or normally installed partition systems (using Ramdisk, VHD, and partition modes respectively). Ventoy’s strength lies in its excellent EFI boot program, which can load ISO, WIM, and a series of disk image files.
However, Ventoy has two notable drawbacks:
- When creating the bootable drive, the USB must be formatted, causing all data on the USB to disappear.
- Since Ventoy’s EFI program is not UEFI-certified, if the UEFI motherboard has Secure Boot enabled, UEFI will block Ventoy from loading. We then have to manually import security certificates, which is very troublesome. For non-tech-savvy users, this is simply impossible.
The method provided in this tutorial effectively avoids both drawbacks: data is preserved, Secure Boot checks pass normally, and PE boots directly.
Preparation Before Starting
The resources and tools we need are as follows:
- A USB drive (preferably 8GB or larger)
- At least two PE system ISO images (the author uses WePE and UQitong ISOs)
- DiskGenius software
- BOOTICE software
Creating a Multi-PE Bootable USB Drive
The multi-boot USB we create must be compatible with both old and new firmware, meaning it should boot in both BIOS and UEFI environments.
Since UEFI firmware can recognize both MBR and GPT partition table types, while BIOS firmware can only recognize MBR, our USB must use the MBR partition table type to boot properly on both types of firmware.
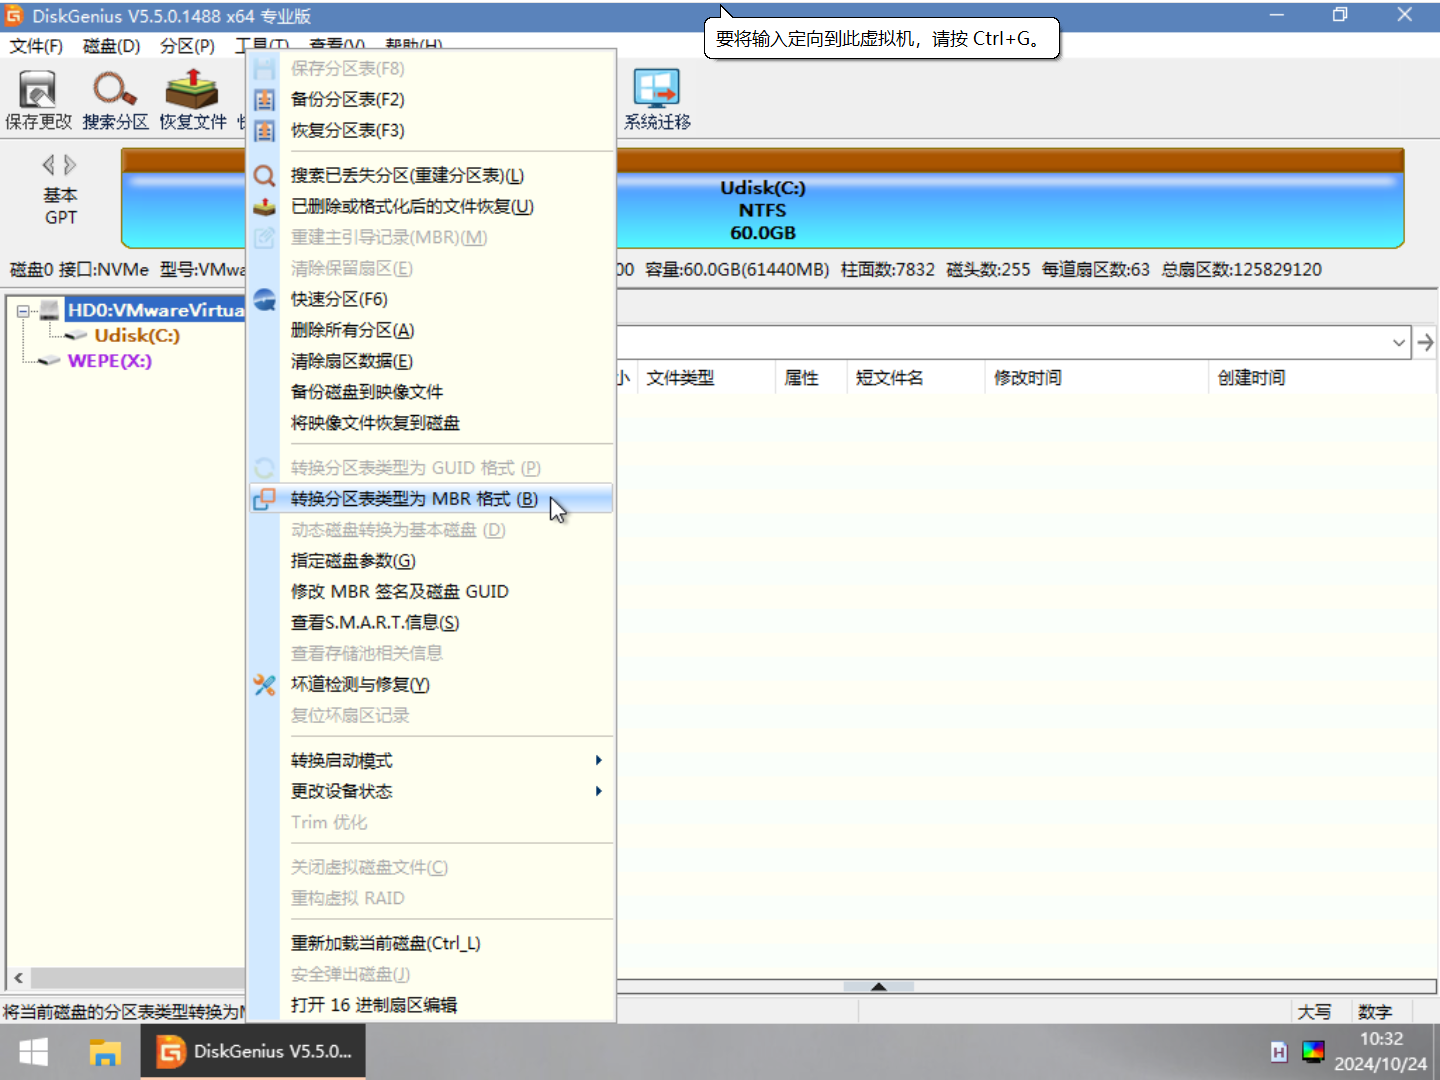
How to check and change the USB’s partition table type?
Using DiskGenius, right-click the USB drive, and in the menu, you’ll find “Convert Partition Table Type.” If the USB is GPT (also called GUID), the option to convert to MBR will be clickable. Conversely, if it’s MBR, the option to convert to GUID will be clickable.
Convert to MBR, then click “Save Changes” in the top-left corner.
DiskGenius converts partition tables without data loss, so you can safely do this in seconds.
Now, for the two firmware types, we need two different methods to create the bootable USB.
Booting Multi-PE System USB on UEFI Firmware
As we know, UEFI booting requires an EFI System Partition (ESP), which contains the boot EFI files and the boot configuration file BCD.
The EFI partition must be FAT32 or FAT16 file system, as UEFI firmware can only recognize these file system types. (FAT32 is highly recommended.)
So, the first priority is to create an EFI partition. Since the author prefers to store PE system images inside the EFI partition, I allocated 2GB for it.
In fact, PE system images can be placed anywhere on the USB. It’s a matter of personal preference.
Here’s how to create the EFI partition:
- Right-click the original partition on the USB and select “Split Partition.”
- Enter 2GB for the front part size and 0 for the rear part size.
- Select “Keep Unallocated” from the dropdown.
- Click OK.
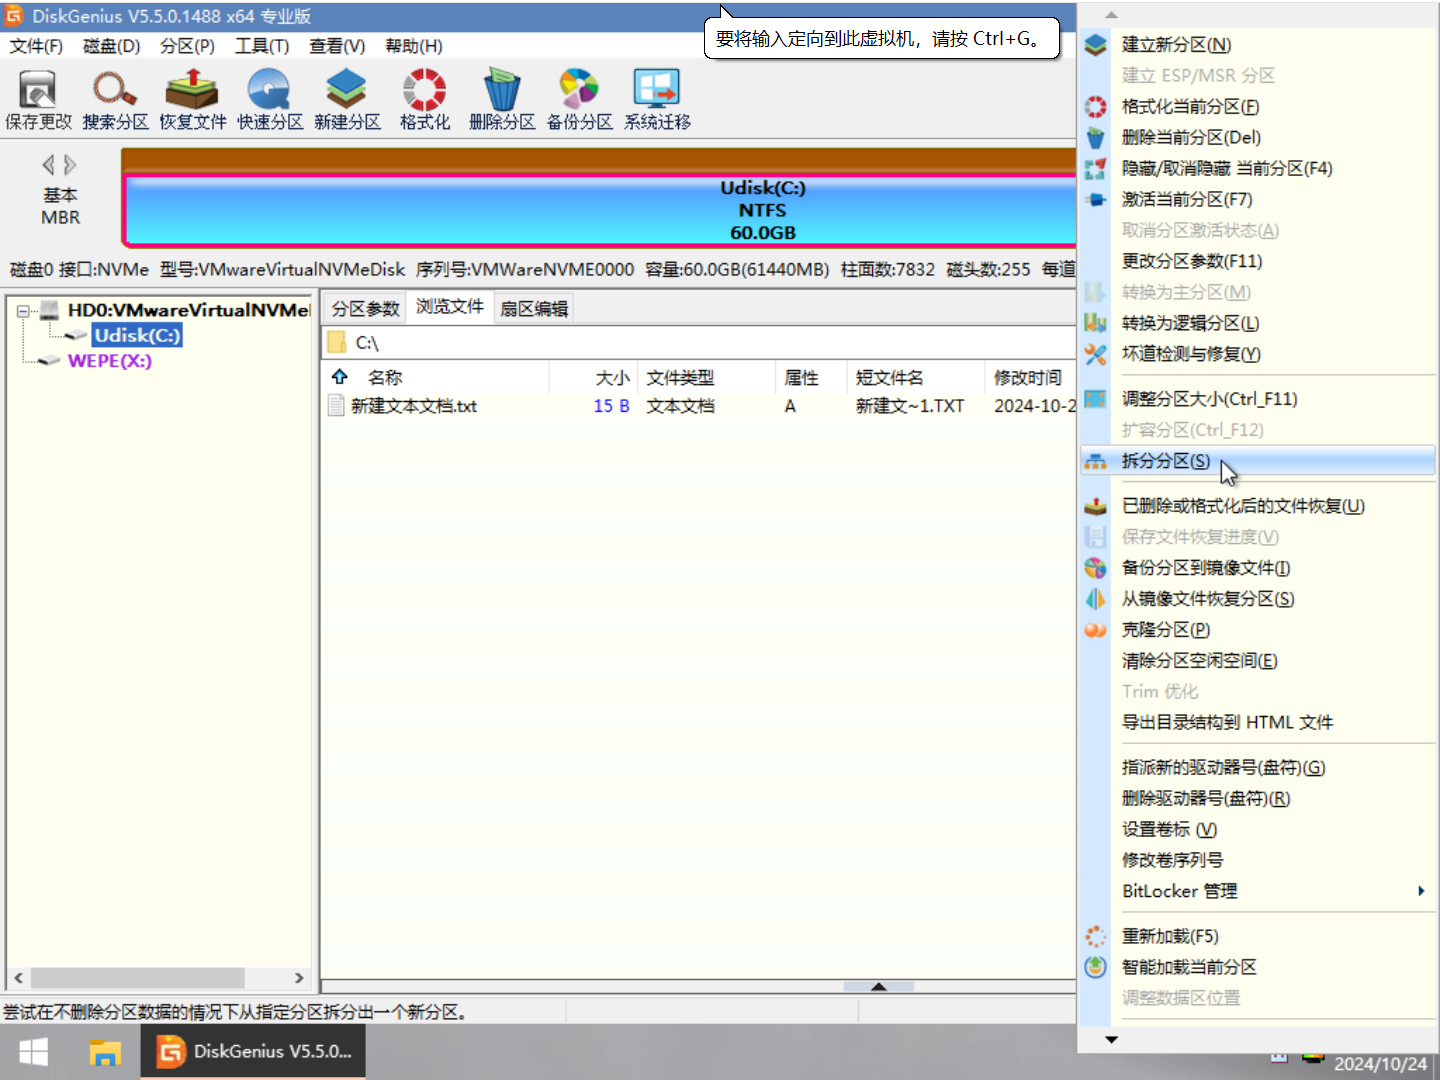
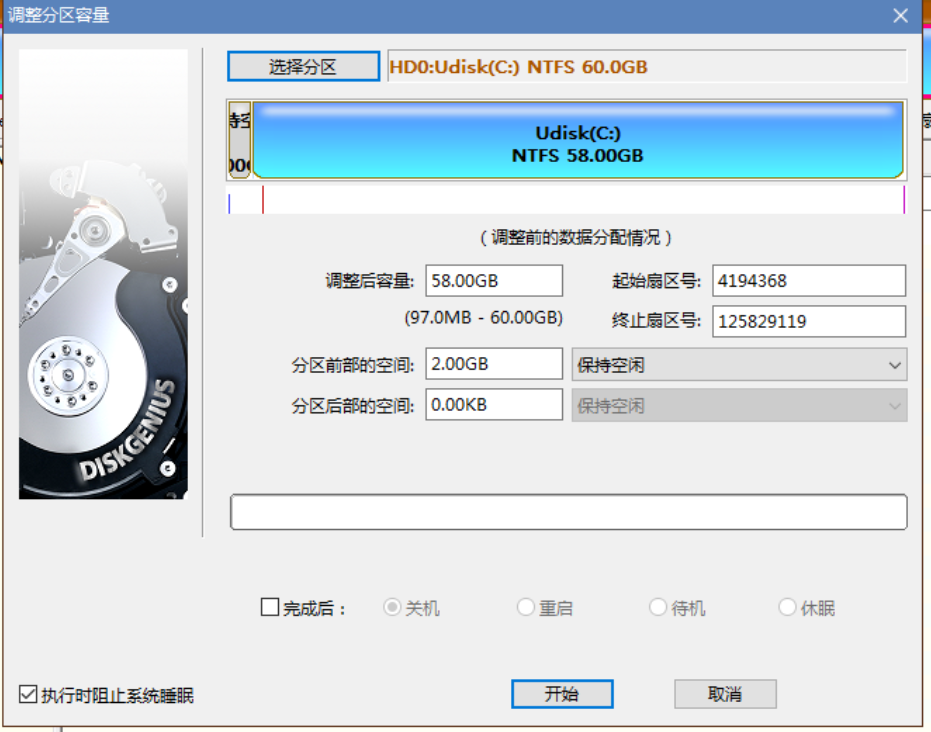
The above operations will not cause data loss on the USB, so you can proceed with confidence.
- Click on the newly created unallocated space (2GB).
- Click “New Partition.”
- Select “Primary Partition,” file system type FAT32, volume label “EFI,” and click OK.
- Click “Save Changes” in the top-left corner.
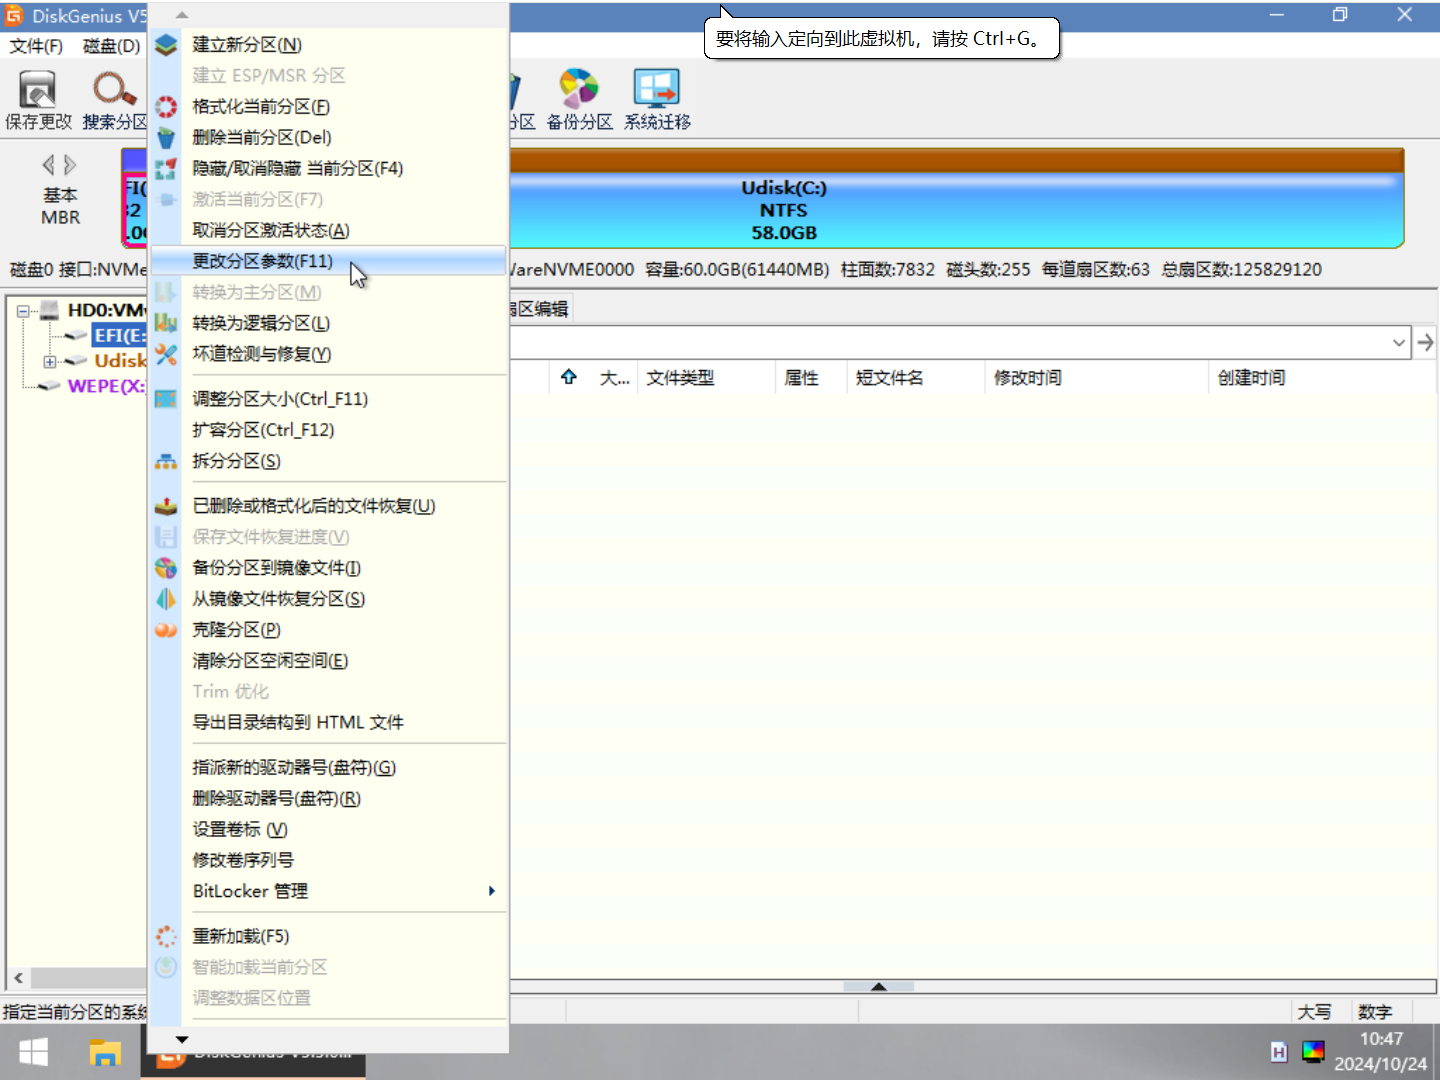
- Right-click the newly created EFI partition.
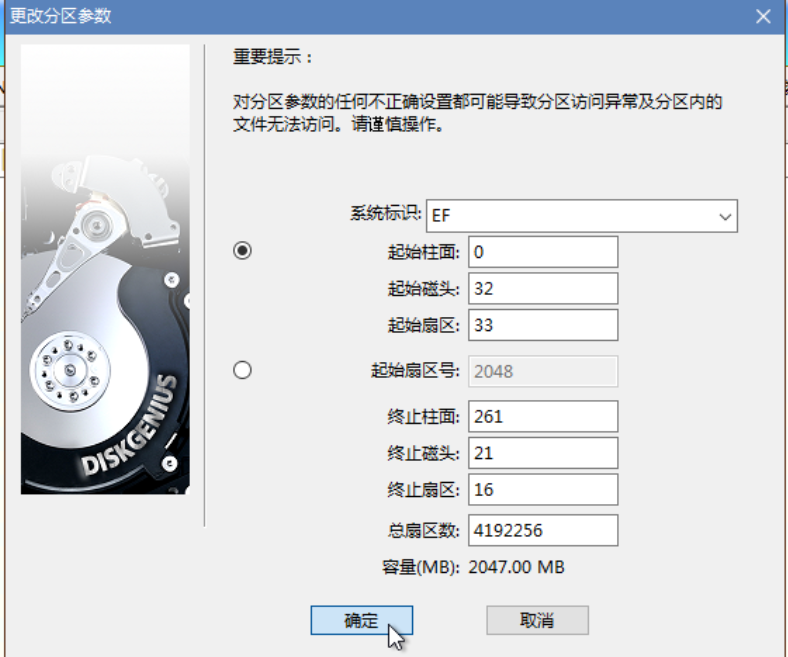
- Click “Change Partition Parameters.”
- Under “System ID,” find and select “EFI system partition.”
- Click OK all the way through and save changes.
The EFI partition is now created.
Copying Boot Files
The boot files in the EFI partition can be obtained by directly copying the EFI folder from the root of the PE system ISO.
The author uses the WePE ISO. Double-click to open the WePE ISO, then directly copy the EFI folder into the newly created EFI partition.
Obtaining PE System WIM Packages
A PE system always boots in Ramdisk mode. If you’re unfamiliar with Ramdisk, you can read Article 25 in my public account, “Introduction to Ramdisk Boot Mode.”
Ramdisk booting requires two resources:
- The PE WIM package
- The SDI file
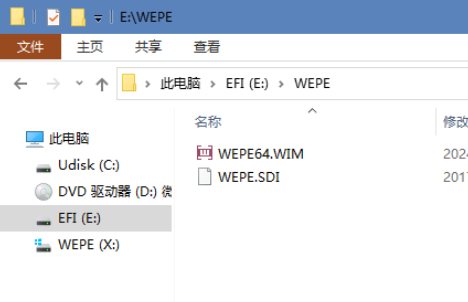
Both files exist inside the PE system ISO. For WePE, their paths are:
\WEPE\WEPE64.WIM
\WEPE\WEPE.SDI
The author copied them into the WEPE folder on the USB’s EFI partition for easy management.
For UQitong, its WIM and SDI files are located at:
\BOOT\10PEx64.wim
\BOOT\BOOT.SDI
The author copied them into the \easyu\boot folder on the USB’s EFI partition for easy management.
Why place them in the boot folder instead of directly in the easyu folder?
UQitong is special: it has an external extension tools folder called PETOOLS, located in the ISO root. We also need to copy this into the easyu folder; otherwise, UQitong won’t recognize the external package.
Since the relative path between 10PEx64.wim and the PETOOLS folder cannot be changed, those two files are placed in the boot folder.
Creating the BCD Boot Menu
With the PE files ready, we now create the BCD boot file menu for UEFI firmware.
Open BOOTICE and click “BCD Edit.”
Click “Other BCD File,” then click the three dots and select the BCD file in the USB’s EFI partition. The specific path is:
\EFI\MICROSOFT\BOOT\BCD
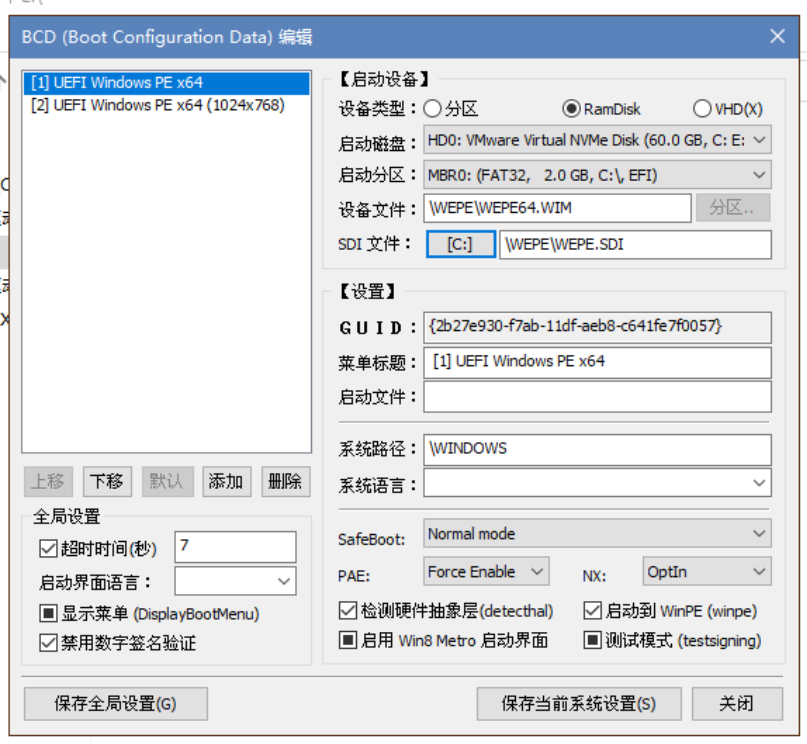
Click “Smart Edit Mode.”
We can see that there are already two WePE boot entries. Since this BCD was copied from the ISO, it’s not suitable for our USB. We need to modify some items:
- Change “Boot Disk” to our USB drive.
- Change “Boot Partition” to the partition where we store the PE WIM packages. For the author, I select the USB’s EFI partition.
- “Device File” is the path to the PE WIM package, i.e.,
\WEPE\WEPE64.WIM. - “SDI File” is the path to the SDI file, i.e.,
\WEPE\WEPE.SDI. - Click the button to the left of “SDI File” and select the USB drive and partition where the SDI file resides, using the same method as for “Boot Disk” and “Boot Partition.”
- Leave other items unchanged, then click “Save Current System Settings.”
- For the entry [2] containing 1024x768, make the same changes and save.
Now, add a boot entry for UQitong:
- Click “Add” on the left, then “New WIM Boot Entry.”
- Select the USB drive and partition where the UQitong PE WIM package resides. For my USB, I select the EFI partition.
- Device File:
\easyu\boot\10pex64.wim - SDI File:
\easyu\boot\boot.sdi - Menu title is up to you, but it’s best to avoid Chinese characters. The author set it to
[3] easyU. - Leave other settings unchanged, save current system settings, then save global settings. Exit all the way.
At this point, the single-USB multi-PE boot drive for UEFI firmware is complete.
Booting Multi-PE System USB on BIOS Firmware
BIOS firmware booting requires an active primary partition. So, we need to set one partition on the USB as an active primary partition. This allows the MBR to boot into the partition’s PBR and launch BOOTMGR.
The choice of active primary partition is not unique. For convenience, the author sets the USB’s EFI partition as the active primary partition.
How to set it:
- Open DiskGenius.
- Right-click the USB’s EFI partition and click “Activate Current Partition.” If it’s already active, no action is needed.
Next, we need to prepare boot files for BIOS firmware. These include:
- BOOTMGR (the boot program for BIOS)
- BCD (B64)
BOOTMGR can be directly copied from the WePE toolbox ISO and placed in the root of the USB’s EFI partition.
For the BCD file, the situation is slightly different. Since WePE’s BOOTMGR is not Microsoft’s official BOOTMGR but a modified version, official documentation shows that this BOOTMGR does not read the BCD file but instead reads a file named B64. The B64 file is essentially still a BCD file, just with a different name.
So, we can use the BCD file from UEFI mode, but we need to rename it to B64. Additionally, the BIOS BCD configuration differs slightly from UEFI, as explained below.
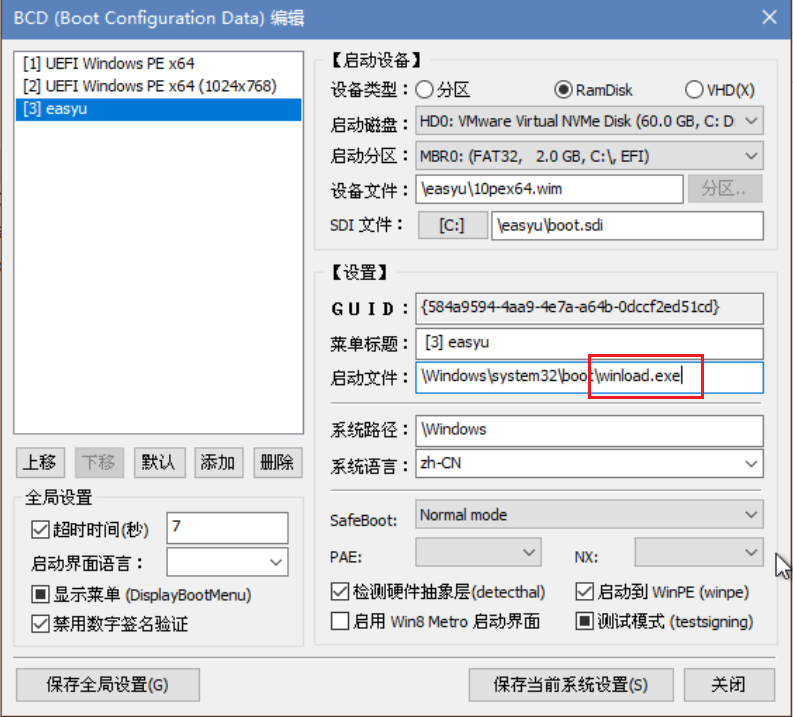
First, copy the \EFI\MICROSOFT\BOOT\BCD file from the USB’s EFI partition to any other location, then edit this BCD. Only modify the easyU boot entry:
- Change “Boot File” to
winload.exe, leaving everything else unchanged. - Save current system settings, then save global settings. Exit all the way.
- Rename this BCD file to
B64.
The BCD modification is complete.
Why not modify WePE’s BCD menu?
If you look closely, you’ll notice that WePE’s boot file field is empty. This means it uses the default boot file without manual setup. The system will automatically find the appropriate file to boot WePE.
Then, copy B64 into the WEPE folder on the USB’s EFI partition.
In fact, Microsoft’s BOOTMGR searches for the BCD file using the path
\boot\BCD.WePE’s modified BOOTMGR changes this path to
\WEPE\B64.
At this point, the multi-PE system USB for both BIOS and UEFI firmware is complete.
File Structure of the USB’s EFI Partition:
1 | |
Boot Test
UEFI

BIOS