Analysis of Windows Computer Boot Process 2
Analysis of Windows Computer Boot Process Part 2
Once UEFI has identified and listed the EFI files in the boot menu, it has essentially completed most of its tasks. What follows depends on how each EFI program handles things.
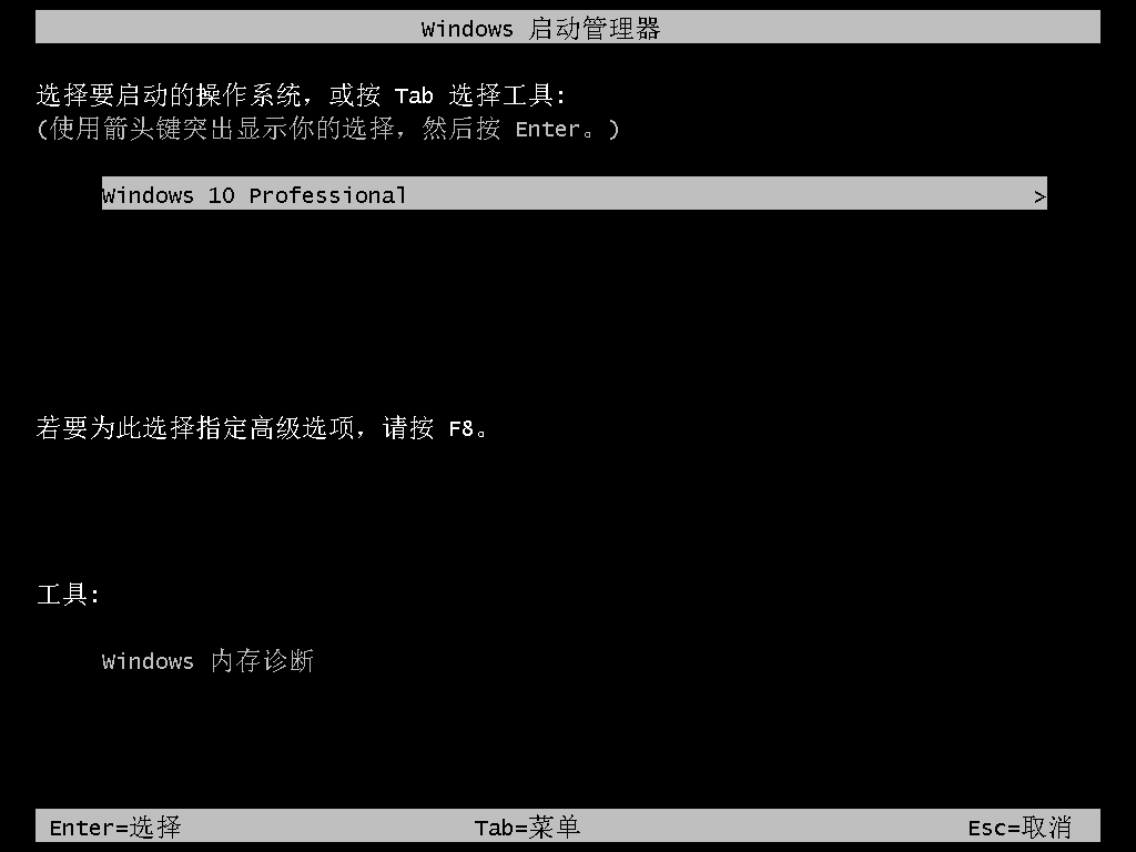
bootmgfw.efi, appearing as the “Windows Boot Manager” option in the boot menu, is typically selected by default. Next, this EFI program reads a critical system startup information storage file: the BCD file.
BCD File
The BCD file records boot configuration information for various operating systems. It is essentially a registry file. Its size is very small, as a few lines of code don’t take up much space.
The BCD file is stored in the same folder as bootmgfw.efi. The first step after bootmgfw.efi runs is to read this BCD file.
Learning to edit the BCD file is a necessary step for advancing in computer system administration. Incorrect BCD settings can prevent the operating system from booting.
BCD Editing
We cannot open the BCD file directly. However, the excellent little tool BOOTICE can help us edit the BCD.
Editing the Local BCD File
Open BOOTICE in a Windows 10 system (preferably a virtual machine). Click “BCD Editing,” then select “Current System BCD” → “Smart Mode Editing.”
Getting Familiar with BOOTICE
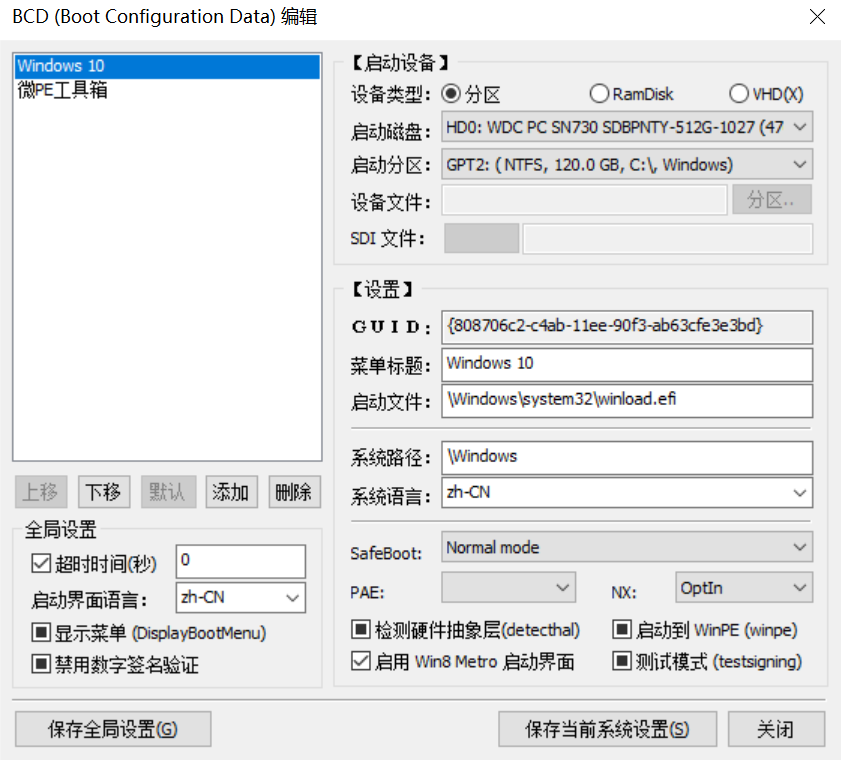
The software is divided into two panels. The upper-left area shows the operating system menu entries contained in the BCD file, while the right side is the editing area.
Detailed Explanation:
1. Device Type: Three options: Partition (standard Windows installation), Ramdisk (system loaded via virtual memory), and VHD (system installed on a VHD).
2. Boot Disk: The disk where the Windows system is located.
3. Boot Partition: The partition where the operating system is installed (typically the C: drive).
4. Device File, SDI File: To be introduced in a future article.
5. GUID: A unique identifier, not relevant to us.
6. Menu Title: The name displayed in the Windows Boot Manager menu.
7. Boot File: The first file that runs when Windows starts. This is typically \Windows\system32\winload.efi.
8. System Path: The location of the system’s Windows folder.
9. Safeboot: Safe boot mode. Options include normal mode, safe mode, safe mode with networking, etc.
10. PAE: A technology that allows 32-bit computers to recognize and use more than 4GB of memory.
11. NX: A feature that prevents malicious code from running in memory.
12. Boot to WinPE: If the operating system is a PE system, this option must be checked.
13. Enable Win8 Metro Boot UI: The Win8 Metro boot interface is a new boot interface introduced by Microsoft in Windows 8, suitable for tablet operation.
Traditional Interface:
Win8 Metro:

14. Timeout: The time allotted to display the operating system selection menu when multiple systems are present.
15. Display Boot Menu: Forces the display of the traditional boot menu, even if only one system is installed.
BOOTICE’s BCD editing features are very practical, but understanding the specific meaning of each option requires hands-on experimentation.
For the “Enable Win8 Metro” option, it is recommended to disable it in a virtual machine, as loading the Metro interface is often much slower than the traditional boot menu. Besides being more visually appealing, it offers little benefit.
You may quickly become confused: the check state of options has three possibilities: checked, unchecked, and a black square.
Checked and unchecked are easy to understand, but what does the black square mean?
This question puzzled the author for a long time. After extensive experimentation, no significant difference was found between the black square and unchecked. As of March 2, 2024, no reliable answer to this question could be found through online searches. So, for now, treat the black square and unchecked as the same thing!
Using BOOTICE to Edit the BCD File
1. Click “Add” to create a new Windows boot entry in the BCD. For Windows 10 and 11 systems, choose “New Windows 7/8/8.1 Boot Entry.”
2. If you are using a standard system installation method (not VHD or Ramdisk), select “Partition” mode for booting.
3. For “Boot Disk” and “Boot Partition,” simply target the system drive where Windows is installed.
4. Set the “Menu Title” as you wish.
5. System Path: \Windows
6. Safeboot, PAE, and NX do not need to be configured.
7. It is recommended not to select “Enable Win8 Metro Boot UI.”
8. Timeout: Set it as you like, as long as you can react in time :)
9. No other settings are necessary, but it is recommended to experiment with each option. Hands-on testing is the most solid way to learn.