Windows System Overview and Disk Partitioning
Windows System Overview and Disk Partitioning
Windows System Overview
As the most widely used and popular operating system in the world, Windows deserves thorough study by enthusiasts. We will cover Windows system installation, maintenance, optimization, and advanced operations. All tutorials in this series are based on Windows 10 Professional.
Disk Partitioning
Basic Knowledge About Disks
On your computer, there is always a drive called C:. In most cases, you may also have D:, E:, F:, G:, or even H: drives. First, you need to understand the relationship between a hard disk and its partitions.
A single physical hard disk can have multiple partitions. This means that the D:, E:, F:, G:, and even H: drives you see in File Explorer might just be several partitions on one physical hard disk. Therefore, the common phrase “C drive, D drive” is not entirely accurate; they should actually be called “C partition, D partition” (C and D are drive letters).
Don’t assume your computer only contains the partitions visible in File Explorer! File Explorer only displays partitions (drives) that have been assigned a drive letter. For example, my File Explorer shows only two partitions: C: and D:. But that’s not the whole story—some partitions don’t have their own drive letters! As a result, File Explorer won’t display them. These are called “hidden partitions,” and they typically store critical system boot files, recovery files, and so on. To prevent us from accidentally modifying those files, the operating system gently removes their drive letters.
Now, here’s the question: I’m curious! I want to see the system’s hidden “secrets”!
Here’s how:
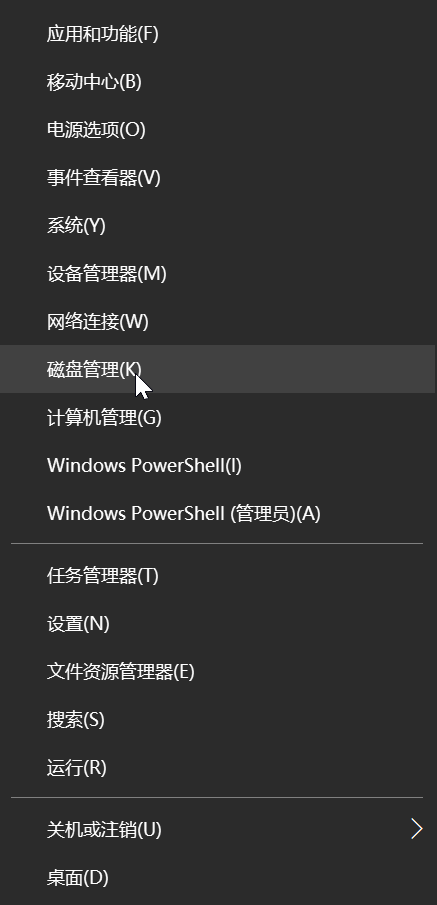
- Right-click the “Windows Start logo” in the bottom-left corner of the desktop → Disk Management
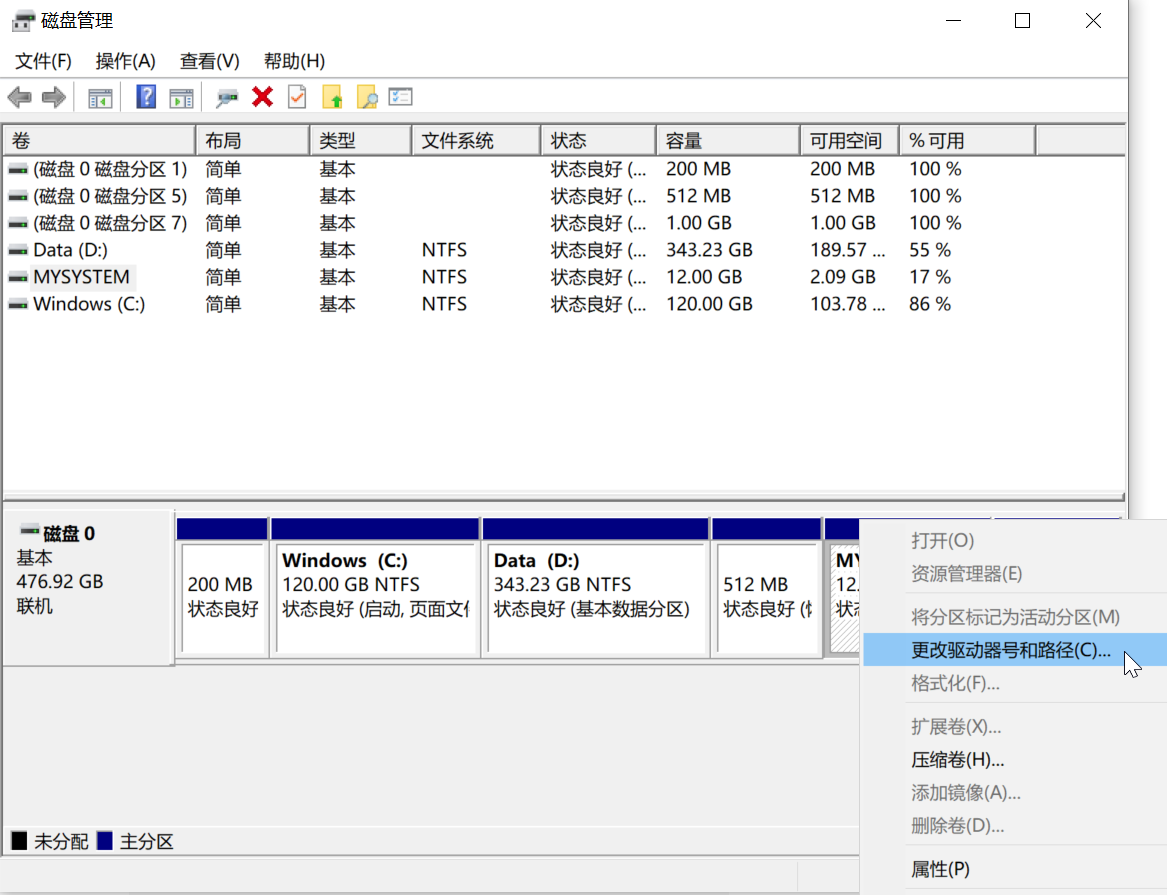
View your disk partitions.
As shown in the image, my computer contains one disk (Disk 0), which is divided into 6 partitions. Among them, only Windows (C:) and Data (D:) have drive letters and appear in File Explorer. The total size of Disk 0 is 476.92 GB.
If you connect other storage devices (USB drives, external hard drives, optical discs, etc.), they will also appear in Disk Management, listed as Disk 1, 2, 3, and so on. Their partition layouts and sizes will be displayed. If File Explorer doesn’t show a USB drive after you plug it in, you can use Disk Management to check whether the drive was actually detected.
If you’re eager to know what’s inside a hidden partition, Disk Management can partially satisfy your curiosity without third-party software.
Here’s how:
Right-click the hidden partition → Change Drive Letter and Paths → Add.
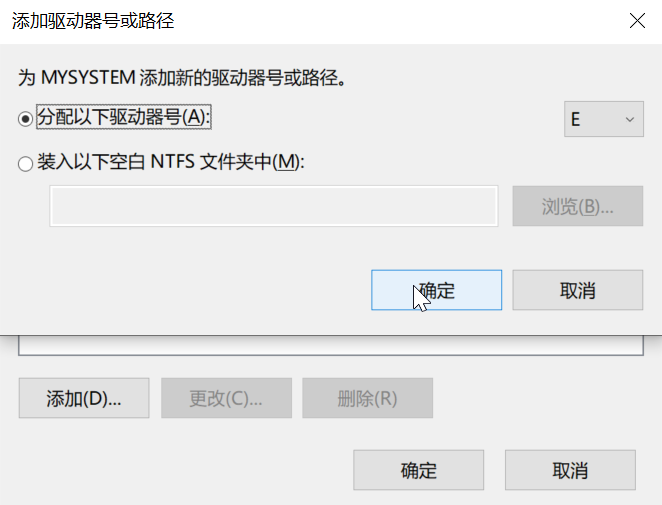
Choose a drive letter you like and confirm.
File Explorer will now display that drive letter.
Note: If you don’t know what’s inside, don’t modify the files carelessly! This could lead to system boot failures, inability to recover the system, and other serious issues!!!
Not all hidden partitions can be assigned a drive letter. Some partitions are the operating system’s “secrets” and require other tools to view their contents.
If a partition cannot be opened, or you want to delete all files in a partition, you can use the format option to quickly erase all files or repair a damaged partition. Simply right-click the partition in File Explorer and select Format.
Please note that formatting a partition can be a dangerous operation. It may permanently delete your precious files. Always back up important files before formatting. Be extra cautious whenever you see the word “Format.”
Data is priceless—operate with caution!!